Whether it‘s on Christmas or a birthday, it might come to you that you have to wrap a jewelry gift. If it’s store-bought, it‘s likely that you have the jewelry package box still with you and that you gift the piece in it. However, it is not necessary.
If you want to gift self-made jewelry, a personal used piece or you lost the package, there are ways to gift your piece as well. And guess what, you find these here in this guide.
Next to simple jewelry gift wrapping with and without a box, we show you creative and more challenging techniques on how to wrap jewelry.
Still not sure what jewelry to gift your loved ones? Check out our guides on gifting the perfect jewelry pieces.
Wrapping Jewelry Tips
Wrapping a gift, or gifting in general, can be exhausting and annoying. So, to avoid the frustrations of not getting every DIY right on the first try, at least I didn’t, look at the following tips before starting wrapping your jewelry.
- Try out the DIY gift package on notepaper before doing it with your pretty paper. And yes, even if you think that it’s going to be easy and you don’t need to try it anyways. In case you did something wrong, you didn’t have to waste your pretty paper. You should try it on notepaper as many times as you are sure that it works all well.
- If you don’t understand one step, look at the one before and the one after. This one might seem obvious to you, but remember this tip in case you are stuck at one point. Maybe, the next picture makes things clearer for you.
- And lastly, be patient. Trying a new DIY hack and wrapping a gift can be difficult, especially if you haven’t done that often yet. It’s important to try to stay calm, reread the steps, look closer at the pictures and repeat them if there are struggles. But you got this, it maybe just needs some time.
How To Wrap Jewelry In A Box
When you just bought a new piece of jewelry, you probably still have the package of it. That’s great because you can easily wrap the package, which is in most case a rectangle, as you would normally do.
If you don’t have a normal package and it’s asymmetrical for example, there are two options. Either you throw away the package and make a very cute and special one yourself with the following guides! Or you try our DIY gift bag in which you can put it many kinds of jewelry packages.
What To Do When Wrapping Paper Is Too Small
Don’t worry if you accidentally cut too little of your wrapping paper. Or maybe you want to reuse an old piece of wrapping paper? There is a great trick to not throwing away some paper leftovers.
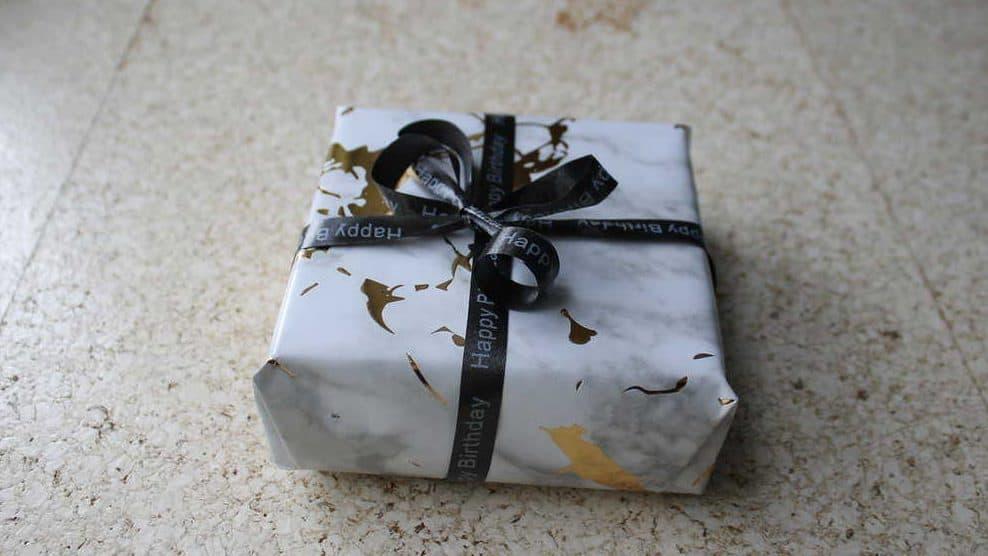
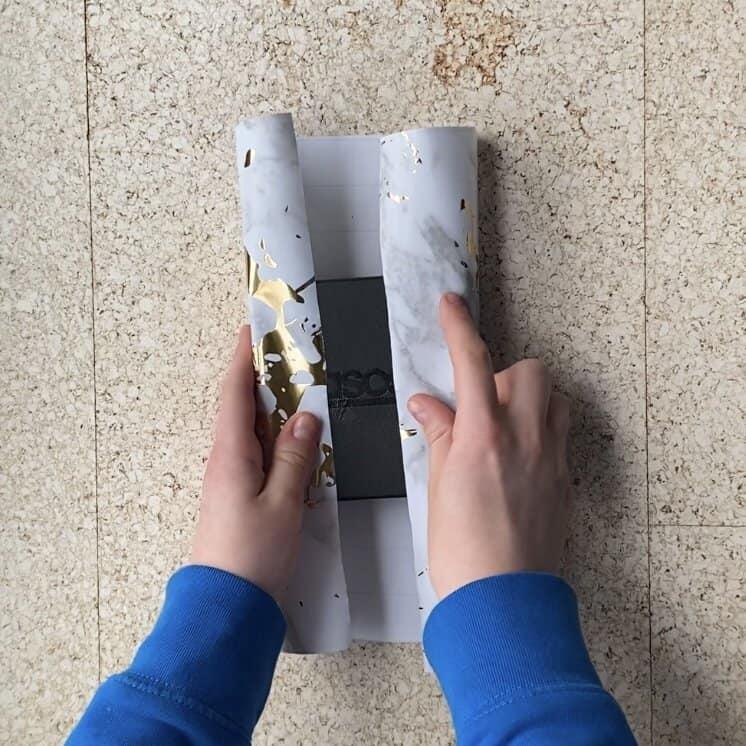
The package can’t be fully packed with wrapping paper.
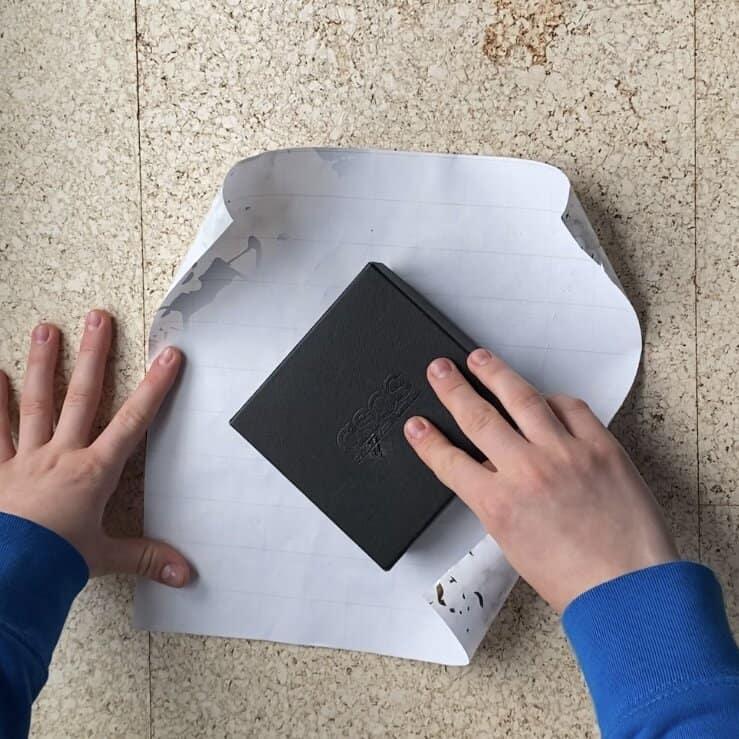
Simply turn your gift 90° so the gift lays diagonal to the wrapping paper.
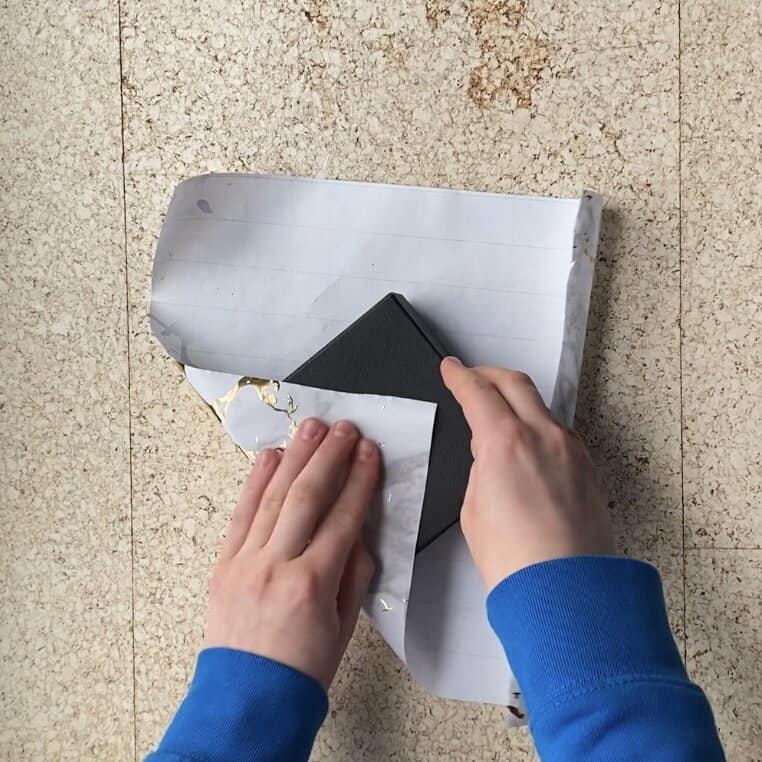
Clip one side of the paper over the package.
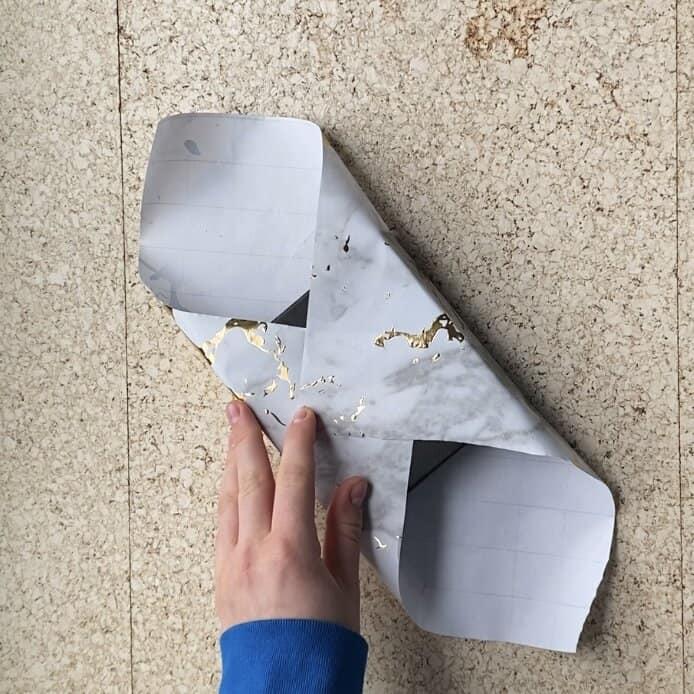
Do the same on the other side. Stabilize the wrapping paper with clear tape.
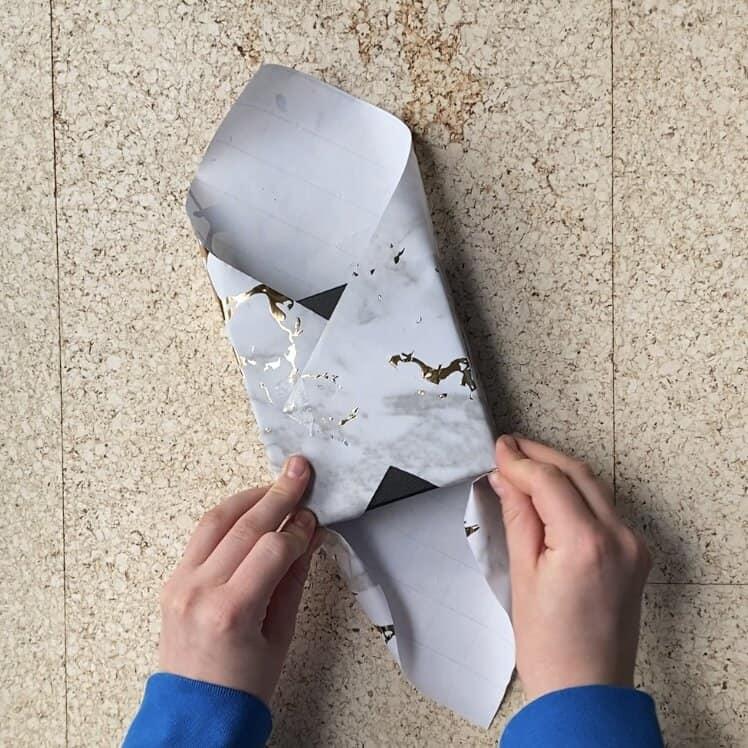
Fold the edges of the wrapping paper. Fold them very tight and smoothen them.
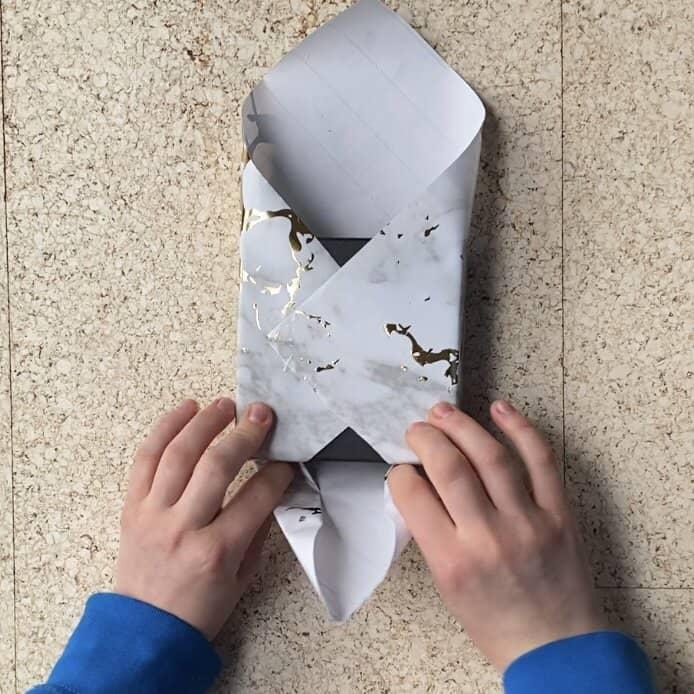
Now, clap over the rest of the paper until they’re on the top of the package.
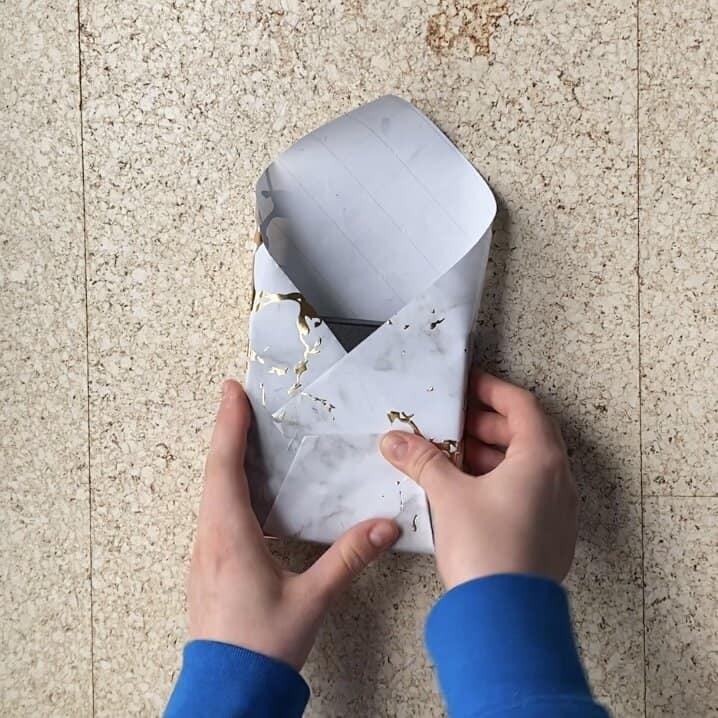
Make sure, the paper is very tight on the edges and site of the package. Secure the paper now with clear tape and repeat this step on the other site.
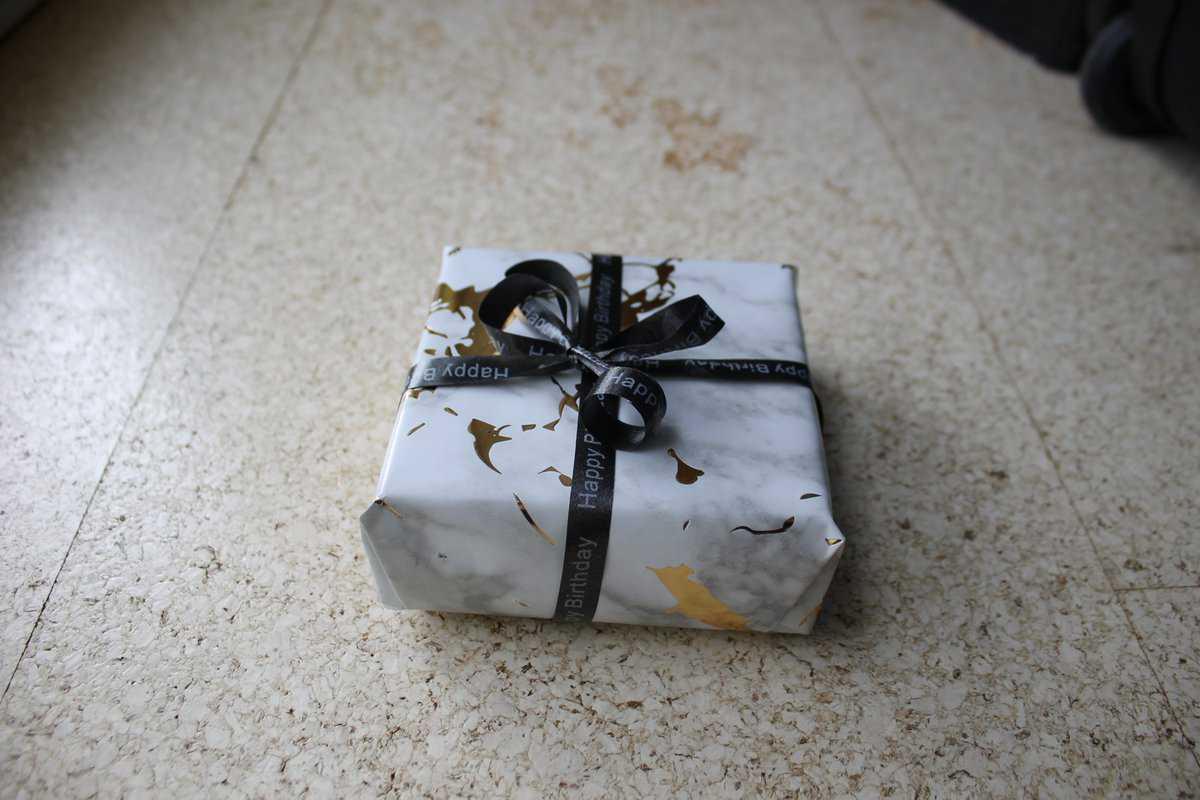
Do you still struggle with this hack? Check out the tutorial on TikTok.
DIY Wrapping Gift With Card Holder
In addition, I want to show you another great hack on how to wrap gifts. For this, you simply just need wrapping paper and clear tape.
With just a few additional steps, you can create these extra spaces in front of the gift packet. You can put birthday cards, flowers, money, or whatever else you have in mind. Even if you don’t put anything inside, this new pattern can really make a difference.
I learned this trick in a couple of minutes and it is definitely worth a try.
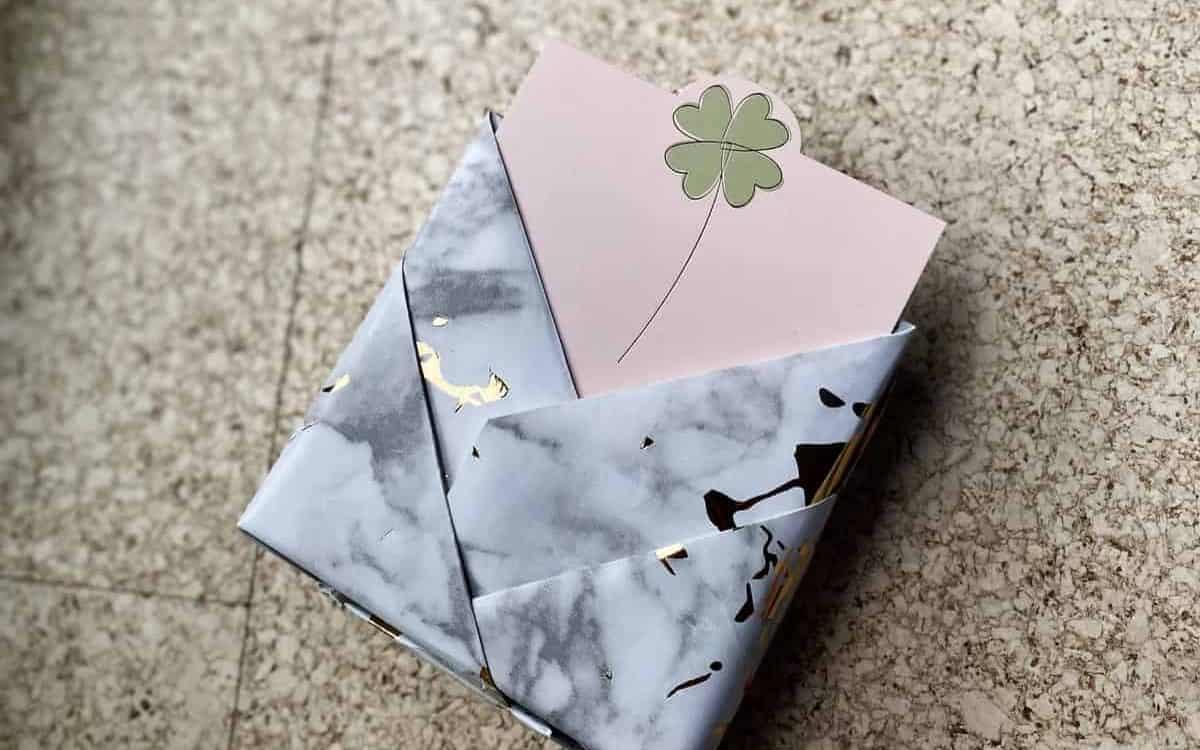
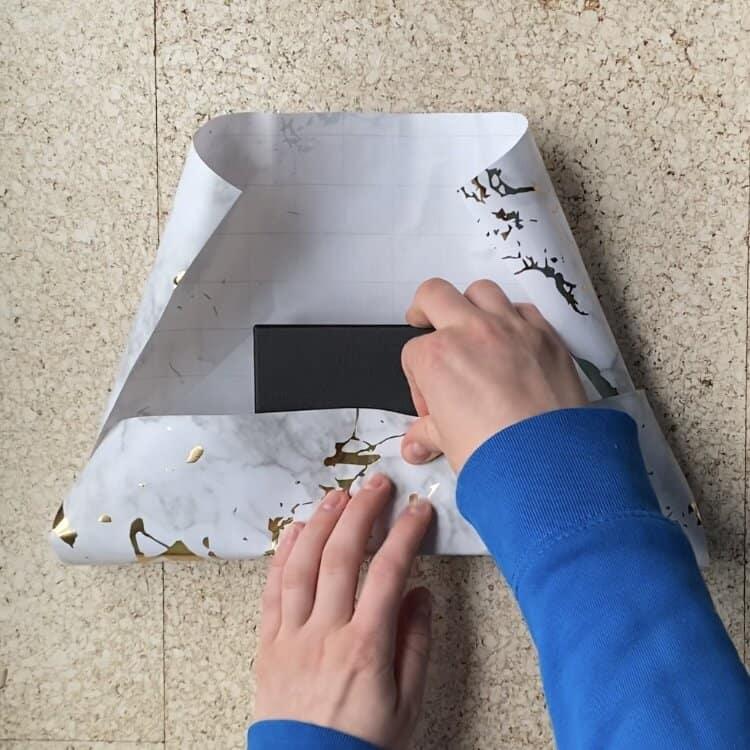
Fold the wrapping paper to the middle of the package’s top.
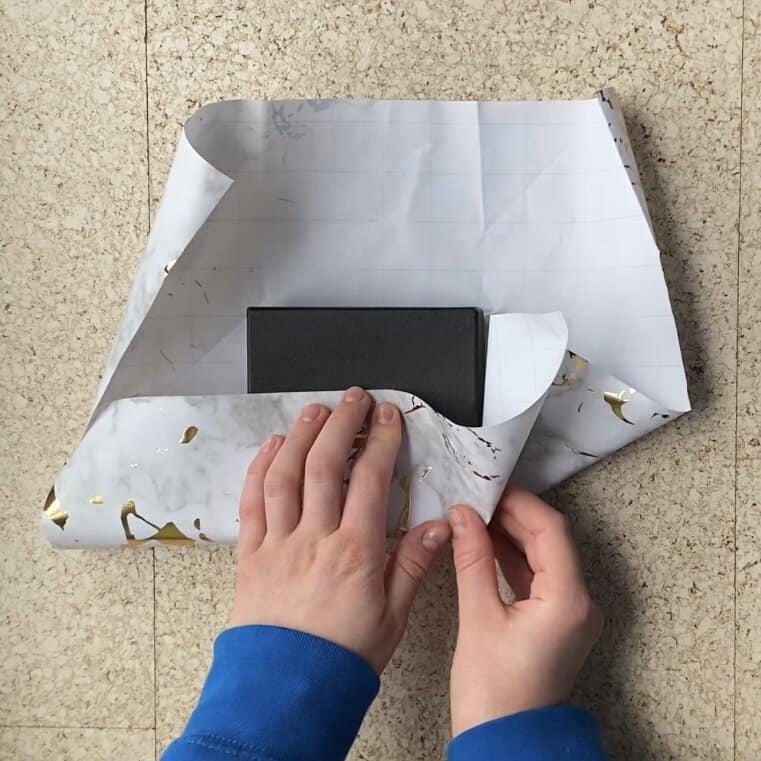
Clap now the side parts of the paper. Fold them to the package, so that a piece of paper is still above and one piece under the fold.
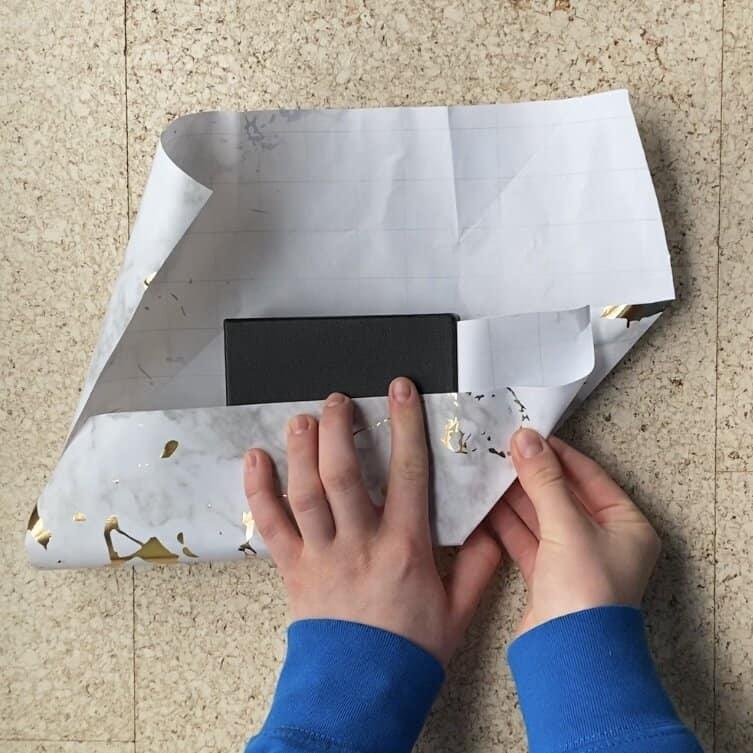
Smoothen now the folded sides by going through the upper and bottom fold and tightening it. Repeat the same on the other side.
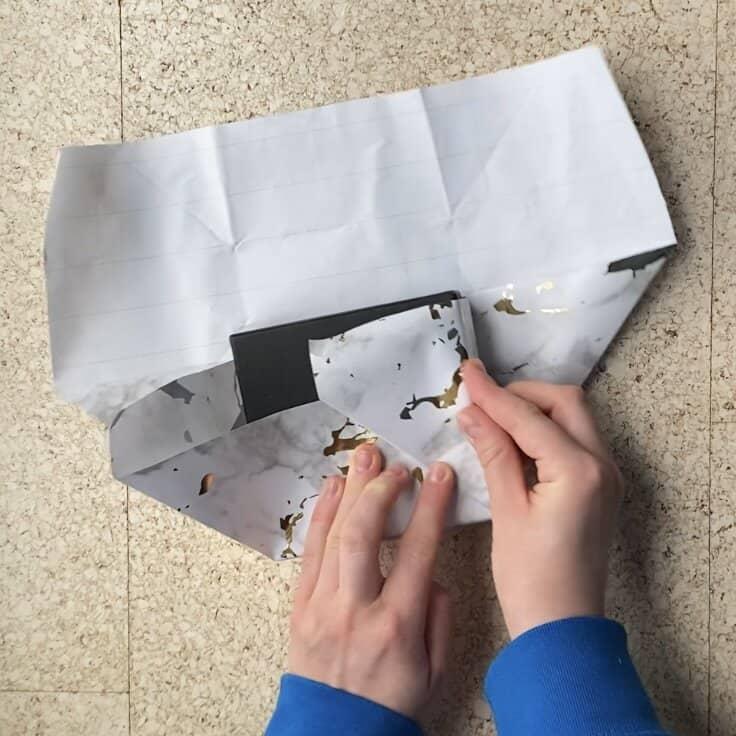
Now, fold both sites on top of the package. Go through the edges again and make sure the paper is the closest to the package.
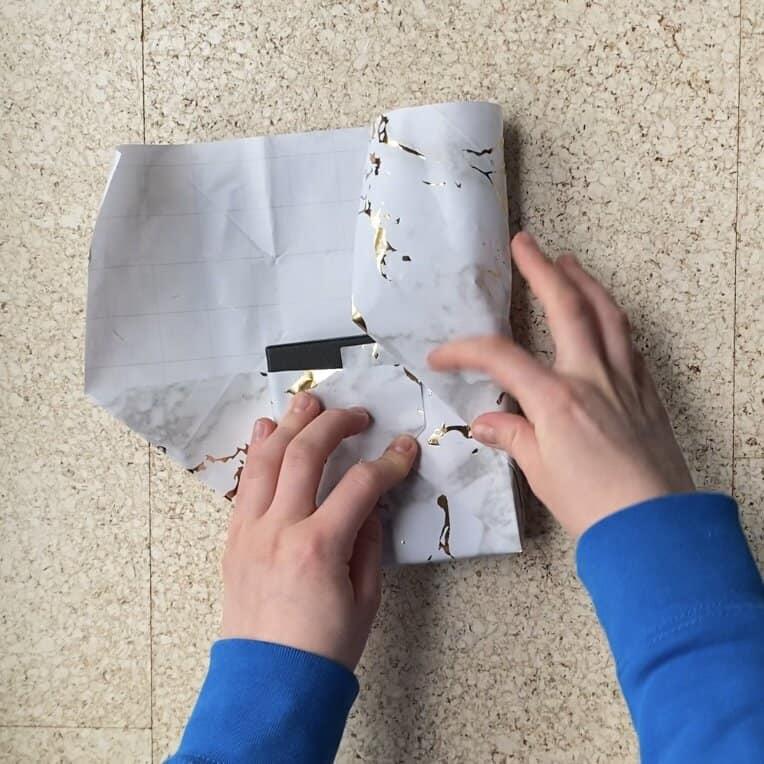
After doing the same on the other side, repeat the step with the leftover pieces on both sides.
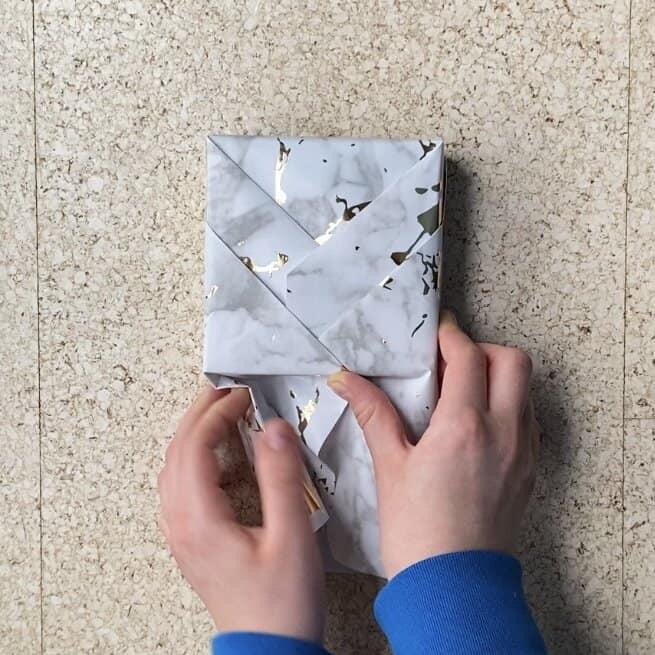
Turn the package 180°, so you have the leftover paper in front of you. Hold the just folded wrapping paper or secure it with clear tape, if it’s easier for you. Fold now the paper on the corner near the package. Straighten it here and repeat on the other side.
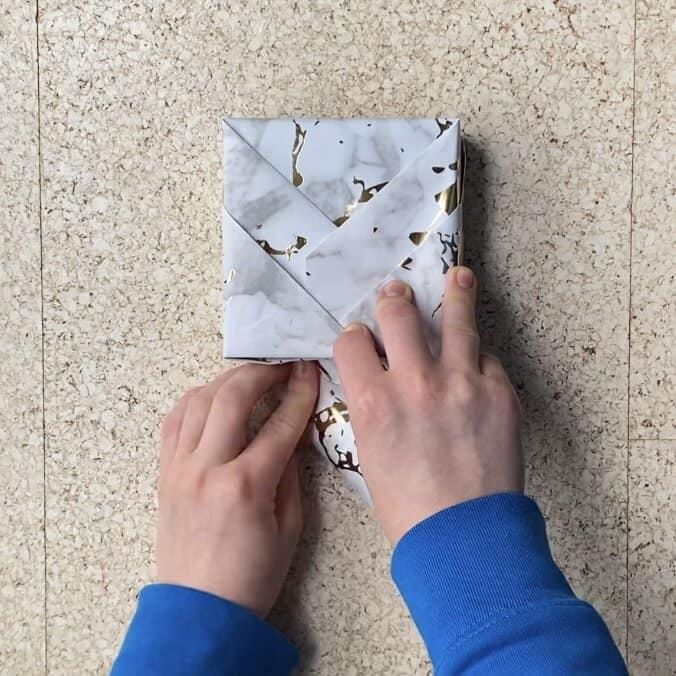
Pull the paper very close to the package on both corners. Fold then a small part of the end triangle in the direction of the package and fold it up to the package. Secure it with clear tape.

Do you still struggle with this hack? Check out the tutorial on TikTok.
How To Wrap Jewelry Without A Box
Maybe you lost the jewelry package, you made the piece yourself, or you want to recycle a gifted jewelry piece, you don’t necessarily have to buy a new box. Or search in your home desperately for one. I show you now three tricks on how to build a box or a small package for your jewelry gift.
All you need is wrapping paper or pretty paper or cardboard. The material you use shouldn’t be as thin as a normal paper piece since you use it as a gift package. However, it shouldn’t be too thick either since you fold it a lot.
Except for the DIY box and the DIY bag, I used a square piece of wrapping paper with 13cm x 13cm (5,1 inches). The size was pretty good for a little package with a single jewelry piece inside. If you have your jewelry gift in a plastic or fabric bag or paper, you can also size up the length.
Additionally, have a scissor and clear tape near you. If you want you can make your gift prettier with some ribbons, stickers, or what else you have or want to use.
DIY Small Paper Package
This DIY jewelry gift package I call also “letter package”. It just totally reminds me of a cute letter.
However, this DIY is a really easy trick to store some small jewelry pieces. After you’re done folding the package, it really makes a different if you wrap a ribbon around it.
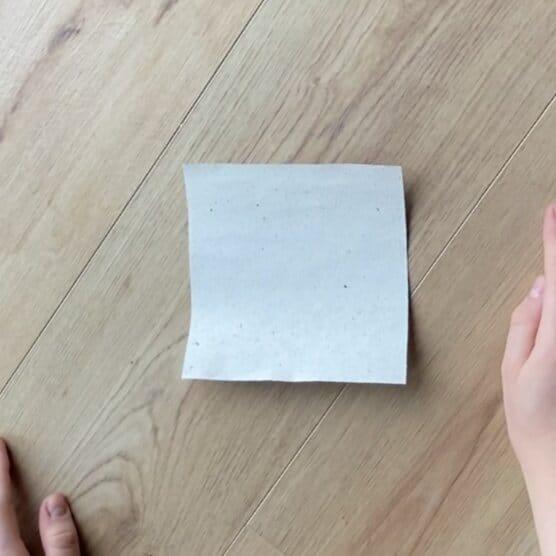
Your square piece of paper.
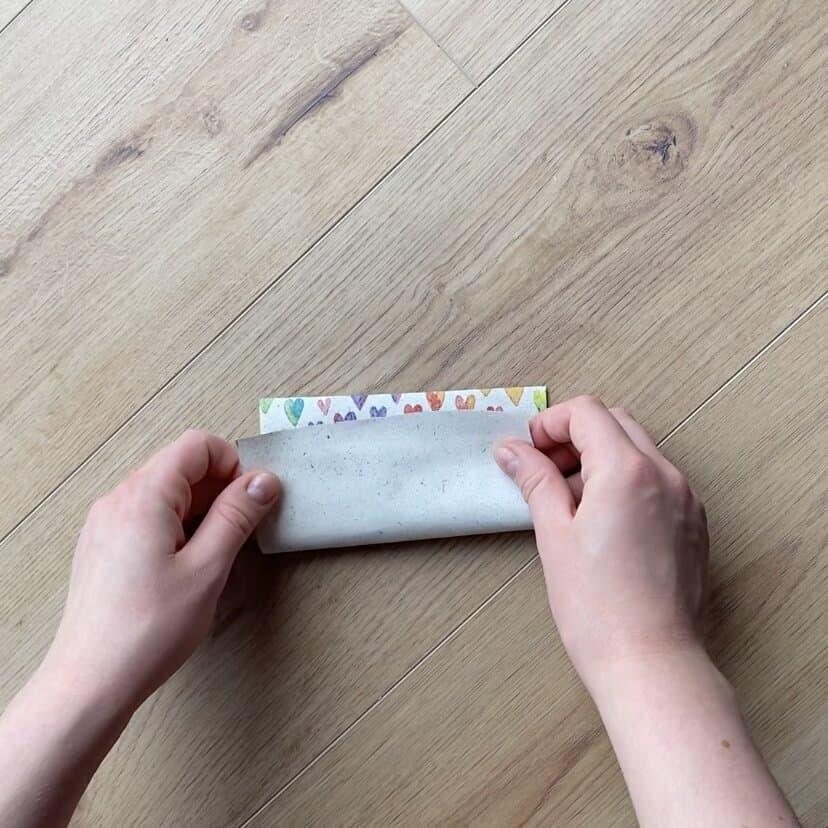
Turn it to the other paper side and fold your paper in the middle.
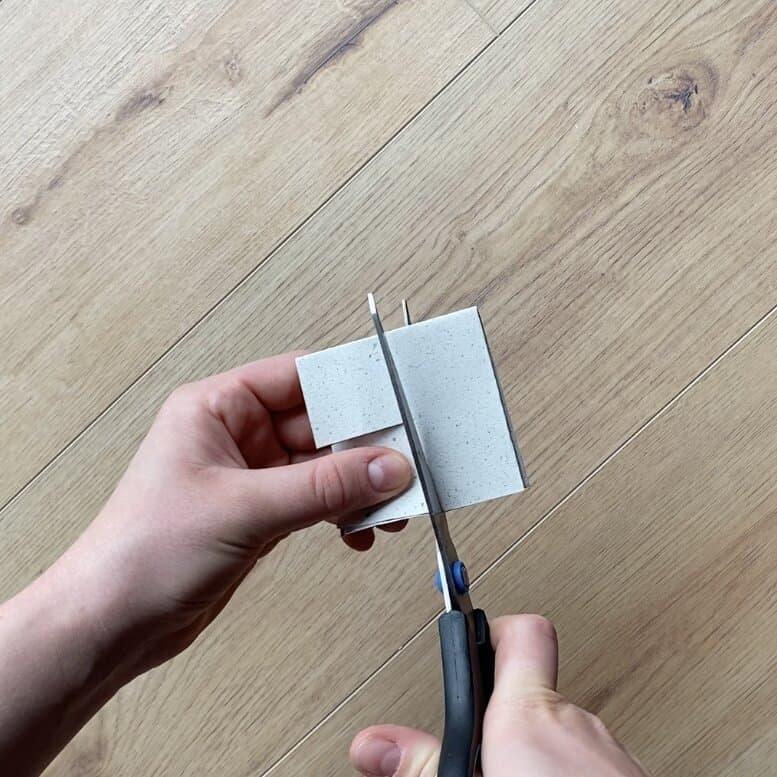
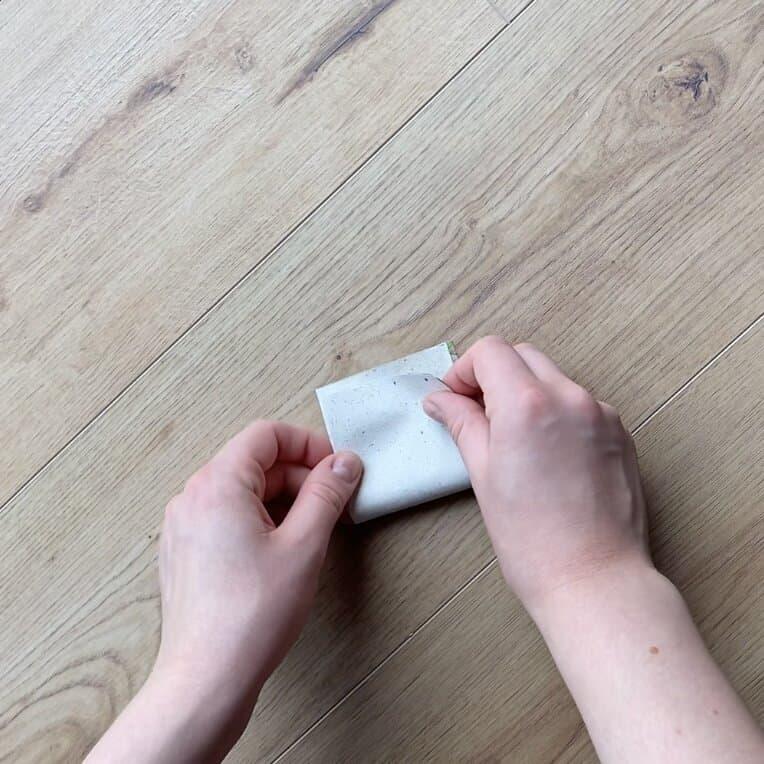
Fold the paper again in the middle.
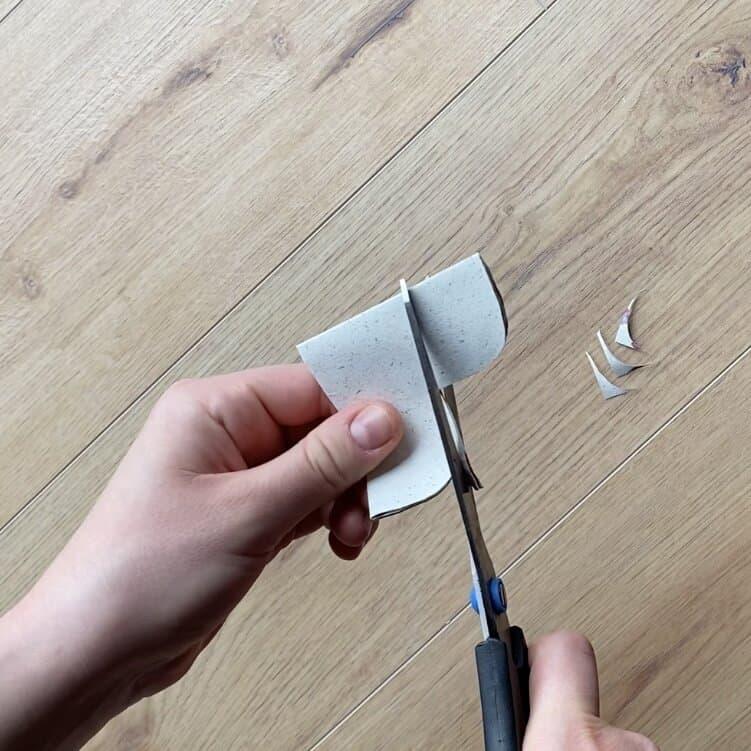
Cut now twice in the middle. Cut on the two sides where the paper is loose, not on those where there is the fold.
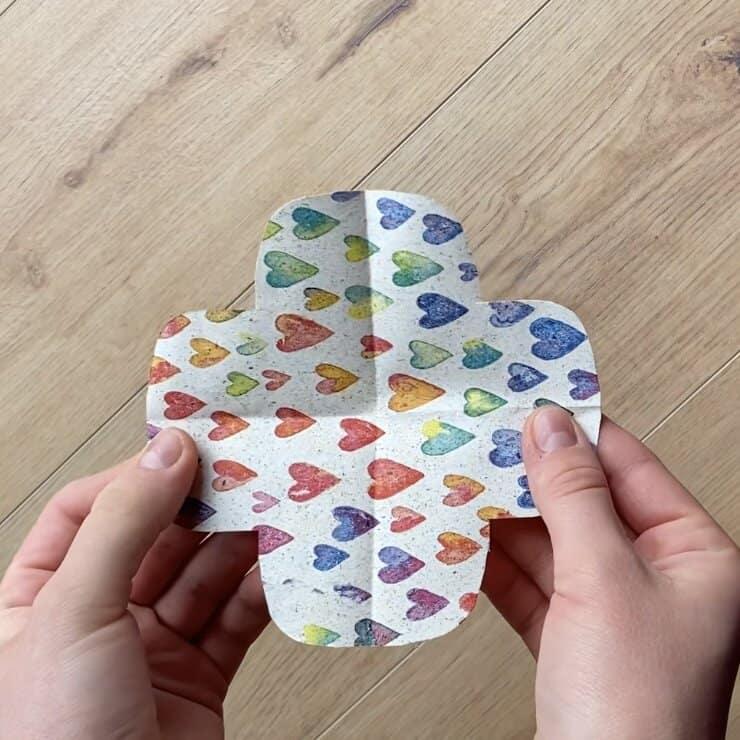
Round the two corners by cutting them into rounds.
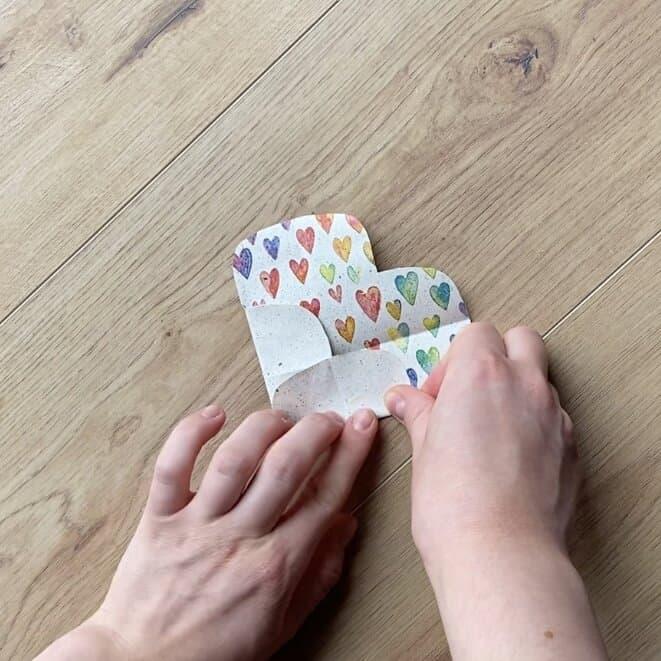
Open now the folded paper. That’s what it should look like.
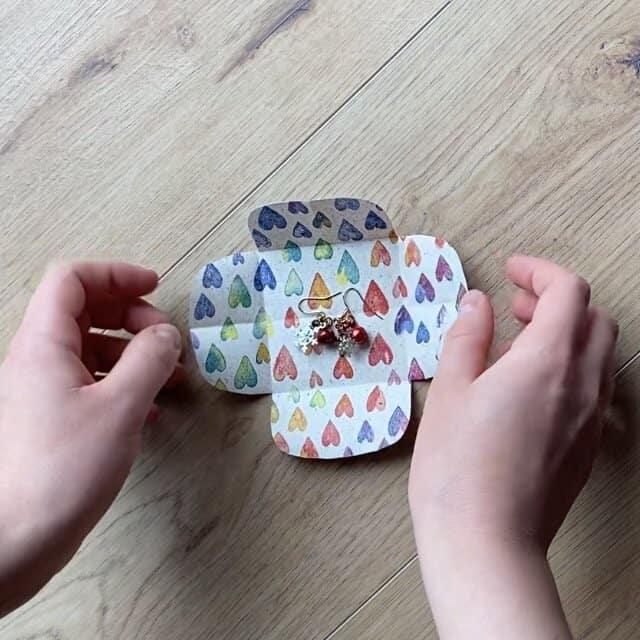
Fold now the rounded sides into the middle.
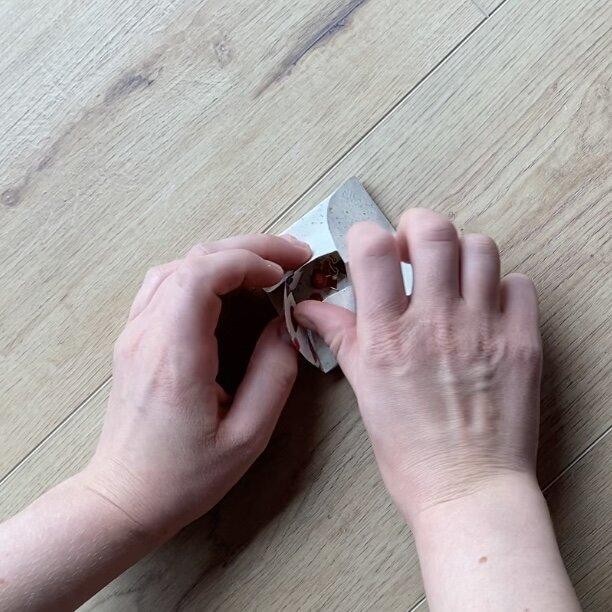
Lay your jewelry in the created quadrangle.
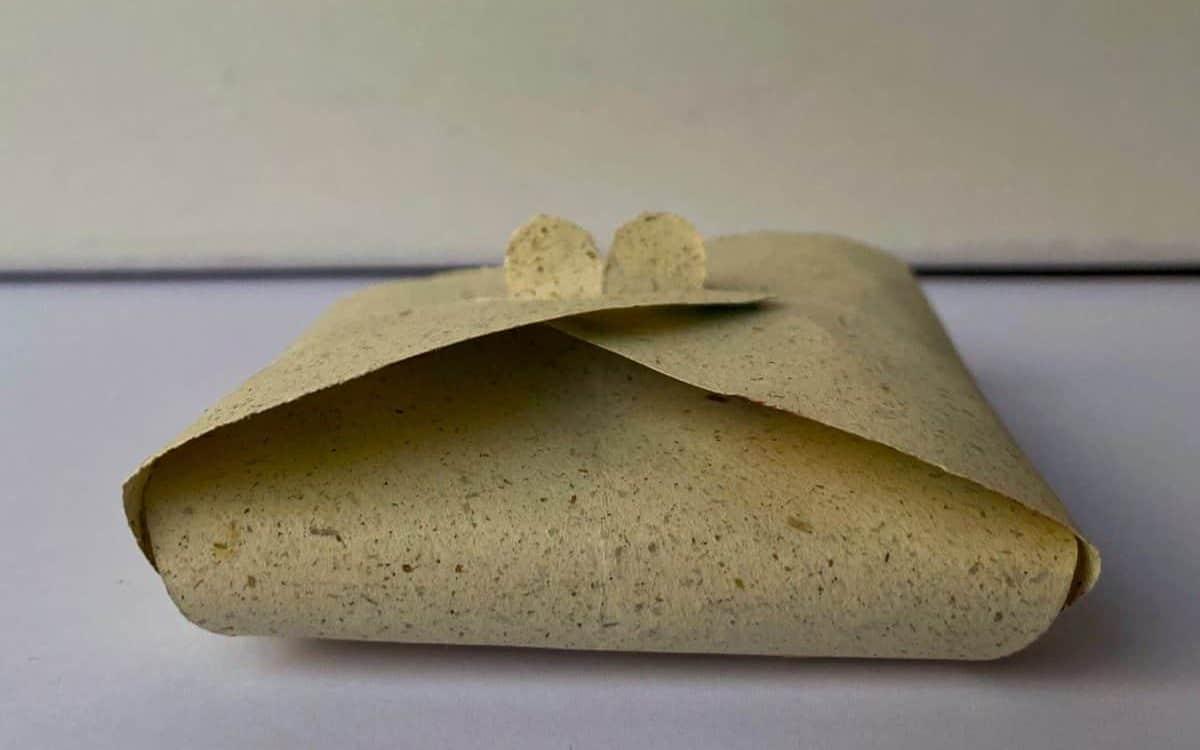
Fold the sites again to the middle. Fold always one site over and under the other side, so that the sites stay closed.

Do you still struggle with this hack? Check out the tutorial on TikTok.
DIY Rounded Package
This DIY package looks a bit more special. The little heart that looks out at the top is super cute and the rounded sides are really pretty.
Since the packet is a bit open on the sides, it’s great if you put your jewelry piece in a tiny bag or piece of paper (or a tissue), so your jewelry is secure.
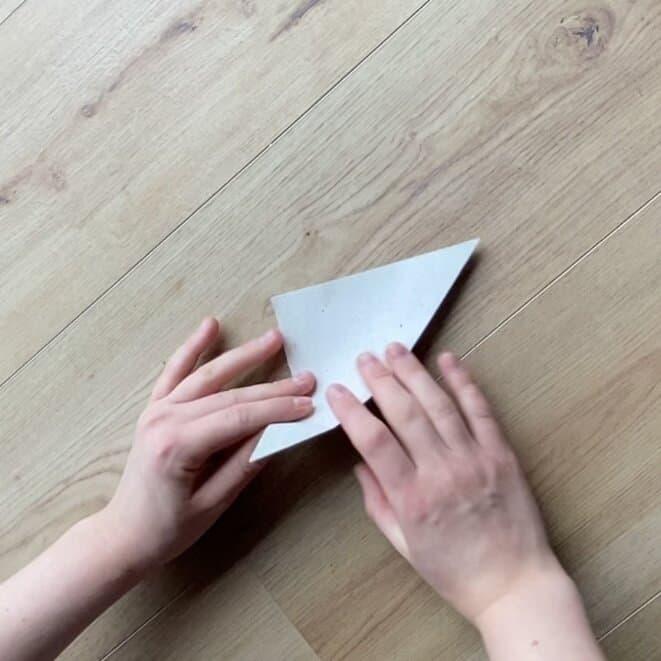
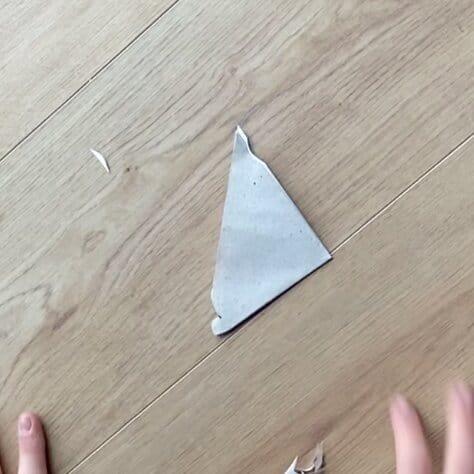
Your square piece of paper.
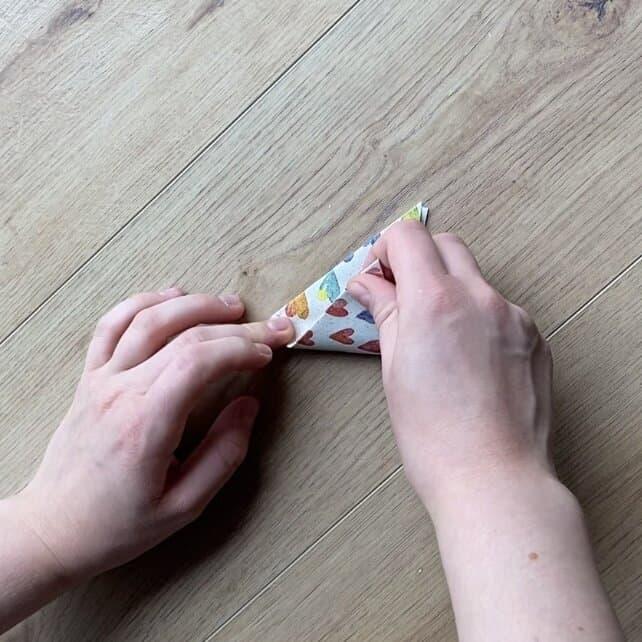
Turn the paper to the other side. Fold it now diagonal in the middle.
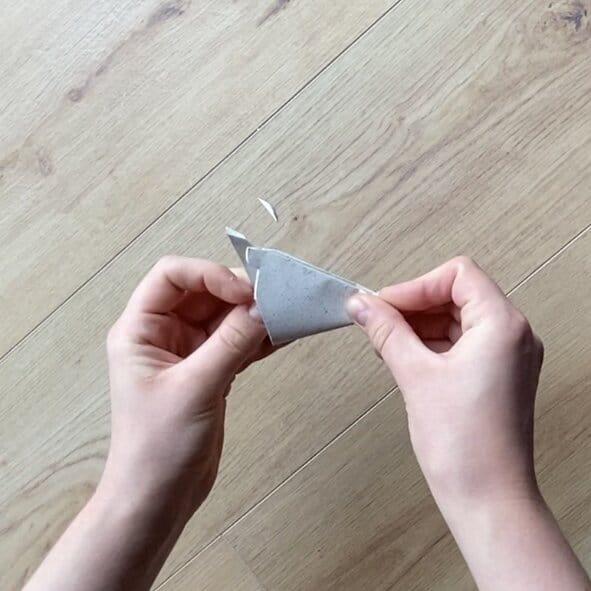
Fold again the triangle diagonal in the middle.
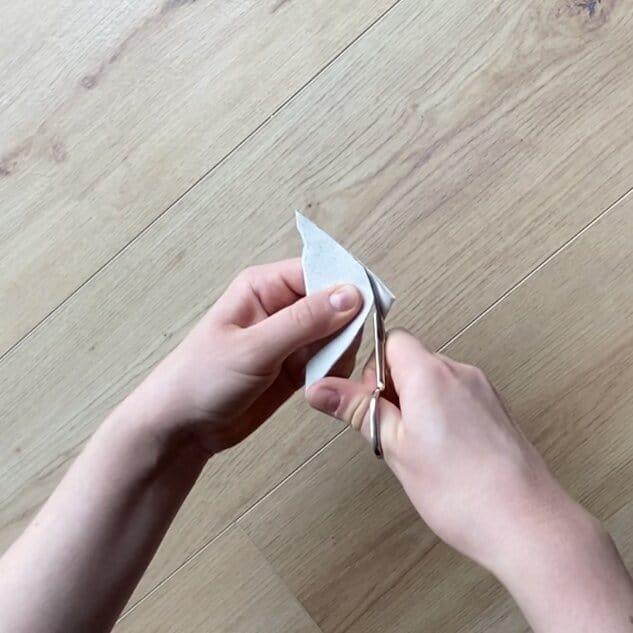
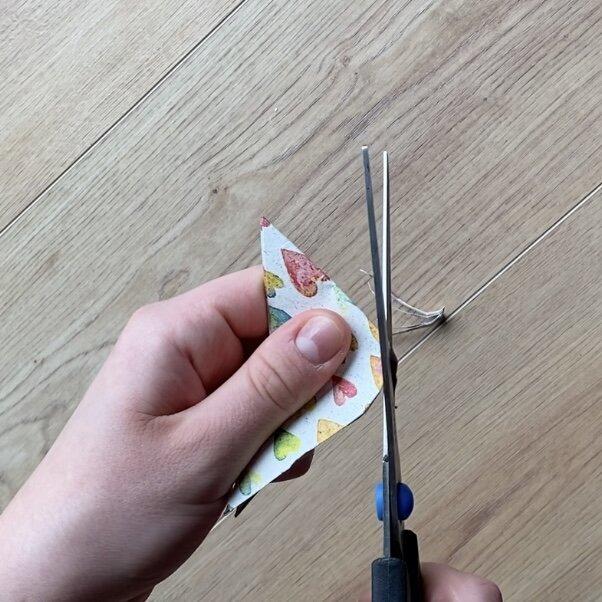
Cut now the shapes that you see here. Cut the rounded shape on the side of the folded closed site.
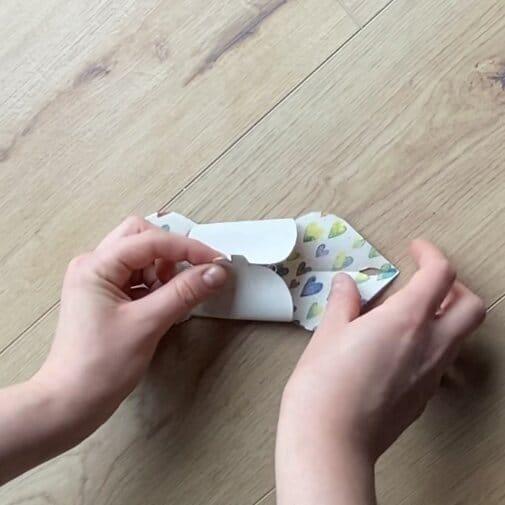
Fold the triangle again diagonal, so both cuts are over one another.
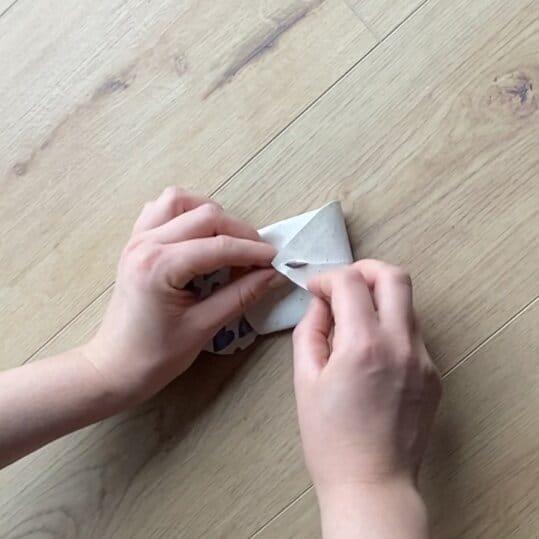
Round now this side of the triangle.
Open the paper and lay your jewelry in. The pieces can also be in a small bag or paper.
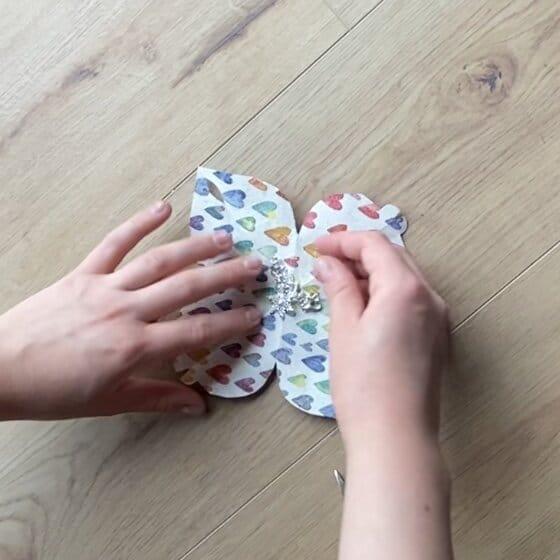
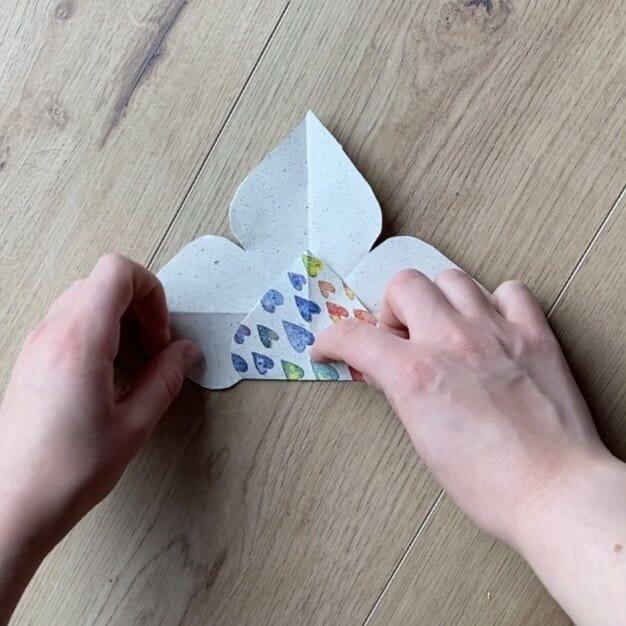
Put now both sides of the heart-shaped cuts together.
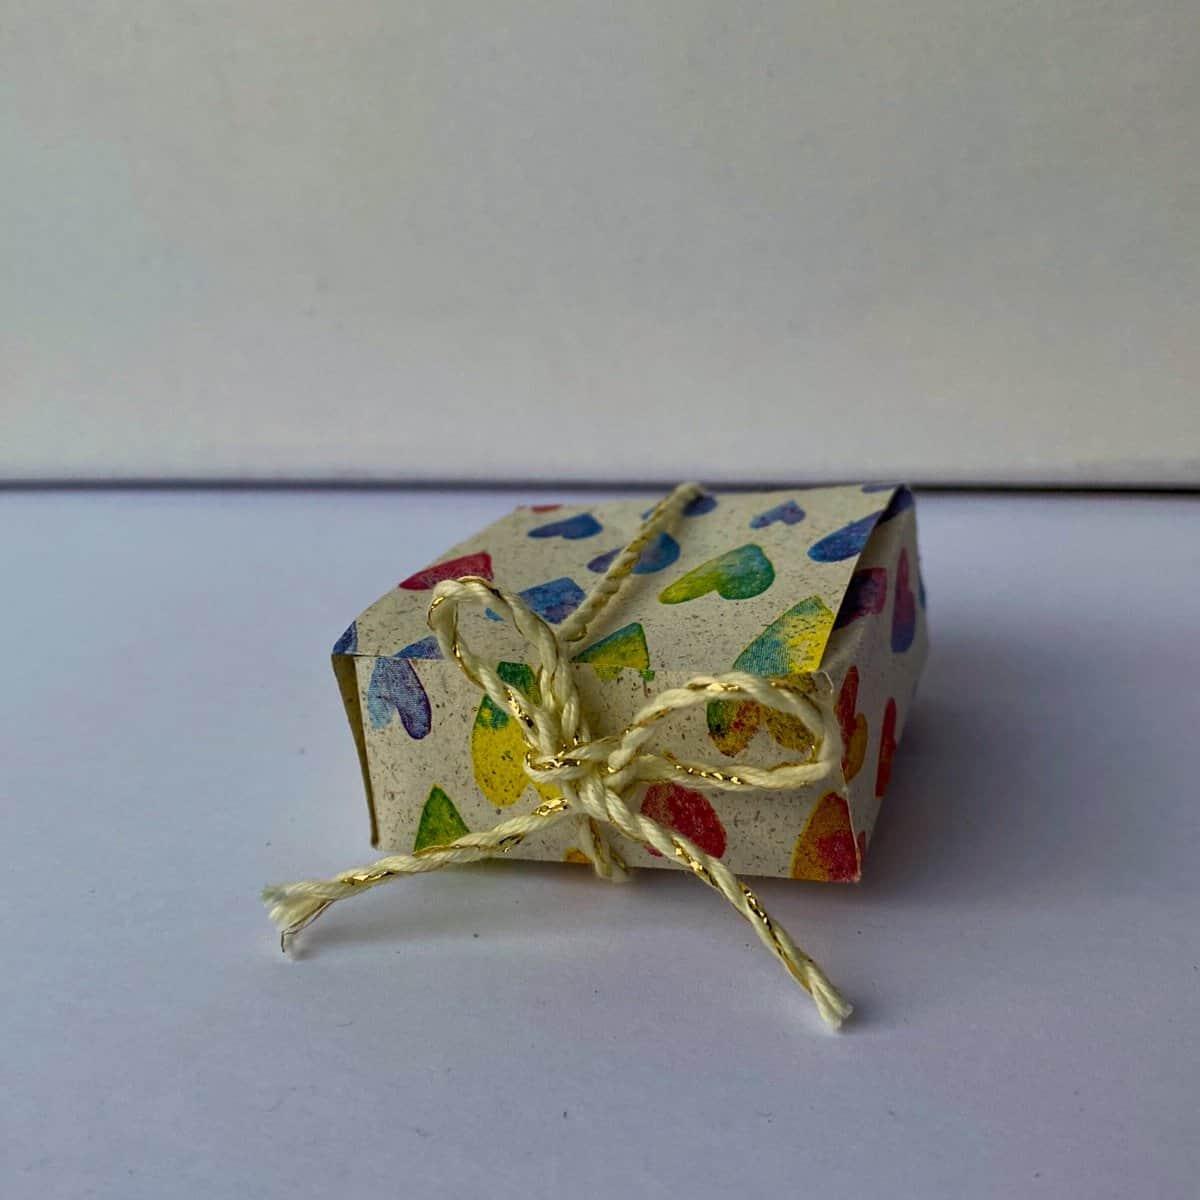
Slide now the two holes from the other sides in the heart-shaped cuts. If the holes are too small, make them bigger with a scissor. You can also round up and adjust the “heart” in the end.

Do you still struggle with this hack? Check out the tutorial on TikTok.
DIY Gift Box
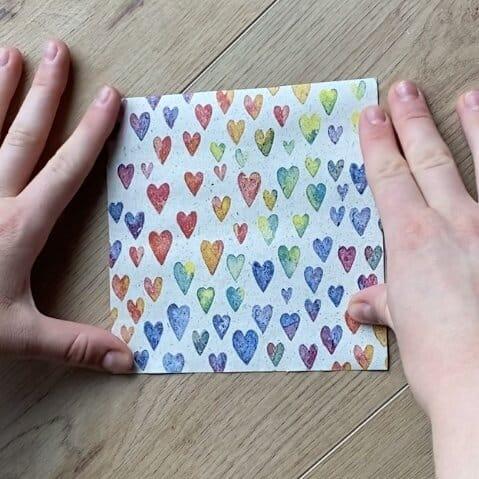
For this jewelry gift wrapping, you simply need your choice of paper, a pencil, and a scissor. It’s great if you use cardboard or thicker paper. Additionally to that, you need a template for the box.
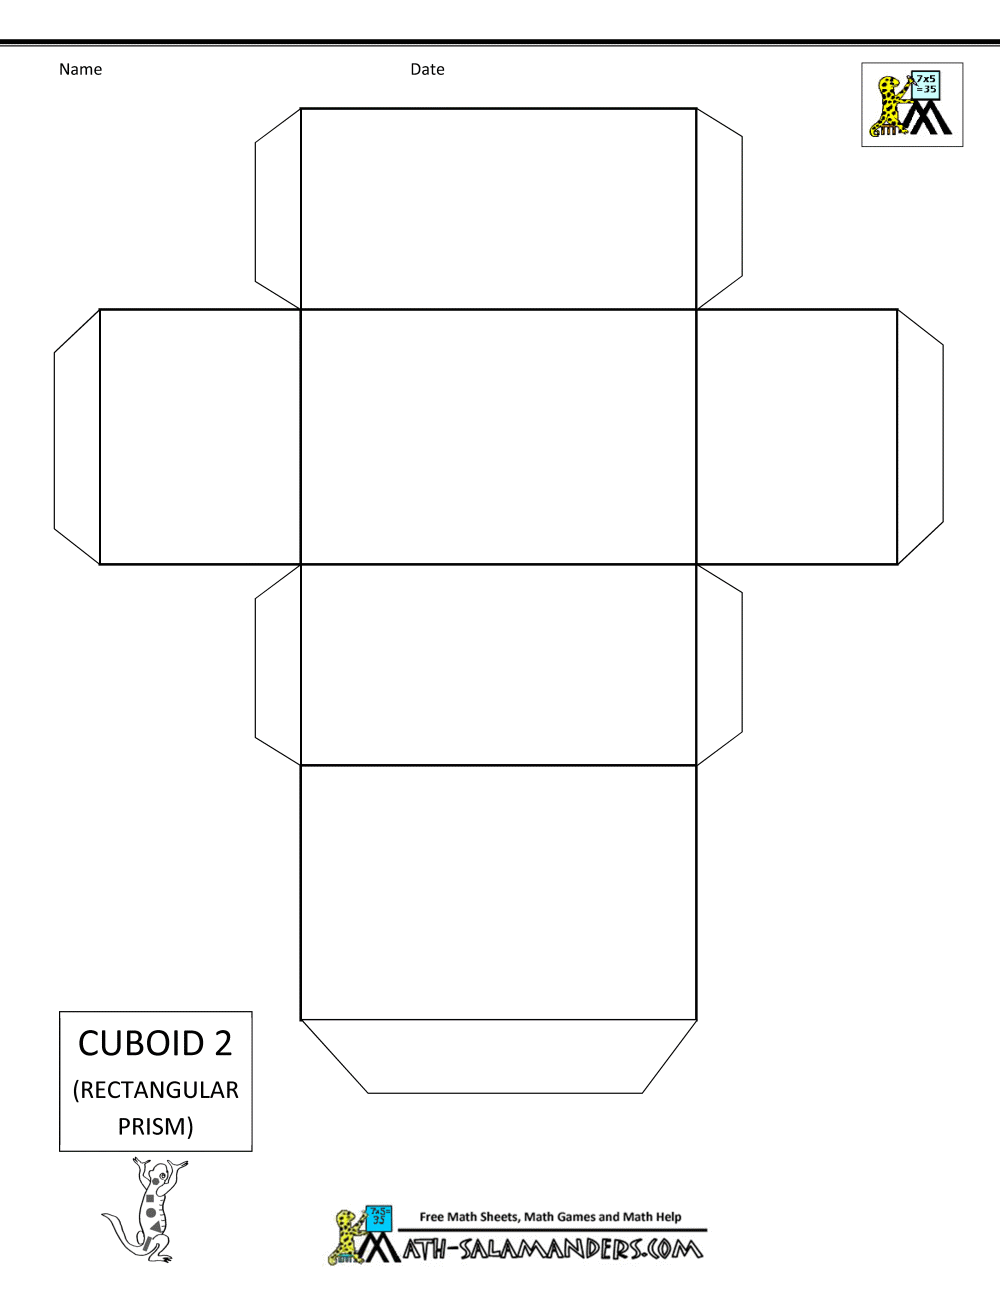
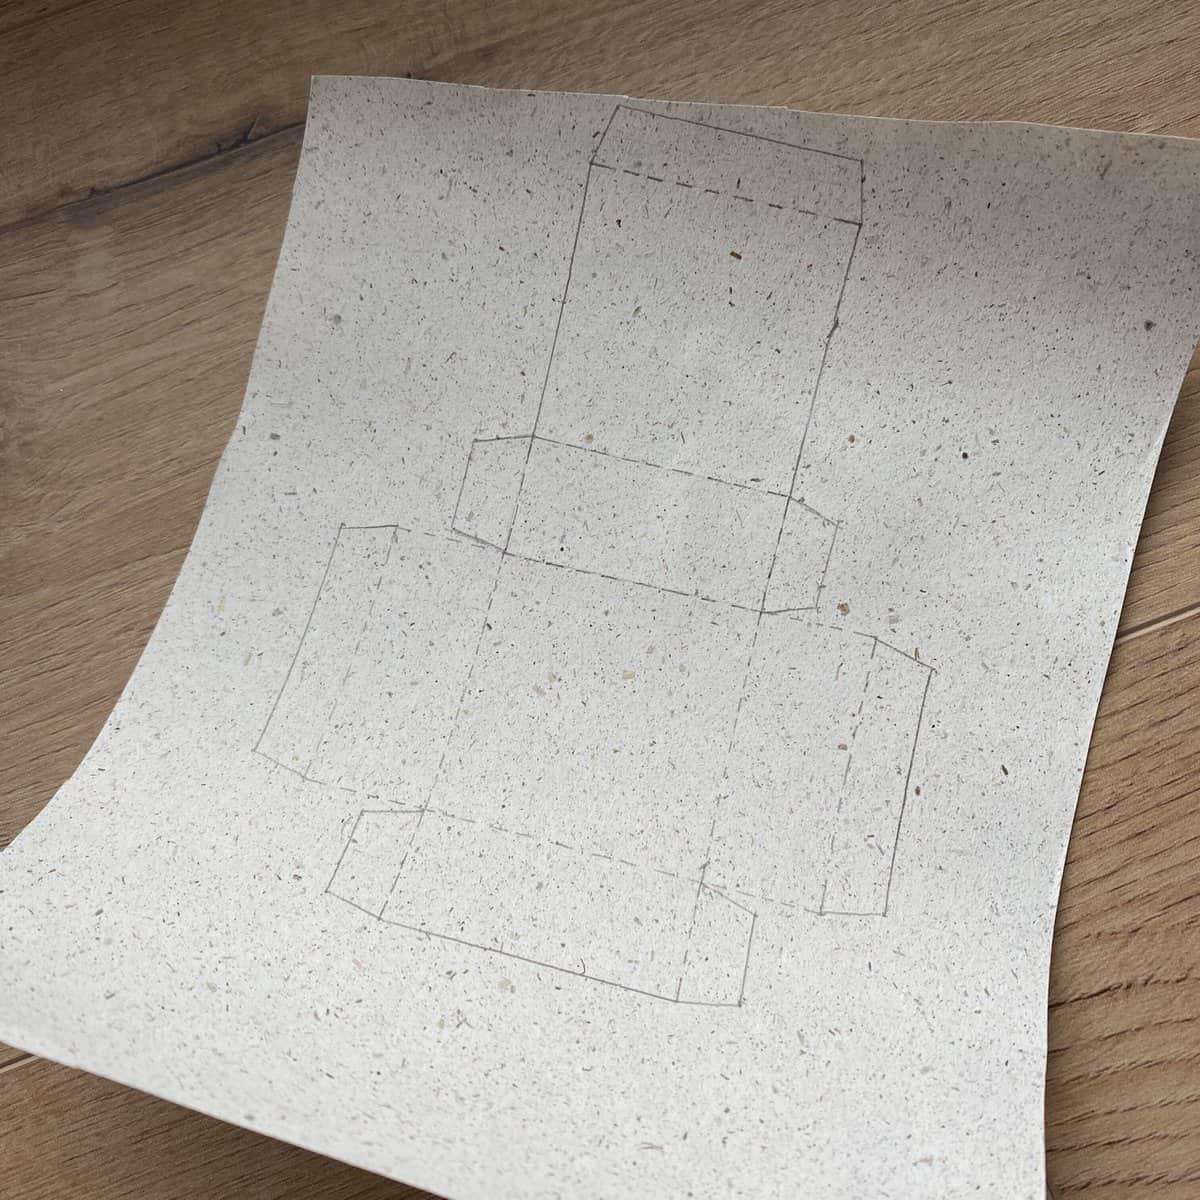
You find here a template for the box. You can print it out directly on the paper you use for the box or on normal paper and copy the template to your pretty paper, by hand of course.
Cut now along the outer lines of your template and fold along the broken lines. If you did everything properly, a pretty and small box should be the result. Glue now the small areas between the main sides, but your jewelry in the middle and close the top.
This self-made box can be a bit tricky and rich in details, but you’ve got after a really pretty gift box that looks adorable.
Creative Ways To Wrap A Jewelry Gift
Still looking for a jewelry package? Here are three more ways to wrap your jewelry gift. For the first two methods, you don’t need a box again. The last DIY is great for a set or larger piece of jewelry and perfect for a jewely box.
DIY Gift Pyramid
The first time I saw this DIY jewelry package, I immediately loved it. Special is the small pyramid. It looks adorable and is greatly optimized with a nice ribbon. It’s even a nice way to open the gift when you just open the know and you slowly see the jewelry inside.
And even if it looks complicated, it truly wasn’t. A bit time-consuming was the ribbon part. It’s really easier to use a hole punch.
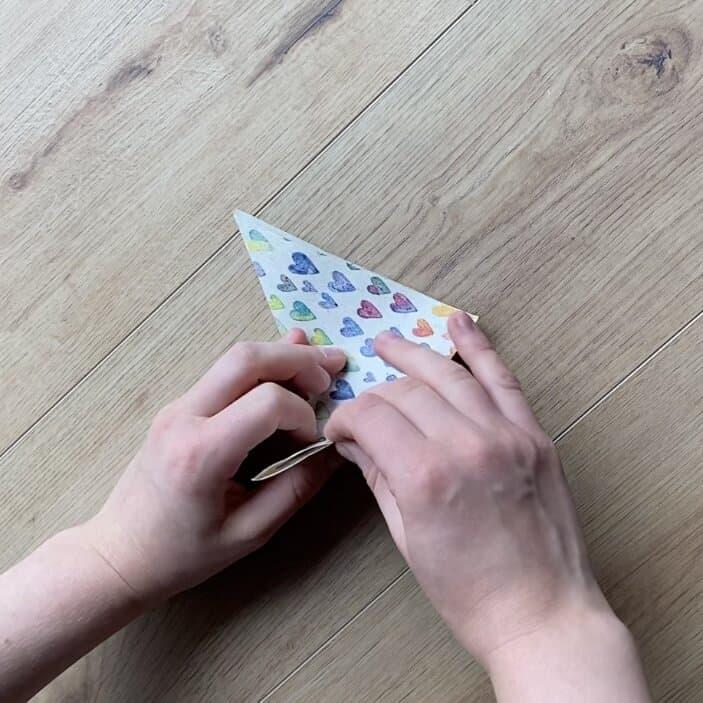
Your square piece of paper.
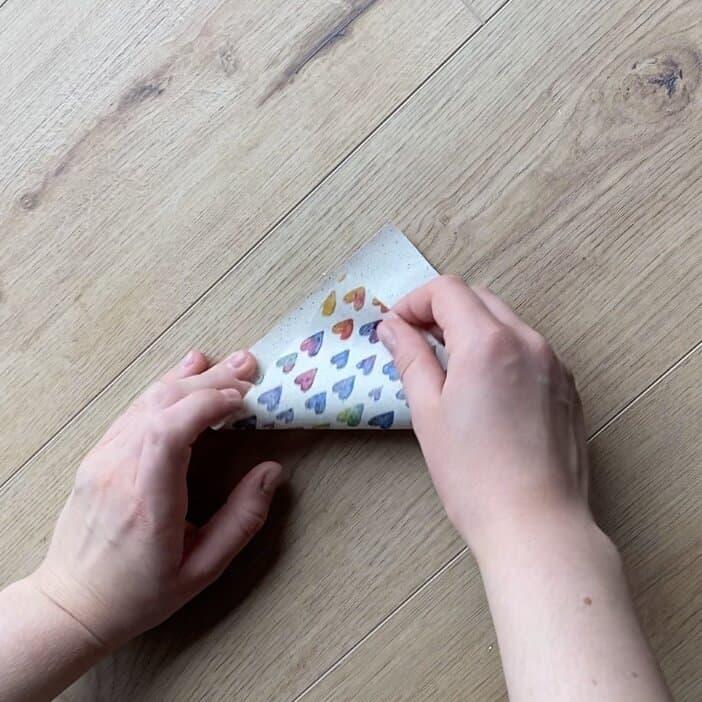
Turn the paper on the other site and fold the paper diagonal in the middle.
Fold it again diagonally.
Repeat this step.
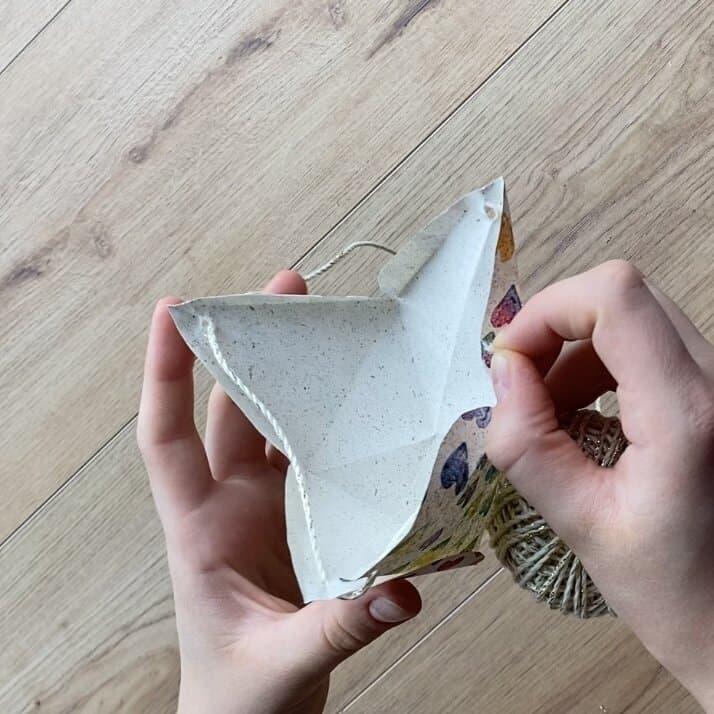
Round the corner that is towards the folded side.
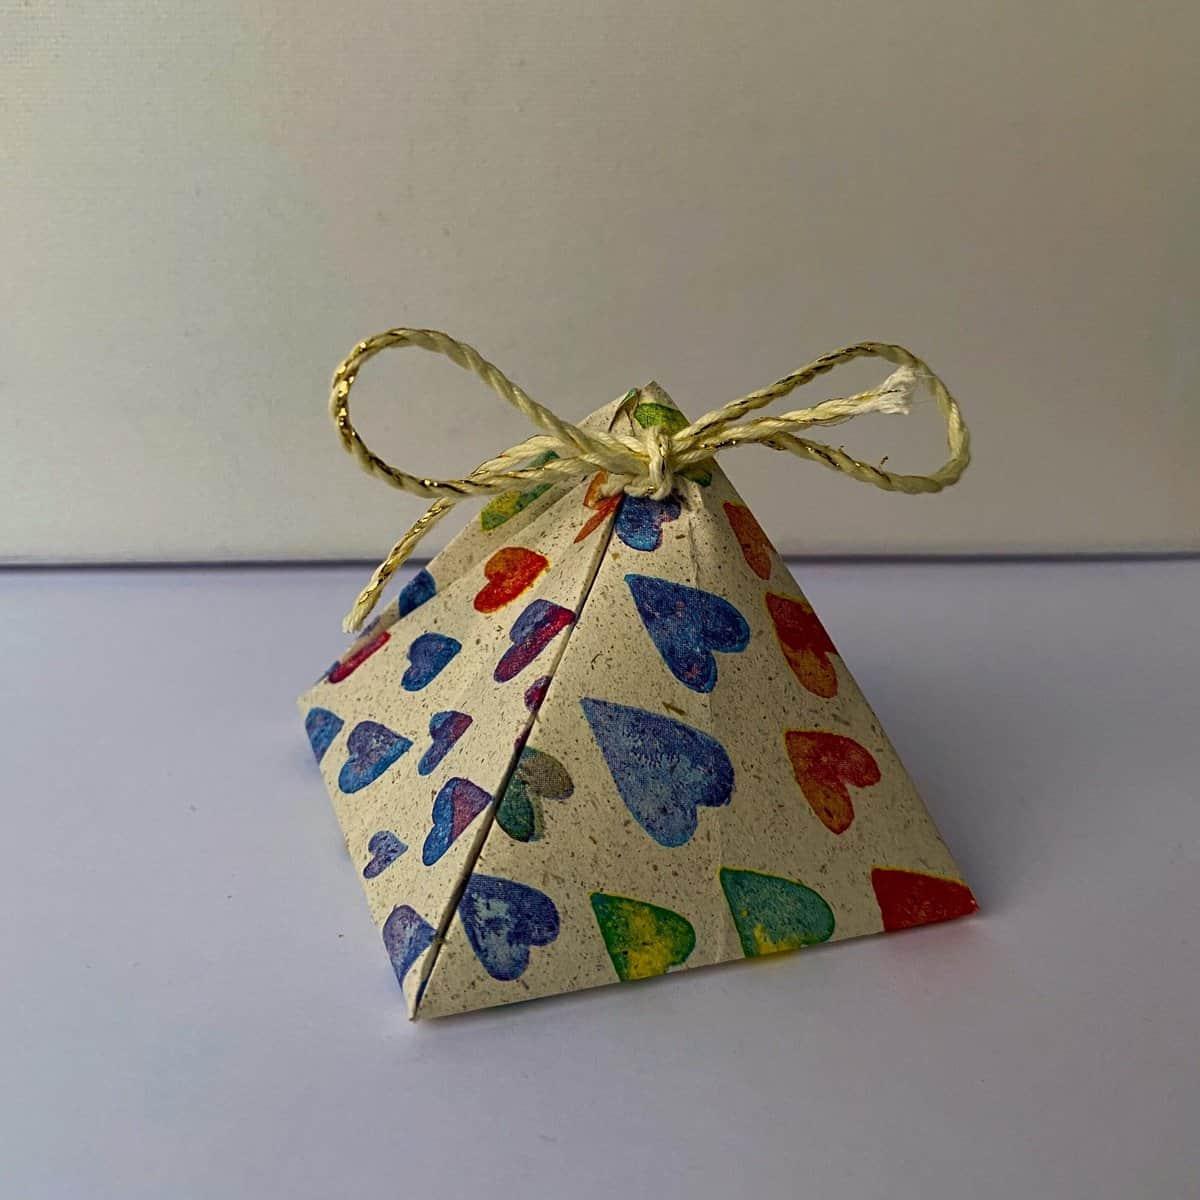
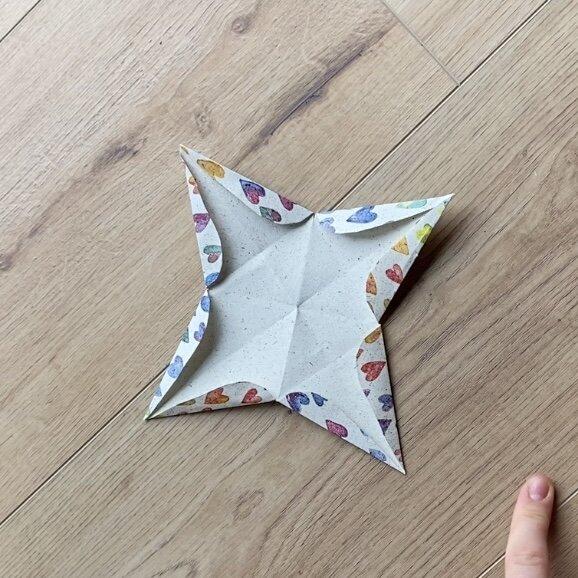
Opened up, your paper should have this kind of shape. Fold now each side like this in the picture.
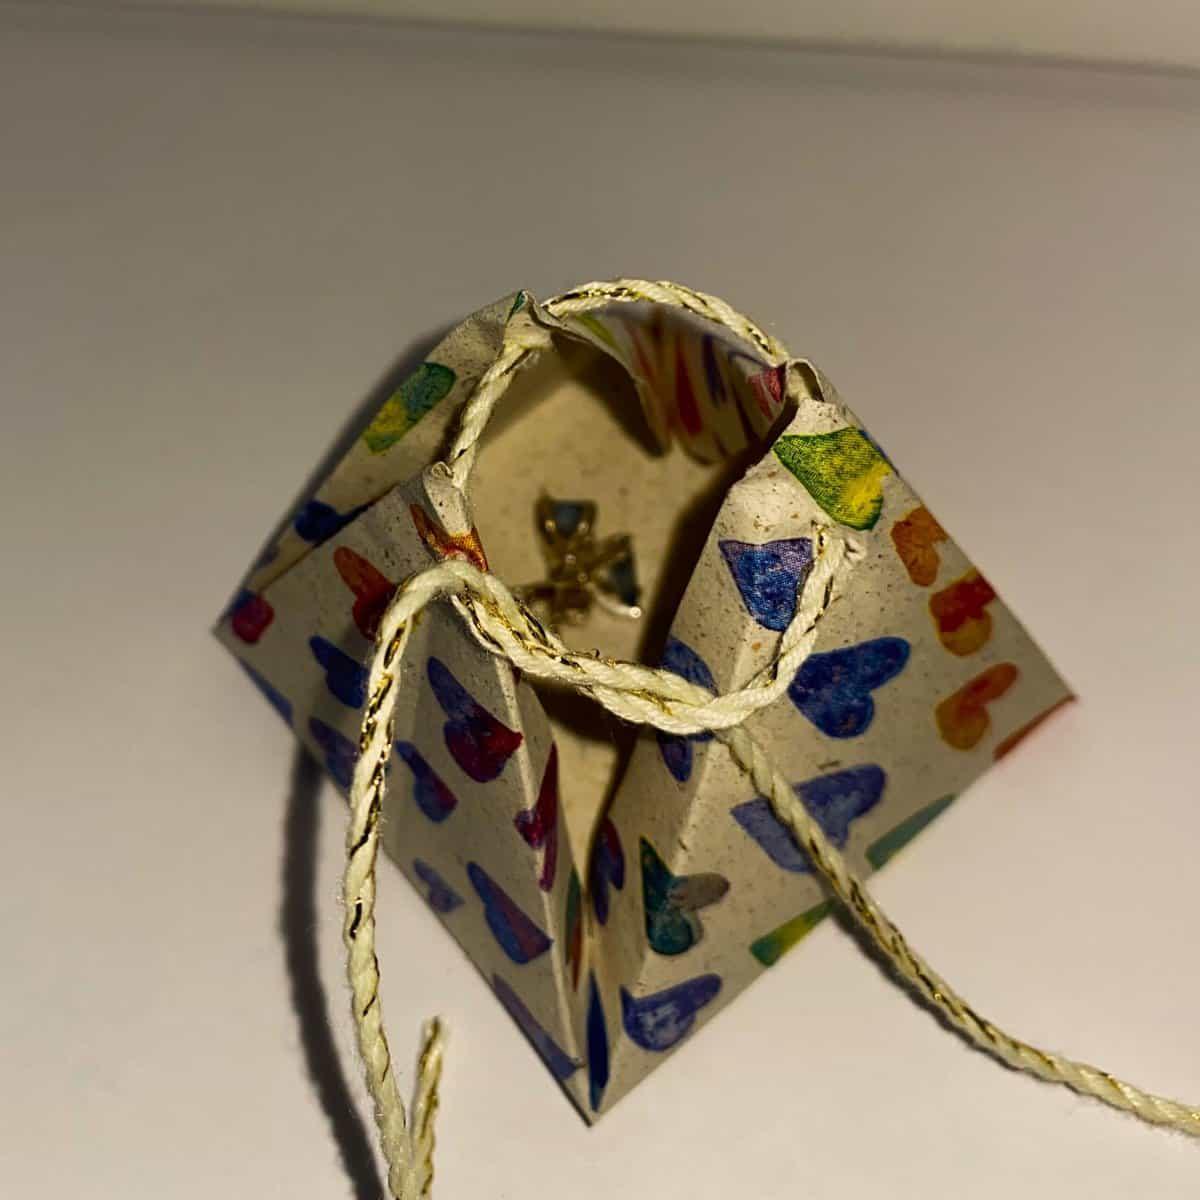
In the middle, there should be now a square. Fold now both sites of the created shapes. Fold them right to the top so, as shown in the picture.
Make a hole with a hole punch in the tops of the triangles. If you don’t have one, you can also cut small holes with scissors, but be careful. Thread a pretty cord through the holes. Pull the cord tighter and then tighten it.
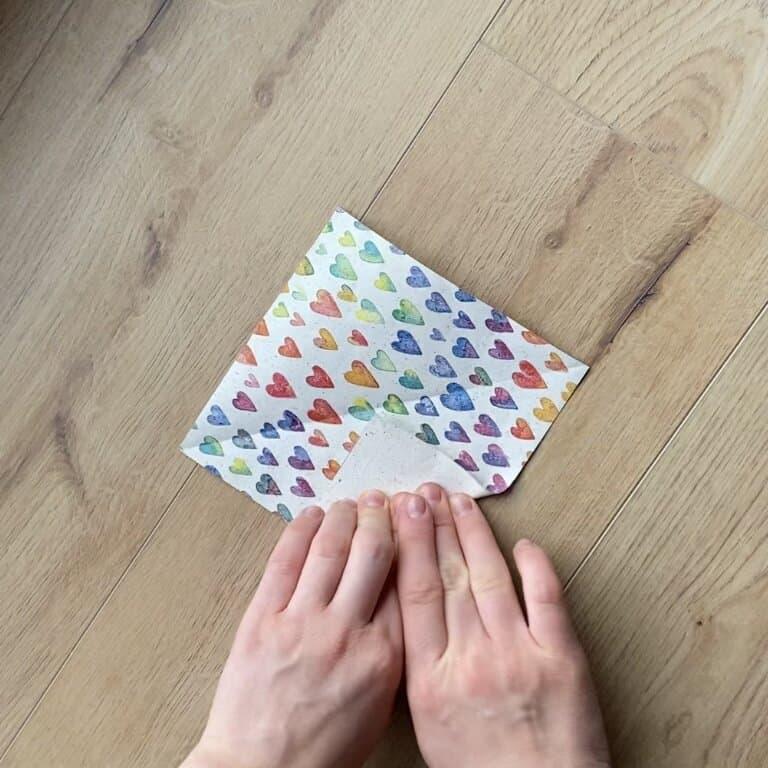
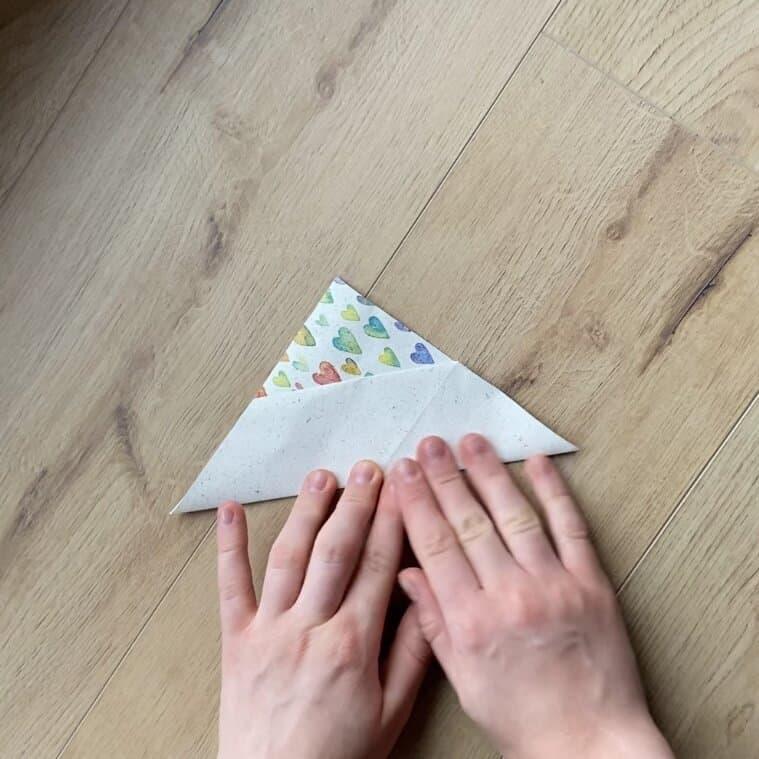
Do you still struggle with this hack? Check out the tutorial on TikTok.
DIY Gift Letter Package
Yes, we had the letter theme earlier as well. This DIY is another “letter package” that I absolutely adore. You don’t have to cut anything here but you should still try out at least once on notepaper.
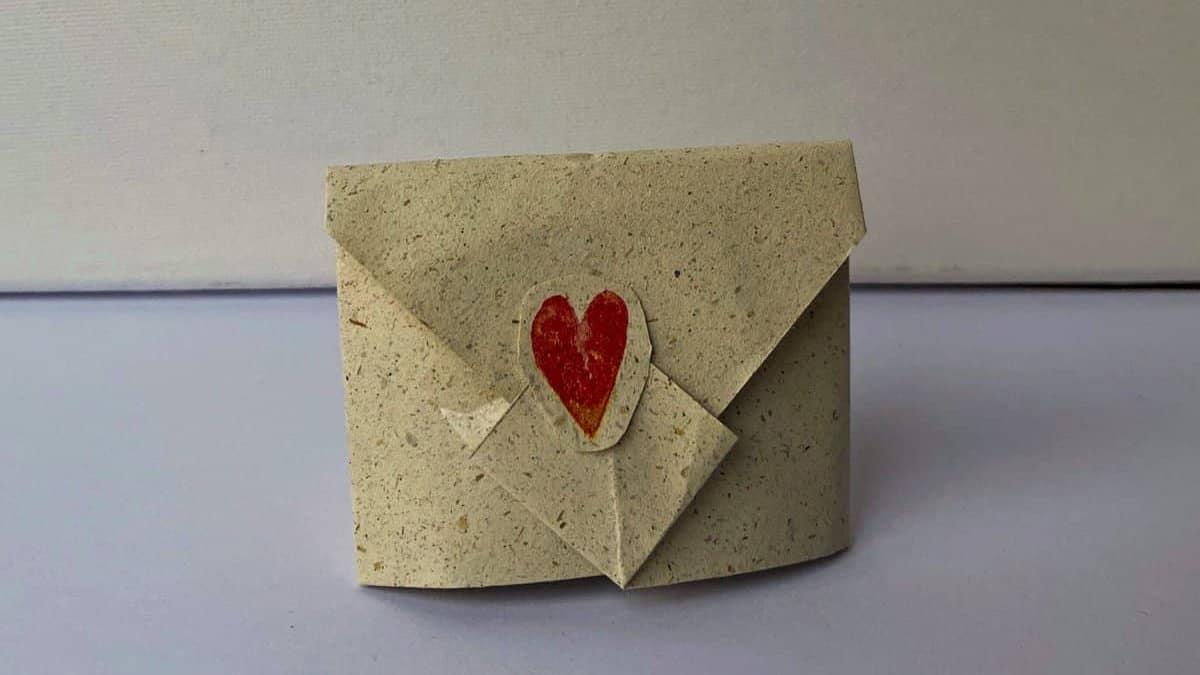
After tucking the top part in the rhombus, you’ll understand later what I mean, a cute sticker is great to “close the letter”. For that, I cut a heart from some left-over wrapping paper and put self-adhesive tape on the back, ripped it off, and taped it in the right spot. That’s a really easy tip and you have directly a matching sticker to your paper.
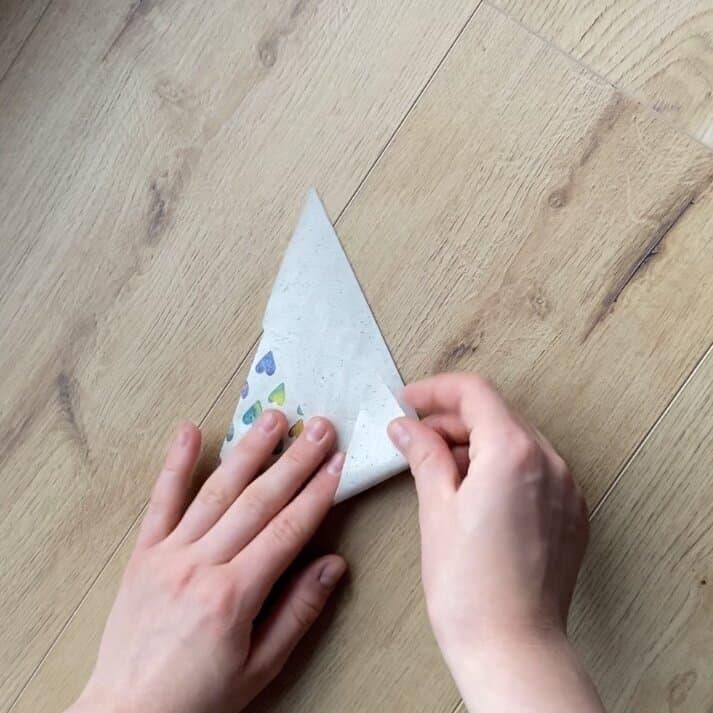
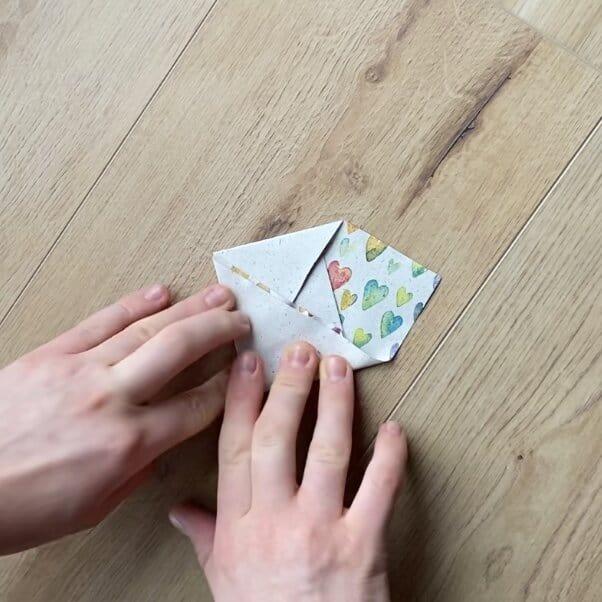
Fold the paper diagonal in the middle. Open the paper again. Now, fold a quarter of the paper into the middle, such as in the picture.
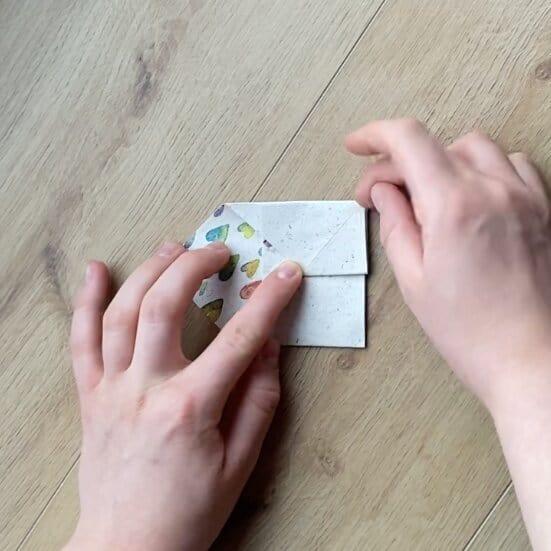
Fold half of the paper diagonally, the same fold that we did in the beginning.
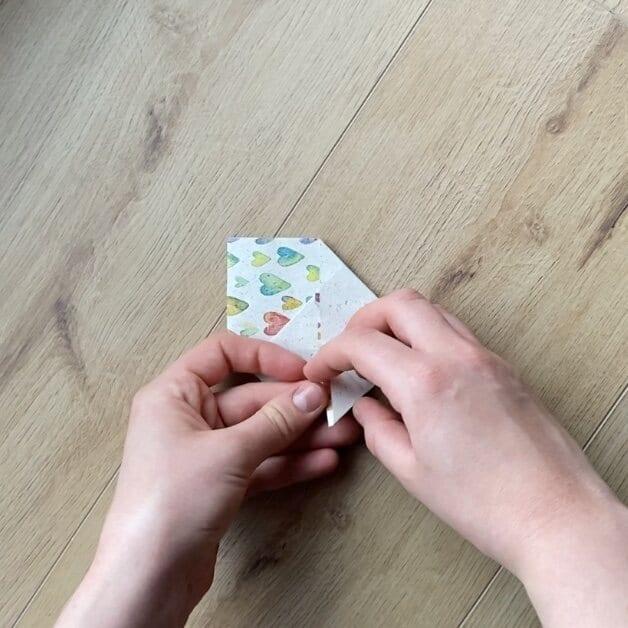
Fold now one courter to ca. 2/3 of the paper.
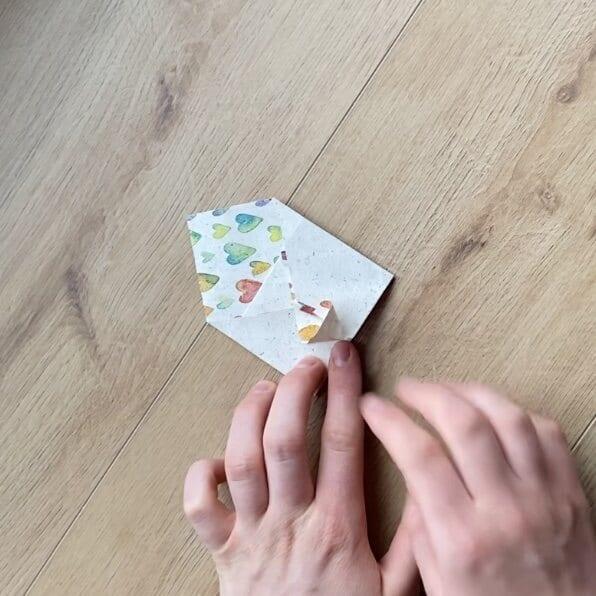
Repeat the same with the other side.
Fold back the latter side from the middle.
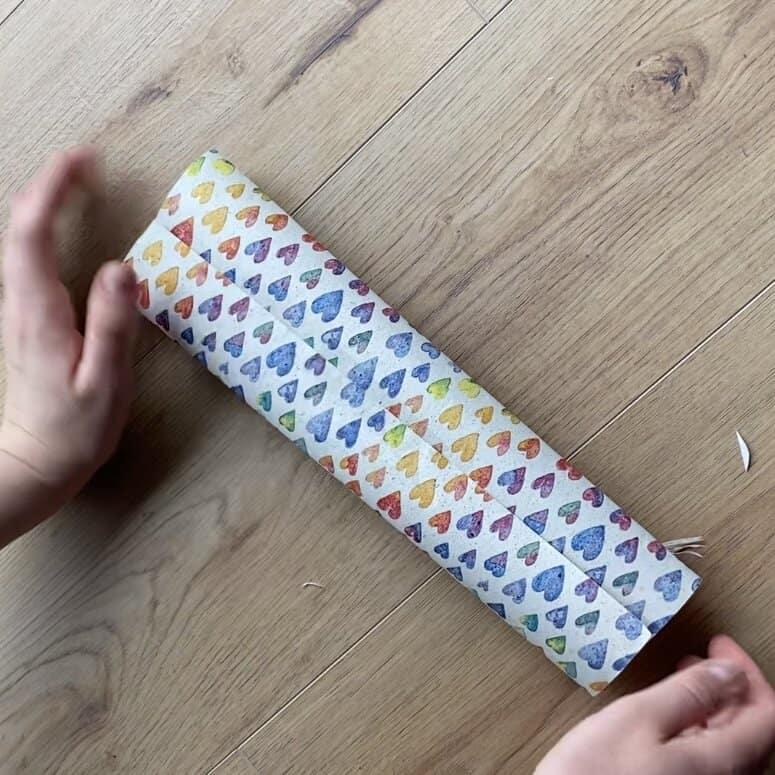
Open this just folded piece that a piece shaped like a rhombus.
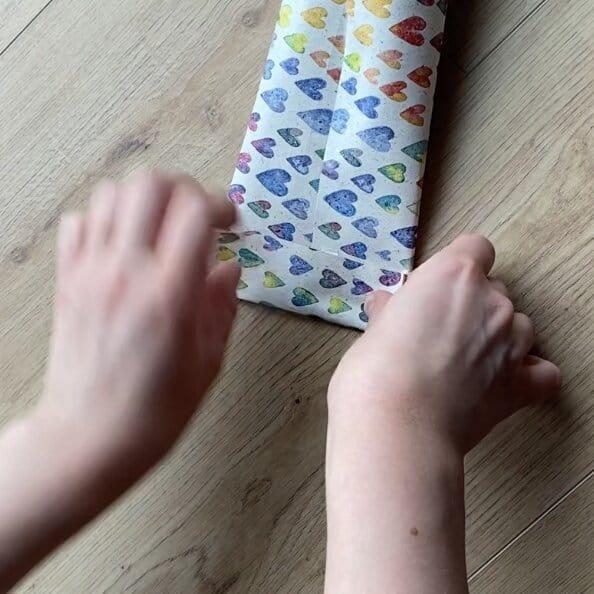
Press down the paper to create that rhombus. You can secure the sites and loose parts with some washi tape or clear tape.
Fold now the opper site that you can tuck into the rhombus. Before that, put your jewelry piece in the bag (the folded letter thing here) and then close it with the top side.

Do you still struggle with this hack? Check out the tutorial on TikTok.
DIY Gift Bag
The DIY gift bag is a great way to wrap jewelry with its package. You can put also bigger jewelry pieces inside.
For this DIY you need a bit more wrapping paper. Before cutting a piece, lay your jewelry gift on it and make sure there is enough space around it. Like, a LOT. You may underestimate like I did, that the space for your piece is reduced so you need more paper than usual.
I also love this DIY bag because you can put it in asymmetrical jewelry packages.
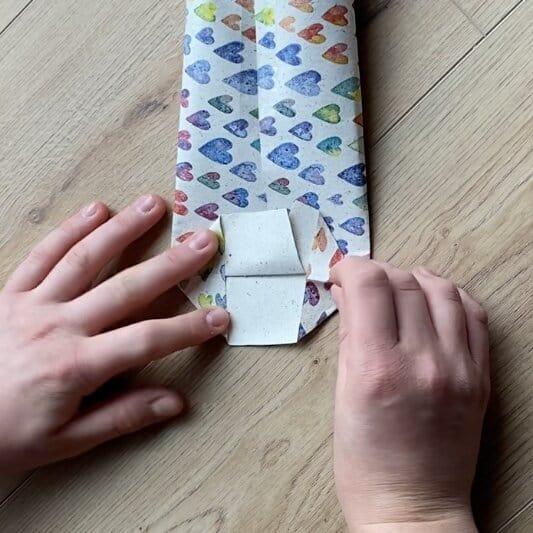
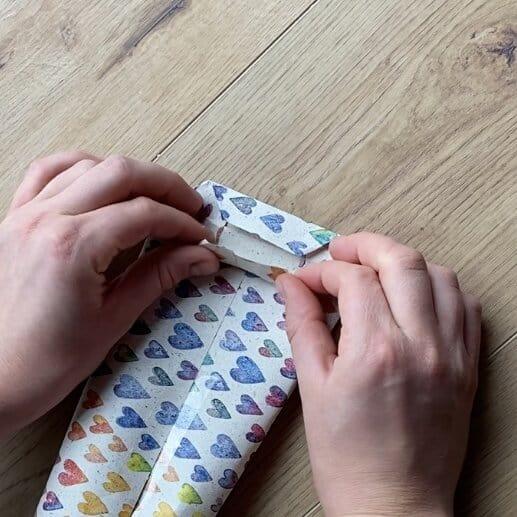
Take your wrapping paper and close both ends with clear tape. Make sure the paper is at the bottom and the top straight and it’s not oblique.
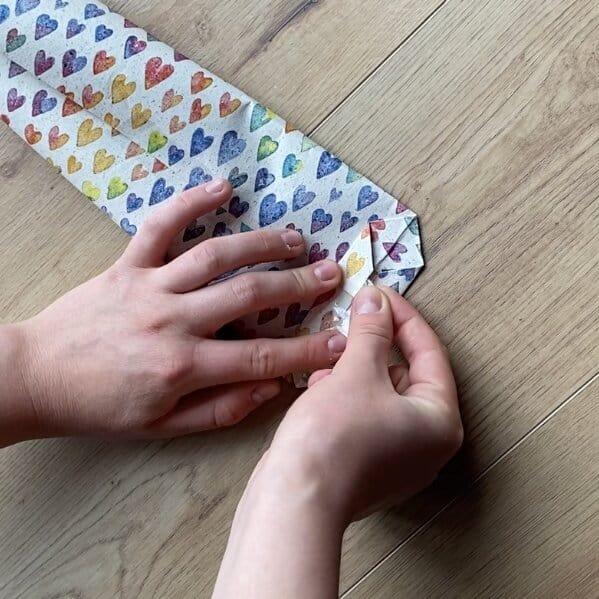
Fold now on one end a small part up.
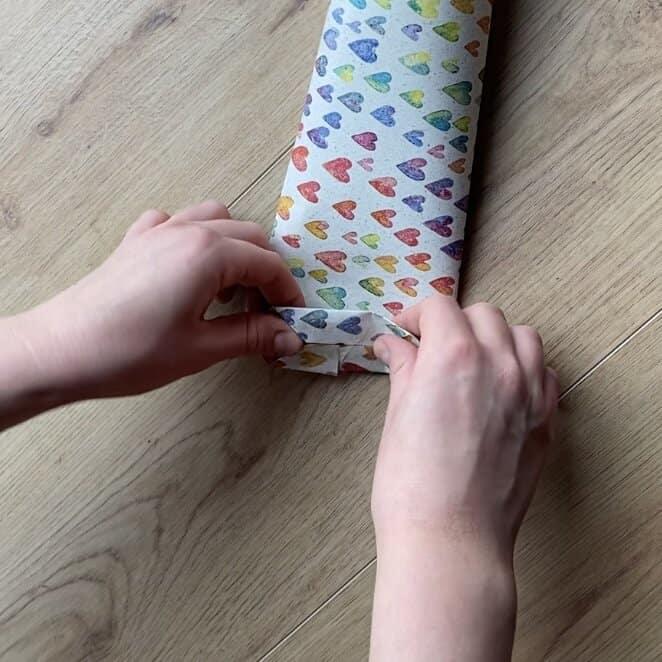
Fold both corners up, so it looks like in the picture.
Open the just folded pieces. Open then the upper site and press the folded sites. It should look like in the picture.
Fold now the half of the paper site. You shouldn’t see the inner side of your paper anymore.
Attach now the folds with clear tape in the middle.
Turn around your wrapping paper and fold it from the other site. You should now be able to put something in your made bag and let it stand.

Do you still struggle with this hack? Check out the tutorial on TikTok.
Don’t Want To Use Wrapping Paper?
In this post, I showed you eight great ways to wrap and gift a jewelry piece. However, you maybe don’t want to wrap up the pretty jewelry that you picked for the gifting. I mean, the jewelry can be so beautiful that you don’t want to hide it under tons of wrapping paper.
- DIY Themed Gift Box: A cute way to gift your jewelry pieces is to create a gift box with a theme. For example, your theme is green: You put your silver earrings with an emerald stone in a box, next to green snacks, matcha, green makeup products, and whatever else comes to your mind. You can do this with any theme you find fitting. In the box, you don’t have to wrap your jewelry piece but it still looks creative and pretty.
- Jewelry Piece + Jewelry Box: What is a better way to gift a piece of jewelry in an actual jewelry storing box? There are a lot of pretty and practical jewelry boxes where you can store your favorite pieces. For this gift, you can put your actual jewelry gift in the box and so gift it together. If you don’t want to spend so much, many jewelry boxes are small and in travel size.
- Miniature Glasses: The last jewelry gift package idea is a small glass. You can find easily on the internet or in craft stores little glasses, preferably with a top, or also test tubes. They often look very decorative and you can easily put your necklace or earrings in there. In a bag or with some decoration around it, you can have a unique and pretty jewelry gift package.
Got stuck at your DIY? If you have any questions, notes, or recommendations, email me at [email protected] or text me on TikTok, Twitter, and Instagram.

 Chanel earrings, CC dangle earrings in water drop shape adorned with stones and pearls v39