In this tutorial we will show how to shorten string Christmas lights.
Have you ever found yourself in a situation while decorating for Christmas where you need a shorter string of Christmas lights?
Maybe you need to finish a small section on your roof or you would like to add lights to your fireplace mantle but don’t need 30 feet to get the job done.
Today we are sharing how to shorten string Christmas lights to the exact length you need.
Follow the simple steps and the second diagram below and you will be able to shorten string Christmas lights in no time.
Important: Use caution when working with exposed wires! Exposed wires can shock you. Don’t plug in the lights until you have all the exposed wires covered with wire connectors and always use outdoor/waterproof wire connectors if your lights will be outdoors. All tips below are based on our experience and if you use any of the techniques shown below, you are doing so at your own risk.
SUPPLIES
- Incandescent C9 Lights
- LED Mini Lights
- Incandescent Mini Lights
- Electrical Tape
- Wire Connectors
- Wire Cutters
Shop the products we used for this project in one place.
FYI: This post contains a few affiliate links to products we used to make this project. Gray House Studio does receive commissions for sales from these links but at no extra cost to you. We appreciate you supporting this site. Read our privacy and disclosure policy. You can also easily shop our recommended products here.
Tutorial Video
Subscribe to our YouTube Channel
Like our video? Subscribe and help us reach our goal of 100k subscribers.
Steps
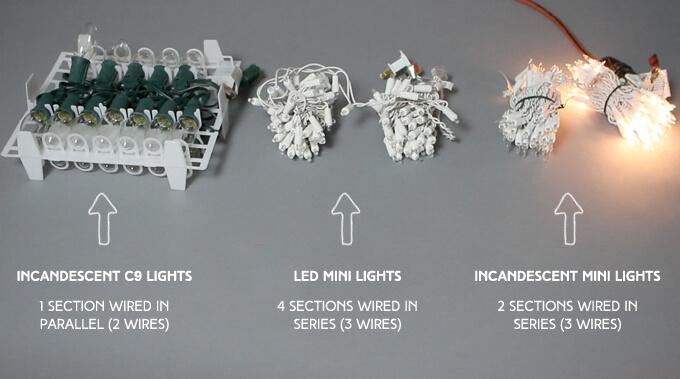
One way to determine how the lights are wired is to completely remove one of the bulbs.
If all or a section of lights turns off than the lights are wired in series. If all the lights remain on then most likely the strand is wired in parallel.
Lights Wired in Series
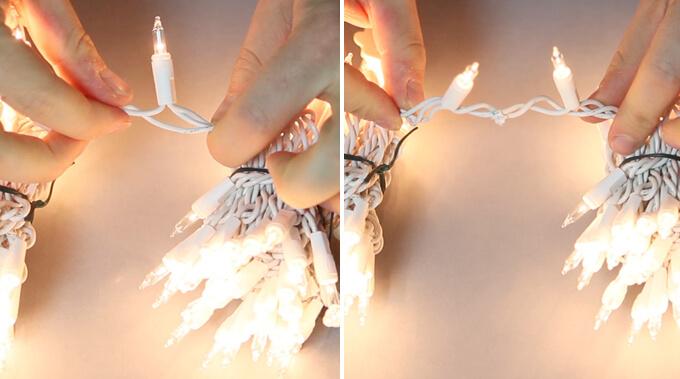
Most mini Christmas lights and LED Christmas lights are wired as multiple sections of wired in series.
Start by locating both sides of each series section of lights that turn off when a bulb is removed. You should see that the Christmas lights change from having 3 wires to 2 wires then changes back to 3 wires.
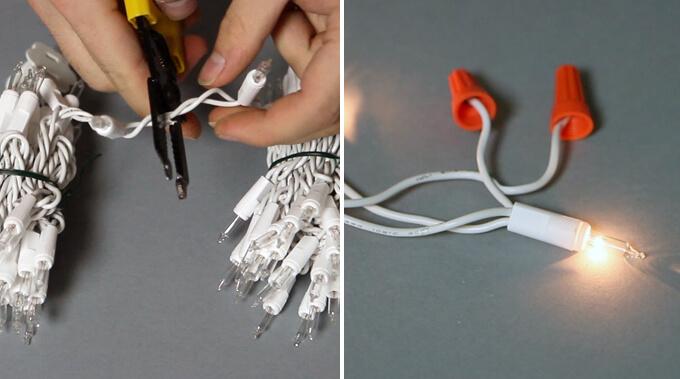
The best way to shorten lights wired in series is to remove an entire series section of lights by cutting lights apart where there are only has two wires, with the lights unplugged.
Then, simply cap each of the two cut wires with a wire connector. If the lights go outdoors be sure to use outdoor/waterproof wire connectors.
Risk of removing individual lights from lights wired in series
If your goal is to remove one or two lights off a strand wired in series it is possible but not ideal.
Christmas lights wired in series spread 120 volts coming out of the plug across all the lights.
Each light that is removed increases the voltage to all the remaining bulbs.
As you can see, removing a few bulbs isn’t a huge deal but remove too many and risk burning out all the lights.
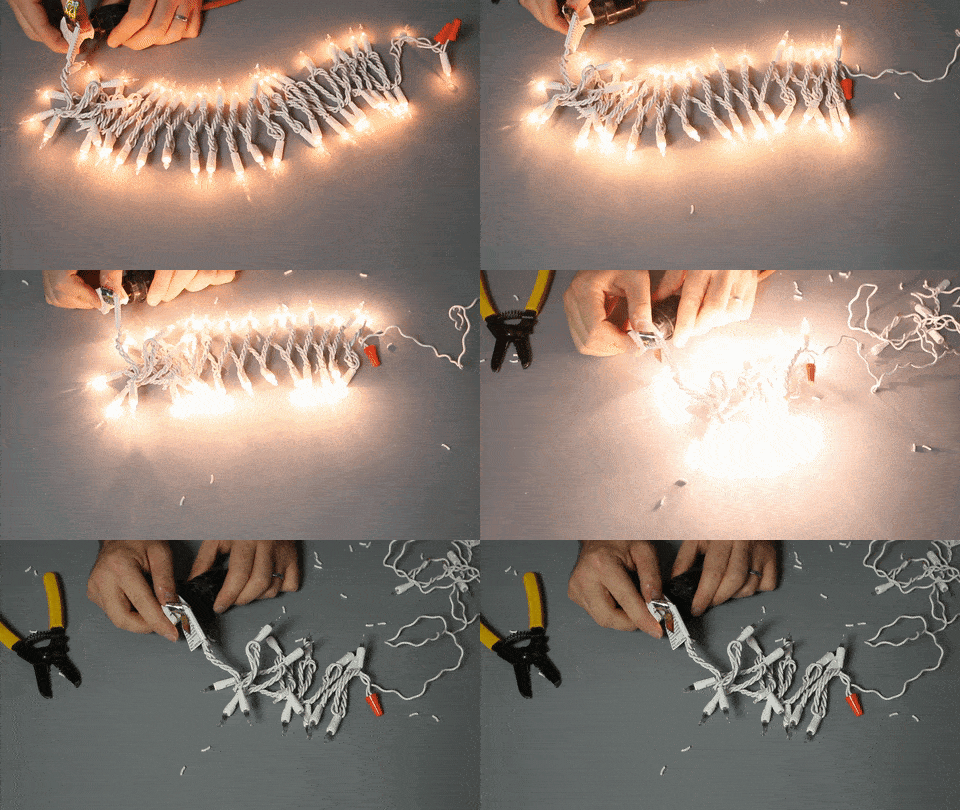
Notice as the bulbs are removed and the volts/light increase the lights get brighter
120 volt / 40 bulbs in series = 3 volts/bulb 120 volt / 35 bulbs in series = 3.4 volts/bulb 120 volt / 10 bulbs in series = 12 volts/bulb
How to remove individual lights from lights wired in series
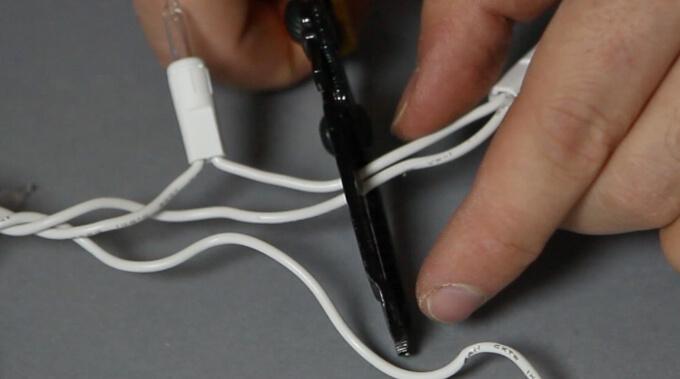
1. With the lights unplugged, cut the two wires that enter the last light in the series strand with wire cutters.
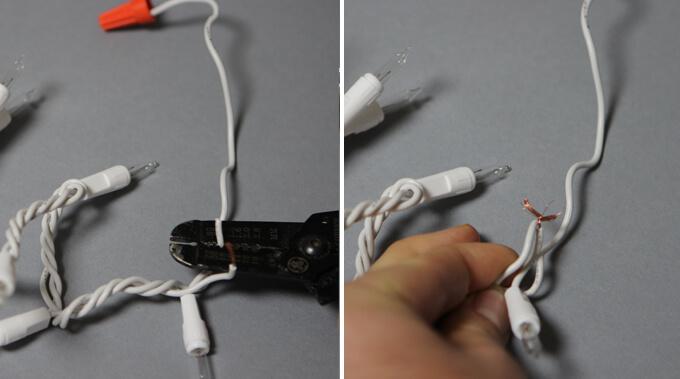
2. Use wire cutters to strip the ends of the two wires cut in the previous step. Twist the two bare wire ends together.
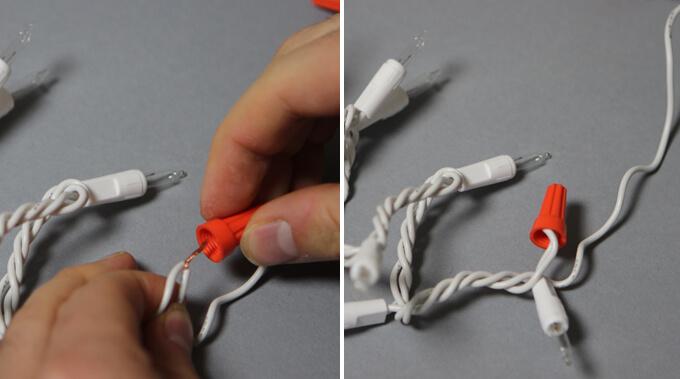
3. After twisting the wires together secure with a wires connector. Then, cut the third wire to match the length of the other two wires and cap it with a wire connector.
Wire diagram for series Christmas lights

This diagram shows how Christmas lights wired in series are wired. There are three different wires.
Each colored line represents a different wire. The blue line connects all the lights together in series and supplies power to the light bulbs.
The yellow and red wires are both connected to the blue line on either side of the light bulbs.

The diagram above shows the CORRECT way to connect the spliced wires. By connecting the wires this way, the lights will turn on when you plug it in.
As you can see the blue wire (the wire connecting the lights) must always be connected to one of the loose wires.

The diagram above shows another possible way to connect the wires. If you connect the wires this way the light bulbs are only connected to one side of the power and they will not turn on.
As you can see in the diagram, the red wire is not connected at all. You must switch the wire coming from the light bulb to connect to the other loose wire.

This diagram shows that if you connect the wires this way it will short circuit and throw the breaker for the outlet.
Don’t attach the two loose wires together. Only one loose wire and the wire coming from the light bulbs should be connected together.
Shortening Christmas lights wired in parallel
The lights are designed so each bulb receives all 120 volts and each bulb has a direct route to power, meaning they can be cut to any length without overpowering and burning out bulbs.
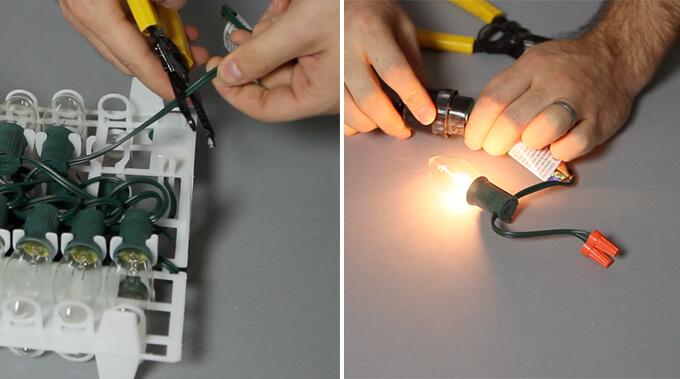
With the lights unplugged cut wires with wire cutters between the bulbs and cap each end with wire connectors.
We hope this helps you adjust the length of your Christmas lights so you can now you hang up you custom length string Christmas lights!
Now that you know how to shorten string Christmas lights, you can fill in any small gaps of lights on your roof or create custom length string lights to decorate with in your home.

 Rolex Milgauss 116400GV Blue Dial
  Chanel earrings, CC dangle earrings in water drop shape adorned with stones and pearls v39