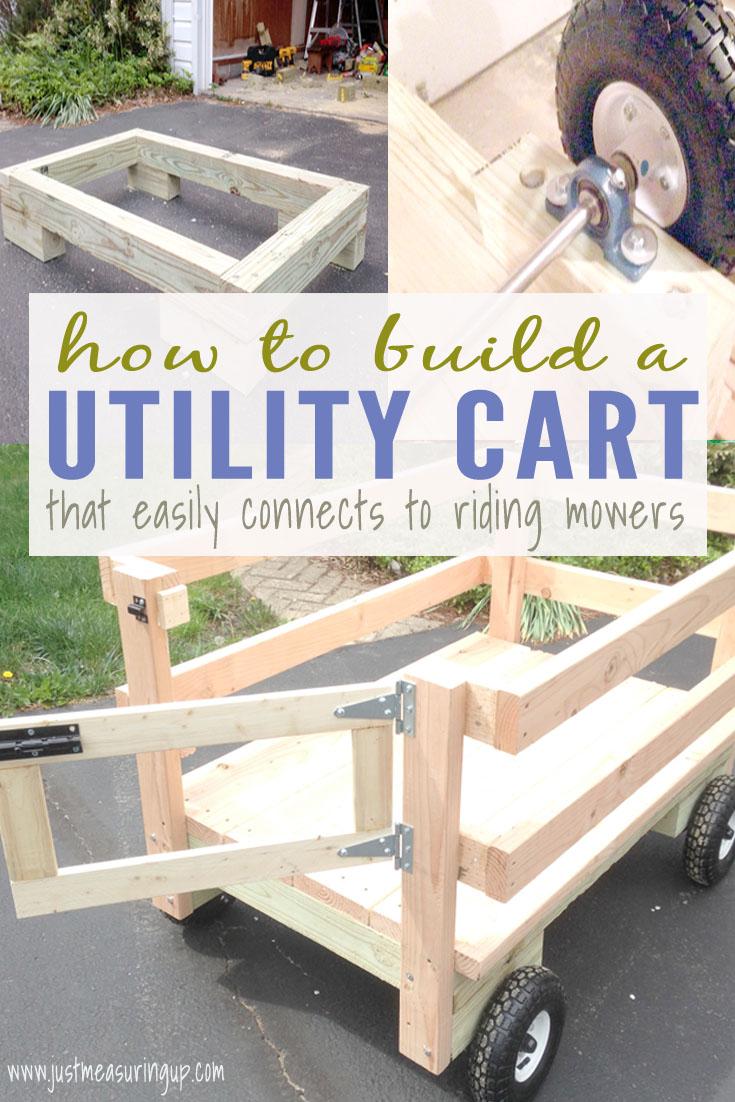
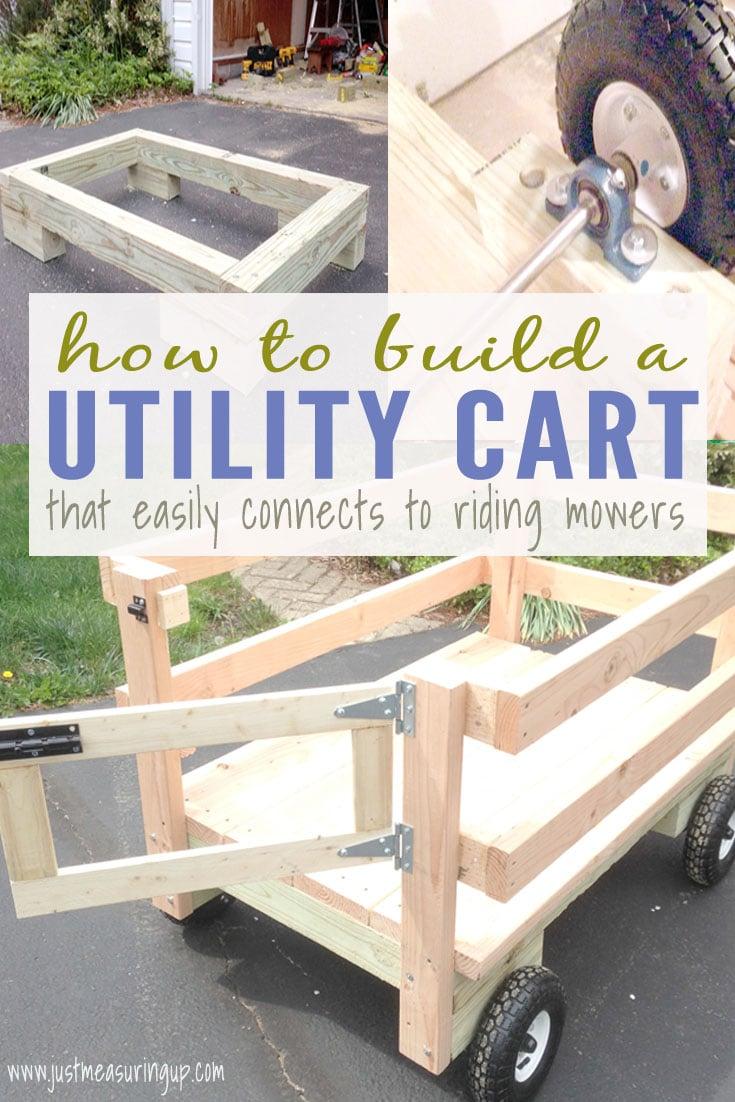
Whether you need a wagon, a garden cart, or a lawnmower trailer, this simple DIY cart can do it all. This easy tutorial will show you how to build this yard cart complete with simple wagon steering.
Ever since I got a riding lawn mower, I’ve been waiting for the chance to do something really cool with it (other than cut the lawn, of course).
We had recently went to a farm to go strawberry picking, and they shuttled us to the field in a hayride. I joked to Eileen that I should build our own hayride to pull the family around the backyard.
But then I got thinking how useful a DIY wagon cart would be, especially for my yard work (and previous yard work – like the boardwalk we just made).
So, as many great inventions once started with a mere joke, so did my next project.
I was going to build my own lawn tractor cart. The following tutorial will show you exactly how to make a wagon too – complete with simple wagon steering.
Planning the DIY Utility Wagon
I was really excited about my DIY garden cart. Aside from the original purpose of a wagon ride around the yard, it could really help me save time in many other tasks (particularly when refuse pickup day comes, and I had to haul 10 heavy bags of grass clippings to the curb).
I looked at many commercial lawn mower wagons, trailers, and utility carts in the past, so I had a pretty good idea of how to make a wagon.
In the past, I had once considered buying a wagon utility cart but never got around to it because of the cost and small sizes they came in. If you’re wondering how to make a wagon, keep reading for all of the wooden wagon construction steps. It’s really quite simple.
The actual construction of the DIY wagon was not going to be that hard. It was just a platform with a fence.
Since the DIY wagon was completely custom-made, the wheel system needed to be built from scratch. I had a rough idea of what the wagon steering assembly entailed. But I still how to figure out exactly how to to make an axle for the wagon.
Wheels would need to be mounted to an axle, which would be mounted to the base of the wagon.
Even though I knew this, I still had lots of questions, such as what would prevent the wheels from sliding off the axle, or the axle from flying off the wagon?
How to Make a Yard Utility Cart
I did a lot of research on wheels, axles, and bearings and gained some exceptional knowledge on wheeled machines. I made my list of materials and started my wooden wagon construction.
How to Make an Axle for a Wagon
In learning how to make an axle for a cart, the following steps will show you the materials you need and how to put the wagon axle together. First, each axle consisted of some pillow blocks, washers, shaft collars, end caps, and wheels.
Materials for Building the Wagon Steering Axle
My homemade wagon steering axle system would be comprised of the following:
- 4 pneumatic tires
- 4 locking pillow blocks (explained below)
- 2 axle rods
- 4 locking shaft collars
- 4 axle rod plastic caps
- a number of spacing washers
Pillow Blocks for Building the Wagon Steering Axle
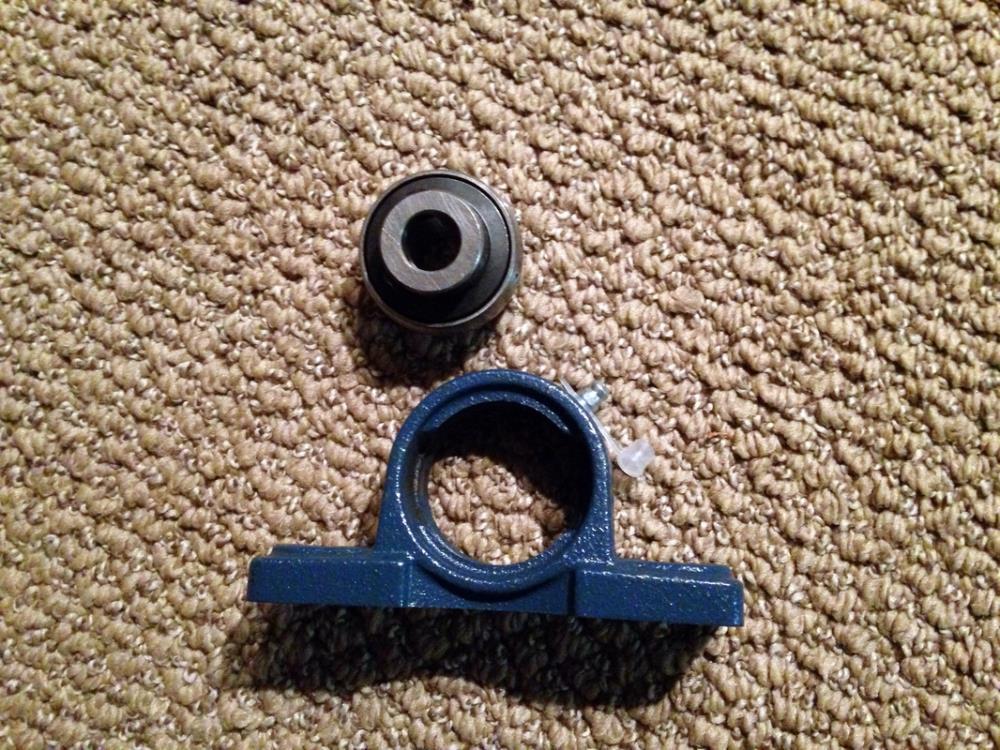
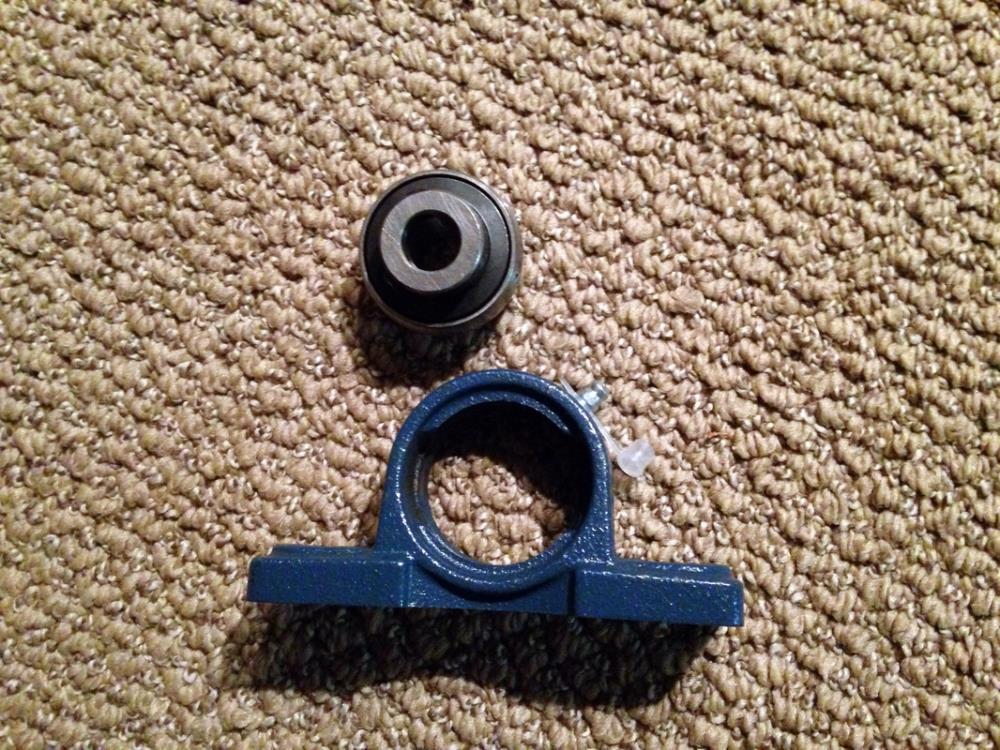
A pillow block is a support pedestal used to mount a spinning axle to a flat surface. It contains a bearing that lets the axle spin independently of the mount.
The ‘locking’ feature of the pillow block is just a screw that you tighten that prevents the axle from sliding out of the bearing.
The pillow block housing comes with attachment holes to let you bolt it onto a surface (in my case, the underside of the wagon).
Here’s a picture of one of the pillow blocks I used (The bearing on top fits into the blue housing below, and the axle rod slides into the bearing):
Spacing Washers for Building the Wagon Axle
In learning how to make a wagon, it’s essential to understand how the wheel parts go together.
First, the two locking pillow blocks are secured to the wagon. Then the axle is inserted into the pillow blocks and locked into place with the block screws.
Before the wheels can be put on the axle, some spacing washers need to go on first.
It’s generally a good idea anyway to use washers to separate spinning parts, but I needed them specifically to enforce a minimum distance between the pillow blocks and the wheels.
If I didn’t put a small distance between the two, then the pillow block mounting bolts would be too close to the edge of the wagon, and risk splintering the wood, or worse, ripping right out the side during usage.
Wheels, More Spacing Washers, and Shaft Collars for the DIY Wagon
So after the spacing washers were put on, the wheel comes on.
After the wheel comes another spacing washer, and then a locking shaft collar.
This is essentially a fat ring that you slide onto the axle rod and becomes immovable once you tighten a screw on it. It’s a lot like the locking mechanism on the pillow block.
The shaft collar is the key part needed to prevent the wheel from sliding off the axle.
Shaft collars come in a variety of flavors. I chose to go with a 2 piece clamping collar. This type of collar comes with two half circles that screw together to form a ring.
I chose this type because compared to other types of shaft collars, it provided a larger amount of force to the axle to prevent it from moving.
Here’s a picture of the shaft collar I used:
End Caps for Building the Wagon Steering Axle
Finally, after the shaft collar comes the axle rod plastic cap. This is just a cap that you hammer onto the edge of the axle. However, it really has 3 purposes.
First, the axle rod has some sharp edges on both ends, so I didn’t want it digging into things and doing damage.
Second, it provides an additional layer of locking protection to prevent the wheel from sliding off. Albeit the locking shaft collar will do its job just fine, but it never hurts to have something extra to reinforce it.
Finally, it finishes off the wheel setup giving it a nice aesthetic look.
I did a lot of shopping around online and found the best prices to come from Zoro.com and Amazon.
Also, I got some great deals on Amazon for 10” pneumatic tires and some ⅝” bore pillow blocks.
The rest of the parts came from Zoro. Additionally, I made sure that all the parts fit on the axle size I was using, which was ⅝”
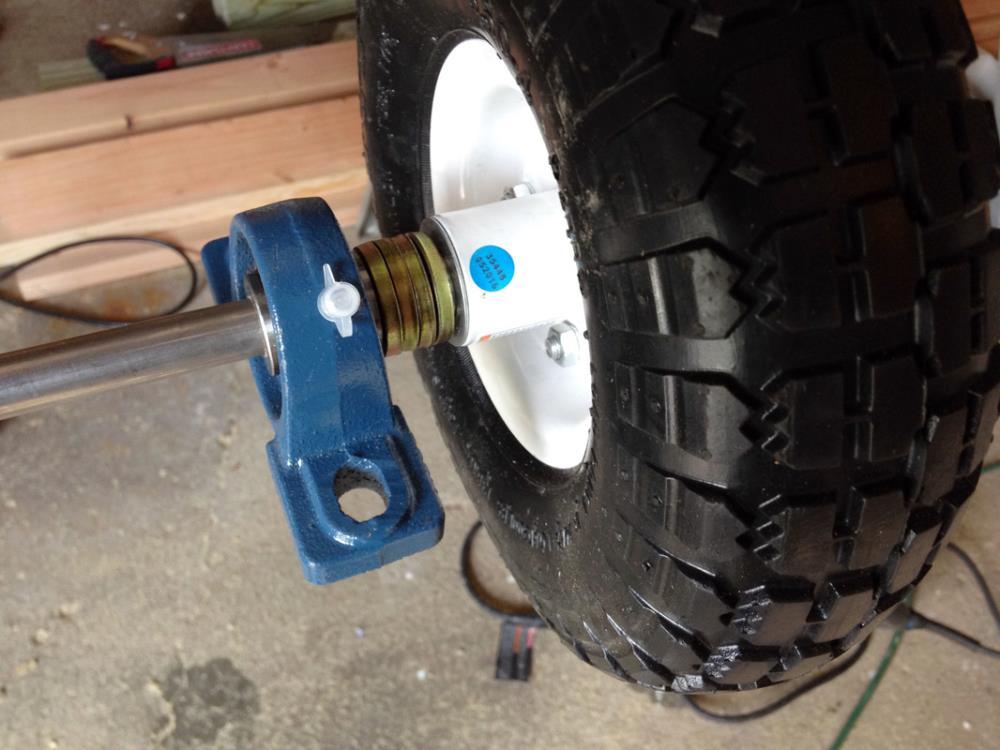
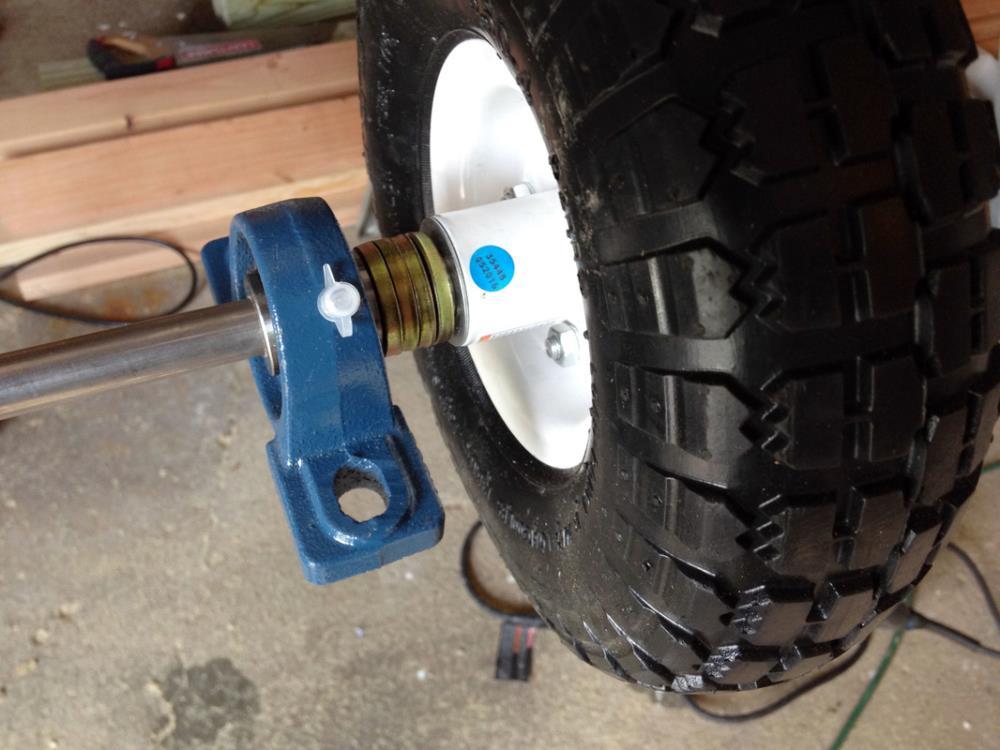
Here is a picture of the assembled wheel structure (see what a nice finishing touch the end plastic caps give):
Here’s a close-up of the pillow block and the spacing washers:
 How to Make a Wagon Chassis
With the wheels for the lawnmower trailer completed, I could focus now on the wagon platform.
This step of the DIY wagon was going to be a piece of cake.
Chassis Materials
The lawnmower trailer wheels were going to be mounted on 1 ft blocks of 4 x 4s. Those blocks would be attached to a rectangular frame made of 4 x 4s.
I planned on using pressure-treated wood for these foundational 4 x 4s. They were going to be underneath the DIY wagon and exposed more to insects.
Any structural damage to the foundation would be catastrophic so pressure-treated wood seemed a necessity.
However, knowing that people would be riding in the utility wagon at some point, I didn’t want them in close proximity to the chemicals used in PT wood, so the DIY wagon floor and above would be regular wood.
Also, I did plan on using deck stain on the lawnmower trailer to protect it from water and weathering.
On top of the frame would be some 2 x 8 planks for the floor of the wagon.
Attached to the perimeter of the wagon would be a fence made of 2 x 4s.
Finally, the rear of the garden cart would have a swinging gate to allow easy access into the wagon.
Here’s my TinkerCad design of the vision I had in mind:
Chassis Design
In building your own lawnmower cart, the rectangular frame underneath the DIY wagon needs to be strong, as it will comprise a majority of the foundation.
So I used half-lap joints to secure the corners of the frame (see my mailbox post where I used a center lap joint).
I made repeated cuts with my circular saw to get a rough cut of the joints.
Then I used my chisel and hammer to clean up the cut and smoothed it down with a sander.
Here’s a picture of a half-lap joint in the process of being made (for efficiency and consistency, I clamped two 4 x 4s side-by-side to get 2 joints cut at the same time):
Here’s a picture of the lap joints completed, and the rectangular frame is ready to come together on the DIY utility cart:
To connect the joints securely on the DIY wagon, I used wood glue and lag bolts.
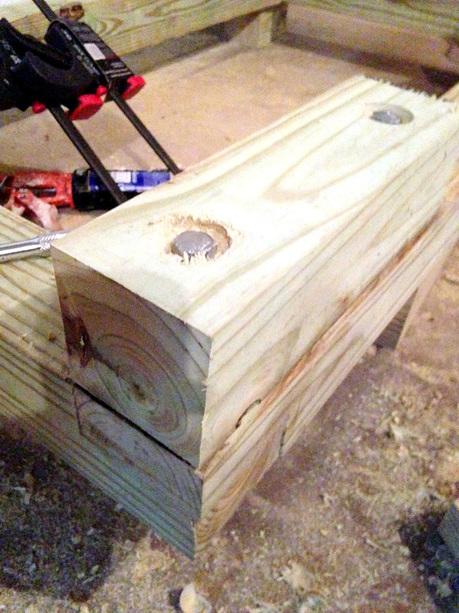
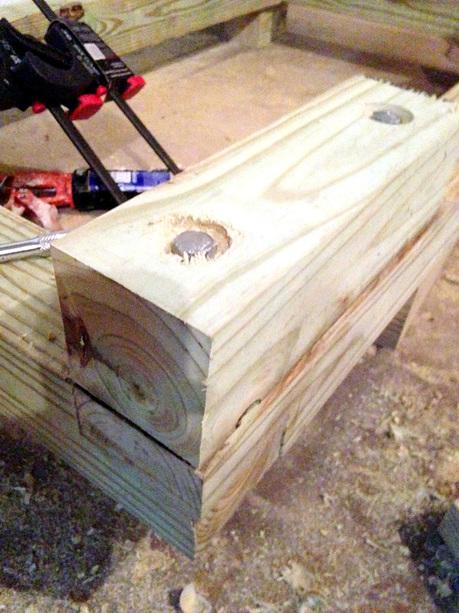
I also wanted the lag bolt heads flush with the surface of the frame, so I used a Forstner bit to carve out smooth holes to countersink the bolts.
Here’s a picture of the completed frame of the DIY cart bolted together with glue:
Forstner bits are awesome. I just added them to my tool collection and have been using them in a lot of recent projects.
Here’s a close-up of the holes they made for the bolts:
To complete the foundation, I attached the 1 ft blocks that the wheel axles would be fastened to.
They needed to be firmly attached, so I used wood glue and two 6” bolts to make a strong connection.
Here’s a picture of one of them:
 Making the Wagon Floor
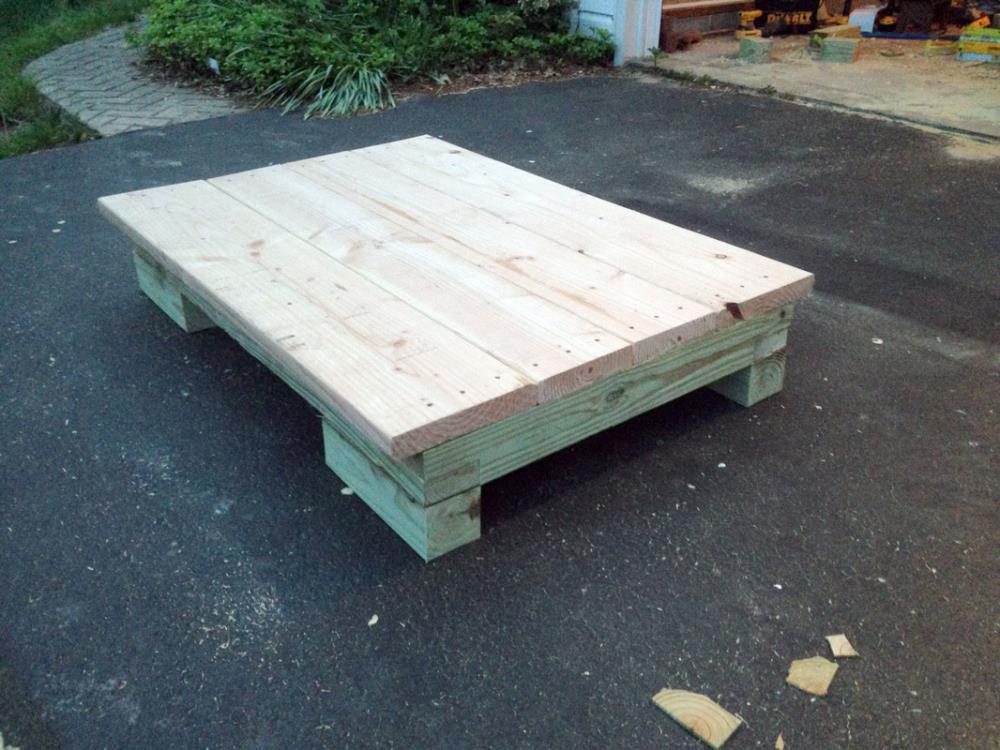
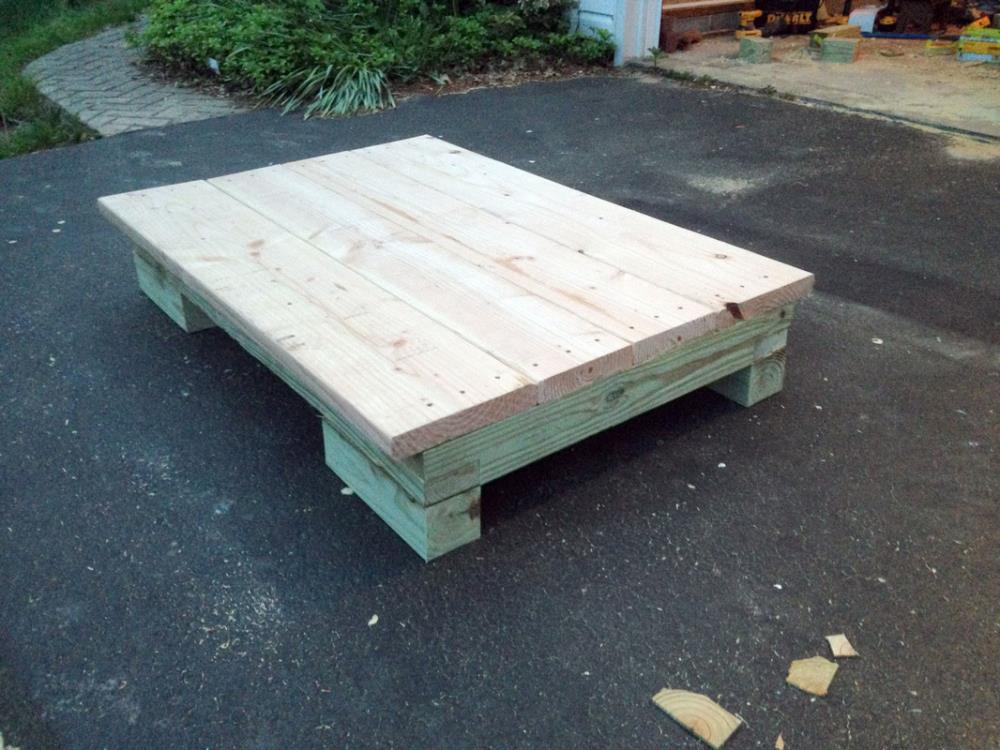
Next up was the floor of the lawnmower trailer. I used 2 pieces of 2 x 8s for the center and 2 pieces of 2 x 10s for the ends.
I attached them to the 4 x 4 frame with some countersunk deck screws.
Here’s a picture of the attached floor while building the wagon:
 Attaching the Wheel Axles
In learning how to make a wagon, the moment of truth came.
It was time to attach the wheel axles to the frame of the DIY wagon. I bolted the pillow blocks tightly and flipped the frame over.
Would the frame roll smoothly… (drum roll please).
Yes, it did!
Here’s a picture of the attached wheels and frame on the lawnmower trailer:
Here’s an underneath close-up of a pillow block mounting to the frame:
I could stop right now and have a gigantic skateboard, but the fun was only beginning. It was time to build the wagon fence and gate.
Building the Fence and Gate on the Lawn Mower Trailer
This part of the DIY wagon project was really easy.
I just cut a number of 2 x 4s. Some were attached to the 4 x 4 foundation frame to serve as posts, and the rest were used as cross pieces screwed into the posts.
For the swinging gate on the homemade wagon, I used some 1 x 3 wood leftover from a previous project.
I made the wagon’s rectangular gate frame with some pocket holes using my trusty Kreg pocket hole jig, and some wood glue.
Here’s a picture of the wagon gate in progress:
Here’s a picture of the DIY wagon with the finished fence and gate (it looks great, doesn’t it?):
Attaching The Hitch To The Lawn Mower Trailer
Prior to starting work on the utility cart, I had done some research on how to actually connect it to the mower.
I found a contraption that let me attach a 2” diameter hitch ball to the back of the mower.
They’re called universal garden tractor hitches.
I also found an adjustable tow bar that would bolt onto a sturdy metal vehicle bumper (like some Jeeps). This would be perfect for my wagon.
I could bolt the connection to my DIY wagon, and attach the other end to the hitch ball on the mower. In theory, it sounded good, so I hoped it worked in practice.
Here’s a picture of the hitch and tow bar linking the utility cart to the riding lawn mower (the tow bar can be easily detached on either end when not in use):
Now it was time to test the riding lawn mower and the DIY wagon together. I started up the riding mower and slowly let the brake go.
It started pulling the DIY trailer without hesitation!
I was worried the engine would struggle, but it did not. I did a few laps around the yard and my lawnmower was pulling the DIY trailer perfectly.
The First Ride On The DIY Wagon
Now, I just needed a test subject.
After all, what’s the fun in pulling around an empty wagon?
Eileen was on the phone, and I was anxious to try out the DIY wagon with someone. Then I looked at the house and who did I see looking out at me but my dog Zeus.
Perfect timing!
Here’s a picture of me testing out the lawnmower trailer with my first test subject:
I later applied some deck stain to the non-pressure treated wood, and the utility cart was completed.
Since learning how to build a wagon, I’ve given many rides in the backyard. I’ve also hauled many bags of refuse to the curb in minutes with this DIY wagon, saving a lot of time.
It does take a few minutes to hook up the wagon to the mower though. So I don’t always use it attached.
Although, it works just fine as a stand-alone utility wagon when I don’t feel like hooking up the hitch.
Now for some pictures of the DIY wagon hard at work.
This was taken when I needed to move a lot of equipment into my storage shed from the garage.
What would have normally taken me several trips, took just one with the utility trailer:
Here is the DIY wagon hauling 10 bags of refuse to the curb.
I used to use my wheelbarrow, but that would only hold 2 bags at a time. It pales in comparison to the wagon. This DIY cart holds so much more, as you can see (below):
Finally, here’s a glamour shot of the DIY cart functioning as it was intended: as a riding lawn mower tractor trailer.
TIME AND COST OF BUILDING THE DIY GARDEN CART
The total cost of my DIY wagon project was around $120. The garden cart was one of my most fun projects to date, and best of all, it was completed in just a weekend.
If you are looking for some help with the yard work or a fun fall ride, follow this tutorial on how to make a wagon that functions as a utility cart, wagon, or trailer, and you’ll be up in running in no time!
Utility Cart 3 Year Update
The wagon has held up great. It’s amazing how much the wagon holds, in comparison to my old wheelbarrow. It’s also perfect for loading up things from the garage that need to go out to the shed in the yard.
The tires on the wagon lasted several seasons. However, they started to lose air after last winter and cracked.
Instead of simply replacing them though, I felt like it was a good opportunity to upgrade the wagon.
Since I found myself pushing the wagon around the yard more than I thought I would, I decided to swap out the front wheels with ones that swiveled in the front.
I was thrilled with the upgrade, as it made pushing and turning the wagon by hand very easy. If you are going to push your garden cart around by hand, I definitely recommend starting out with front wheels that swivel.


