Are you looking for an easy and secure way to access and share files with colleagues? SharePoint is a great tool for businesses as it allows you to easily create shared folders and manage team collaboration. In this article, we will discuss how to create a shared folder on SharePoint and the various benefits of using this platform. Read on to learn more about SharePoint and how to make the most of it.
language.
How to Create a Shared Folder on Sharepoint?
SharePoint is a powerful collaboration platform that enables users to share documents and data with others. It is a great tool for organizations to manage, store, and access all of their files in one centralized repository, while also providing controlled access to authorized users. One of the essential components of SharePoint is the ability to create shared folders and grant access to them to other users. In this article, we will discuss how to create a shared folder on SharePoint.
Step 1: Log into SharePoint
The first step to creating a shared folder on SharePoint is to log into your account. You will need to use your email address and password to log in. Once you have logged in, you should see the SharePoint home page. From here, you can navigate to the folder where you would like to create the shared folder.
Step 2: Create a New Folder
Once you have navigated to the folder you would like to create the shared folder in, you will need to create a new folder. To do this, click the “New” button and select the “Folder” option. You will then be prompted to enter a name for the folder. Enter the desired name and click “Create” to create the folder.
Step 3: Share the Folder
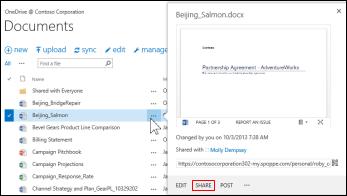
Now that you have created the folder, you will need to share it with other users. To do this, right-click the folder and select “Share”. This will open a window where you can specify the users who will have access to the folder. You can choose to make the folder either public or private, depending on your needs. Once you have specified the users, click the “Share” button to share the folder.
Step 4: Add Items to the Folder
Once you have shared the folder with the desired users, you can begin adding items to it. To do this, simply drag and drop the files and folders you want to include in the shared folder. You can also use the “Add Item” option to add items one at a time.
Step 5: Manage Access Permissions
The last step is to manage the access permissions for the shared folder. To do this, right-click the folder and select “Manage Access Permissions”. This will open a window where you can specify the type of access each user or group has to the folder. You can choose to allow or deny access to the folder for each user or group.
Step 6: View the Shared Folder
Once you have completed the above steps, you can now view the shared folder from any of the users who have access to it. Simply log into their SharePoint account and navigate to the folder. The folder should be visible and they should be able to open and view the contents of the folder.
Step 7: Keep the Folder Updated
Once you have created the shared folder, it is important to keep it up to date. As new documents and files are added to the folder, you should ensure that they are shared with the other users who have access to the folder. This will ensure that everyone has access to the most up-to-date information.
Step 8: Monitor Activity in the Folder
You should also monitor the activity in the shared folder to ensure that the information contained in it is not being misused or shared inappropriately. To do this, you can use SharePoint’s activity monitoring feature, which will provide you with a detailed view of all activity that takes place in the folder.
Step 9: Create a Backup of the Folder
Finally, you should also create a backup of the shared folder. This will ensure that you can restore the folder and its contents in the event of an emergency or unexpected data loss. To create a backup of the folder, you can use SharePoint’s built-in backup feature.
Step 10: Finalize the Setup
Once you have completed the above steps, you can now finalize the setup of the shared folder. To do this, you will need to grant access to the folder to all the users who need access. You can also set up additional security measures, such as two-factor authentication, to ensure that the shared folder is secure.
Related Faq
What is SharePoint?
SharePoint is a cloud-based service that helps organizations share and collaborate on documents, tasks and other information. It is built on top of Microsoft Office 365 and is used by many businesses and organizations. SharePoint allows users to store, organize, and share files with colleagues, partners, and customers. It also provides access to powerful collaboration and communication tools, such as discussion boards, surveys, and web parts.
In addition to storing and sharing documents, SharePoint also allows users to create and maintain websites, calendars, and other content. It is designed to help users organize and manage their data and documents, as well as collaborate with colleagues, partners, and customers.
How to Create a Shared Folder on Sharepoint?
Creating a shared folder on SharePoint is a simple and straightforward process. First, you will need to log in to your SharePoint account. Once you are logged in, you will need to navigate to the library where you want to create the shared folder. You can do this by clicking on the “Libraries” tab on the left-hand side of the page.
Once you are in the library, you will need to click on the “New” button at the top of the page. This will open a window where you can select the type of file you want to create. Select “Folder” and then enter a name for the folder. Once you have entered the folder name, click “Create” to create the folder.
How to Give Permissions to the Shared Folder?
Once you have created the shared folder, you will need to assign permissions to it. To do this, you will need to click on the “Permissions” tab at the top of the page. This will open a window where you can select who should have access to the folder. You can assign permissions to individual users or to entire groups.
Once you have selected the users or groups who should have access to the folder, you will need to select the type of access they should have. You can choose to give users “Read” or “Write” access. If you want to give users the ability to upload and edit files, you will need to select “Write” access. When you have finished assigning permissions, click “Save” to apply the changes.
How to Access the Shared Folder?
Once you have created the shared folder and assigned permissions to it, users will be able to access the folder from their computer or mobile device. To access the folder, users will need to log in to their SharePoint account. Once they are logged in, users can navigate to the library where the folder is located and click on the folder to open it.
Users with “Read” access will be able to view the files in the folder, while users with “Write” access will be able to upload and edit files in the folder. Once a user has uploaded a file, it will be accessible to all users who have been granted access to the folder.
What are the Benefits of Using SharePoint?
SharePoint is a powerful tool that can help organizations collaborate and share information more effectively. It provides users with easy access to files and documents, which can help them work more efficiently. It also allows users to collaborate on projects and tasks in real-time, which can help increase productivity.
In addition, SharePoint provides users with powerful communication and collaboration tools, such as discussion boards, surveys, and web parts. These tools can help users get feedback from colleagues and customers quickly, which can help them make better decisions. Finally, SharePoint is easy to manage and can be used to store and organize large amounts of data and documents.
What are the Limitations of Using SharePoint?
While SharePoint is a powerful and useful tool, it does have some limitations. For example, SharePoint can be slow and difficult to use if you have a large number of users. Additionally, SharePoint can be expensive to maintain and upgrade, as it requires a lot of server resources.
Finally, SharePoint can be difficult to customize and requires a certain level of technical expertise to use. This can make it difficult for organizations with limited technical resources to fully utilize the platform. Additionally, SharePoint is not compatible with certain types of files, such as audio and video files.
Creating a shared folder on Sharepoint is an easy process that can help you streamline your workflow and share documents more easily with your team. With a shared folder, you can organize your documents into the right folders, set permissions to restrict access to sensitive information and easily collaborate with your team. With the help of this guide, you can now create a shared folder on Sharepoint with ease and confidence. Start taking advantage of this powerful tool and make the most of your work today!