There are so many houseplants to choose from, but few are as diverse as Alocasia. There are several varieties of this stunning tropical plant, ranging from breathtaking shades of green to silvery gray and even purple. Grown indoors, they can reach up to 6 feet but can reach close to 15 feet high when grown outside.
Alocasia is a common choice for growing indoors when you want to add a tropical jungle touch to your home. They are easy to maintain and make a big impact indoors with their large, beautiful leaves.
The Alocasia genus is full of gorgeous, leafy plants in a range of shapes, colors, and sizes. There are more than 90 species to choose from and even more cultivars. Many larger species are grown outdoors in tropical environments, but smaller species have been hybridized to grow largely as houseplants.
Alocasias grow from rhizomes under the soil. These rhizomes grow and produce their beautiful variegated leaves, making the plant bigger. This process is also the reason why Alocasias are so easy to propagate – they do most of the work for you. They also produce tiny corms around the base of the plant that can develop into full plants with a bit more patience.
All you need to do is remove the plant from its pot, split the rhizome, and repot to turn one Alocasia into two. If you have a rarer cultivar, this is the best way to replicate it without spending money on brand-new plants. And, as long as you give your Alocasia the proper care, they will keep producing more small plants for you to trim off.
As an added bonus, you can complete two important tasks in one go – dividing and repotting. When your Alocasia has filled all the space in its existing pot, you can divide and plant one of the sections back into the same pot, saving time and limiting your risks of transplant shock throughout the season.
Corms need a bit more attention, including a specialized planting mix and lots of transplanting. But, considering how many corms you can get from one plant, this method will likely yield the most plants in one go.
Propagation Through Division
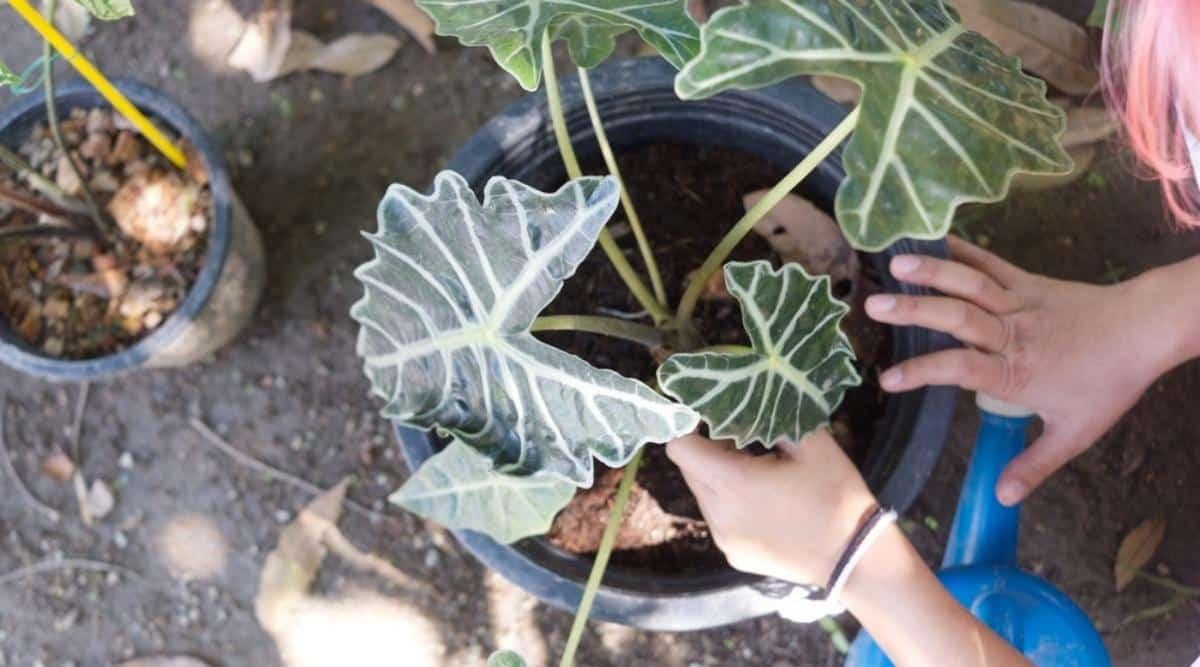
Propagating alocasia by division is ideal for a plant that’s gotten too big for its current pot. Signs of this include slight bulging at the sides or roots growing through the drainage holes. These are indicative that it needs some extra space. Repotting and dividing go hand in hand, allowing you to complete two messy tasks at the same time.
Step 1: Gather What You Need
First, you’ll need a new pot. Or two if you don’t plan on reusing the existing one. The pots should be around the same size as the existing one, or slightly smaller depending on the size of the offset. Avoid excessively large pots as they hold onto more moisture than the plant needs, leading to rotting.
Next, grab a sharp knife to cut into the rhizome. While some can simply be snapped off, it’s far better for the health of the parent plant and the offset to make as clean a cut as possible. Clean it with soap and water before you start to avoid transferring any harmful bacteria from previous propagating sessions.
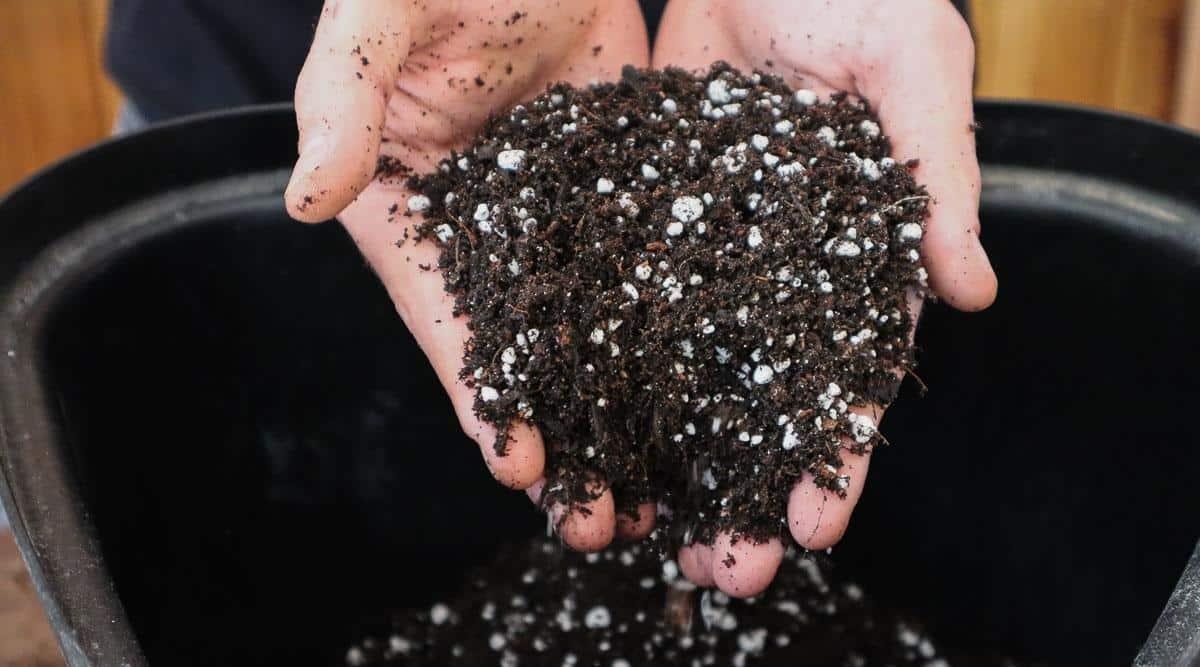
Finally, you need a soil mix suitable for Alocasias. Regular garden soil or even regular potting soil is not ideal for long-term growth as it increases your chances of rotting. Look for a specialized houseplant potting mix, or make your own with these ingredients:
- High-quality potting soil
- Perlite
- Coconut coir or peat moss
Now for the fun part, propagating. Lay down some newspaper to make clean-up easier, set aside 10 minutes and you’ll have a brand-new plant in no time.
Step 2: Remove the Plant From its Current Pot
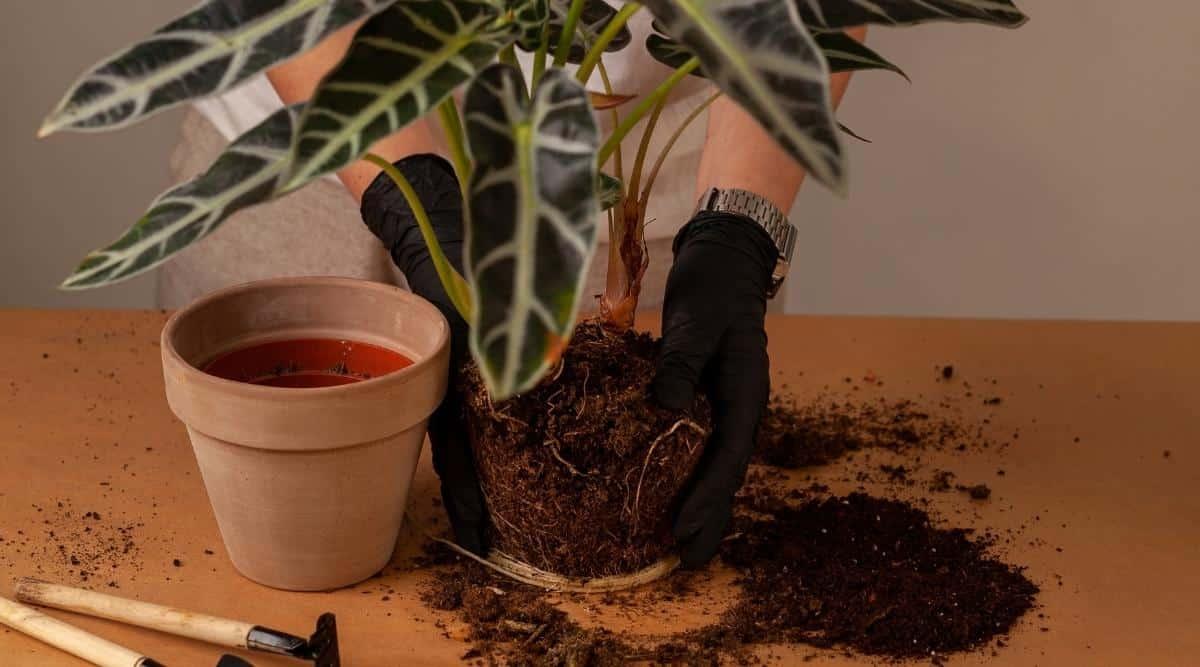
Avoid pulling from the stems as the leaves may easily snap off. Instead, squeeze the sides of the pot to loosen the soil, turn the pot on its side and gently pull the plant out. If your Alocasia is planted in a terra cotta or ceramic pot and gets stuck, you can also run a knife along the edges of the pot.
Step 3: Inspect the Roots
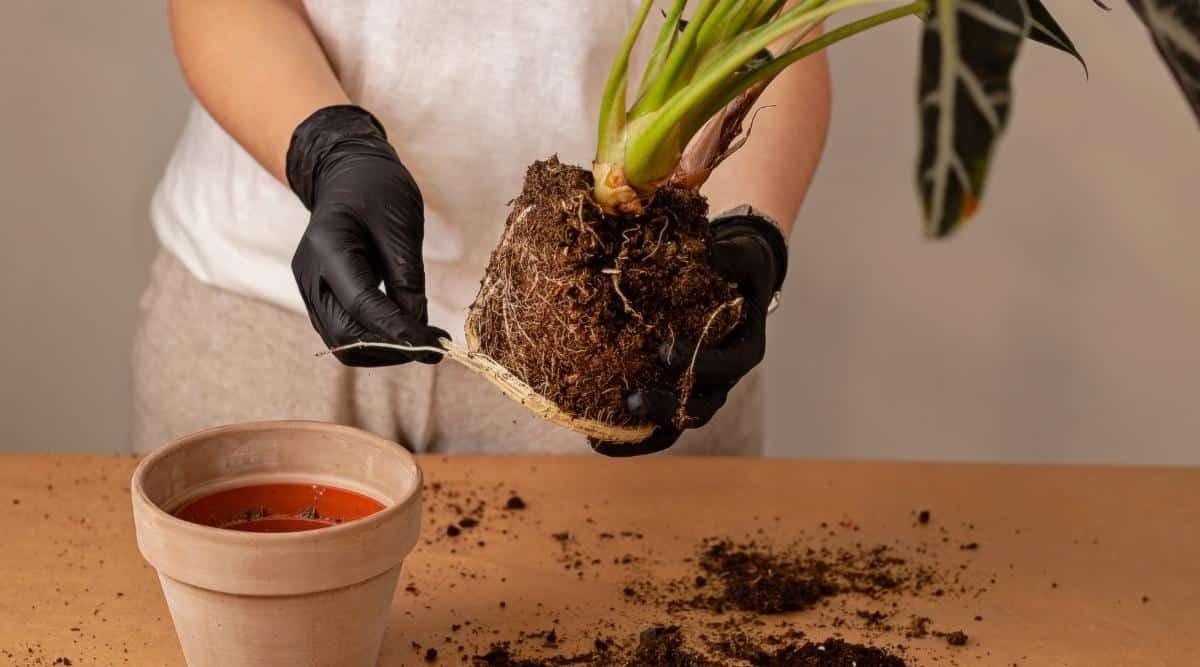
Next, check what’s going on under the soil. This will allow you to identify the areas where any offsets connect to the main plant, ready for separation.
The offsets should be a couple of inches tall before separation in order to grow successfully on their own. If you have a mature and established plant, you may be able to split larger groups in two, but it all depends on the performance of your plant.
This is a good opportunity to check the health of your plant and look for any potential issues. Alocasia plants are prone to rot when overwatered, so use this chance to trim off any problematic roots before planting in fresh new soil.
Step 4: Separate the Offset
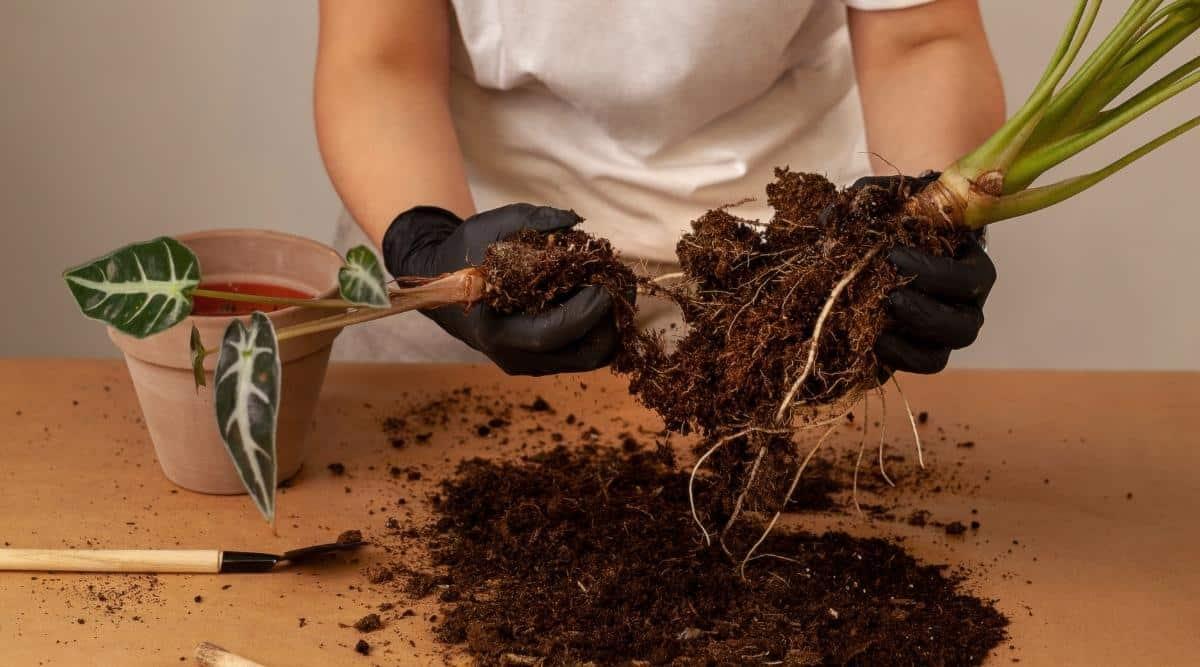
Now that you have a better idea of what the rhizome looks like, you can begin to divide the plant. Smaller offsets can usually be pulled off the plant without much hassle. Larger ones will require a sharp knife to separate them as cleanly as possible.
If your plant has more than one offset, remove as many as you can to repot, as long as you have enough pots to plant them in.
Step 5: Repot the Plants
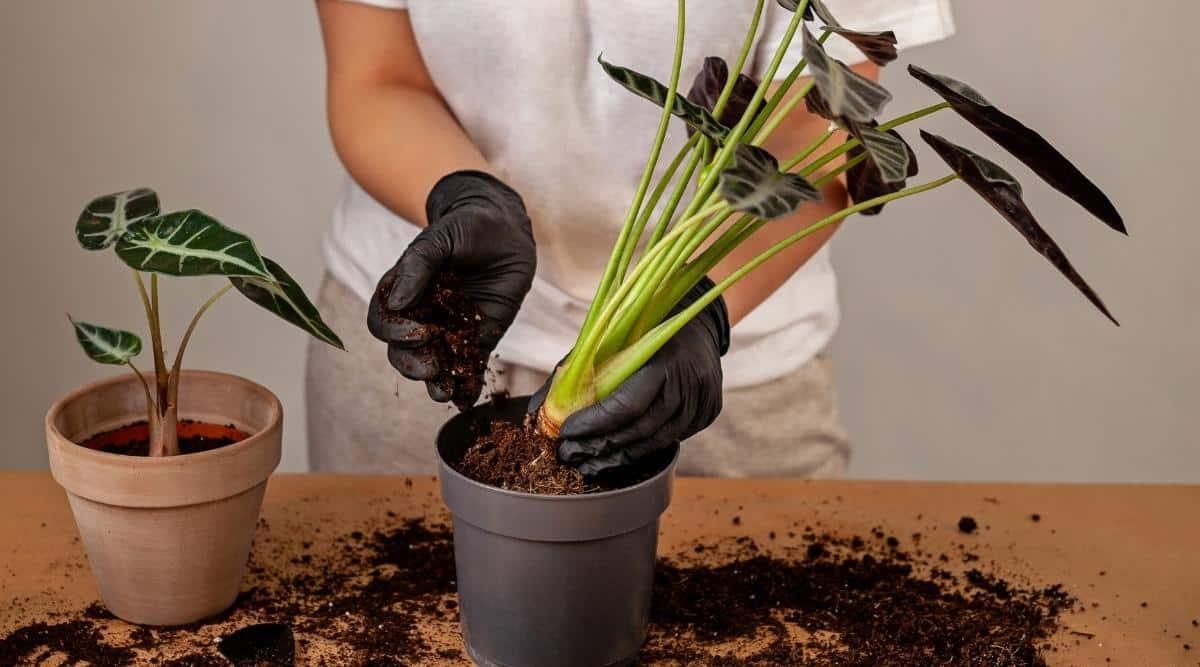
All that’s left to do is repot your parent plant and its offset into the separate prepared pots. Fill the container with your potting mix up to about halfway, then make a hole in the center to plant the main plant. Add extra soil into the gaps around the roots until the soil line matches where it was previously.
For smaller offsets, you can usually fill an entire pot with potting mix, making a small hole in the center with your finger to plant. Make sure you don’t bury it too deeply as you may rot the base of the plant.
And that’s all there is to it. Your parent plant will look largely the same, albeit smaller, and your tiny Alocasia will be ready to sprout into a full and mature plant in no time.
Propagating With Corms

If your plant doesn’t have any offsets, don’t think your chances of propagating are over. As these offsets sprout from corms or bulbs under the soil attached to the rhizome, you can simply cut out the middleman and propagate these yourself.
Step 1: Gather What You Need
This propagation process is slightly different from others you may have tried but doesn’t require any specialized tools.
To start, you’ll need a sharp and disinfected knife to remove the corms from the rhizome. This is not 100% necessary as many will snap off independently, but it can make removal much quicker for tougher bulbs.
Next, grab a shallow container or glass to hold the corms. Clear containers are best to allow you to monitor growth. It also helps to have a small container with sides to rest the corms upright and slightly out of the water.
When rooting, it’s best to use filtered or distilled water for the best chances of success. Alternatively, collect some rainwater to fill your containers – you won’t need much.
Finally, you’ll need some perlite for the latter part of the process. This substance, made from expanded pieces of volcanic glass, will hold the corms upright in place once they’ve rooted to prevent rotting and to stop the new leaves from falling into the water.
Step 2: Remove the Plant from its Current Pot
As with division, the first step to propagating is removing the plant from its existing pot. While you may find a few corms above the soil that are easy to remove, you’ll find more of them lower down, closer to the rhizome. If you want to propagate as many corms as possible, removing all the soil around the root ball is your best chance.
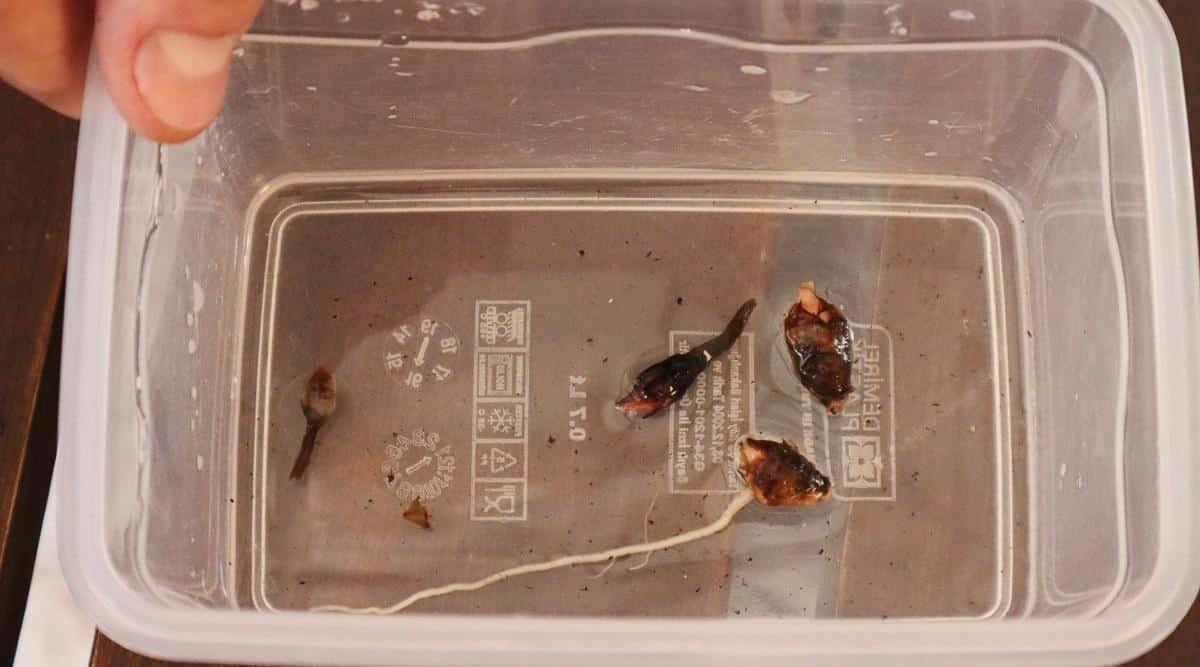
Step 3: Find the Corms
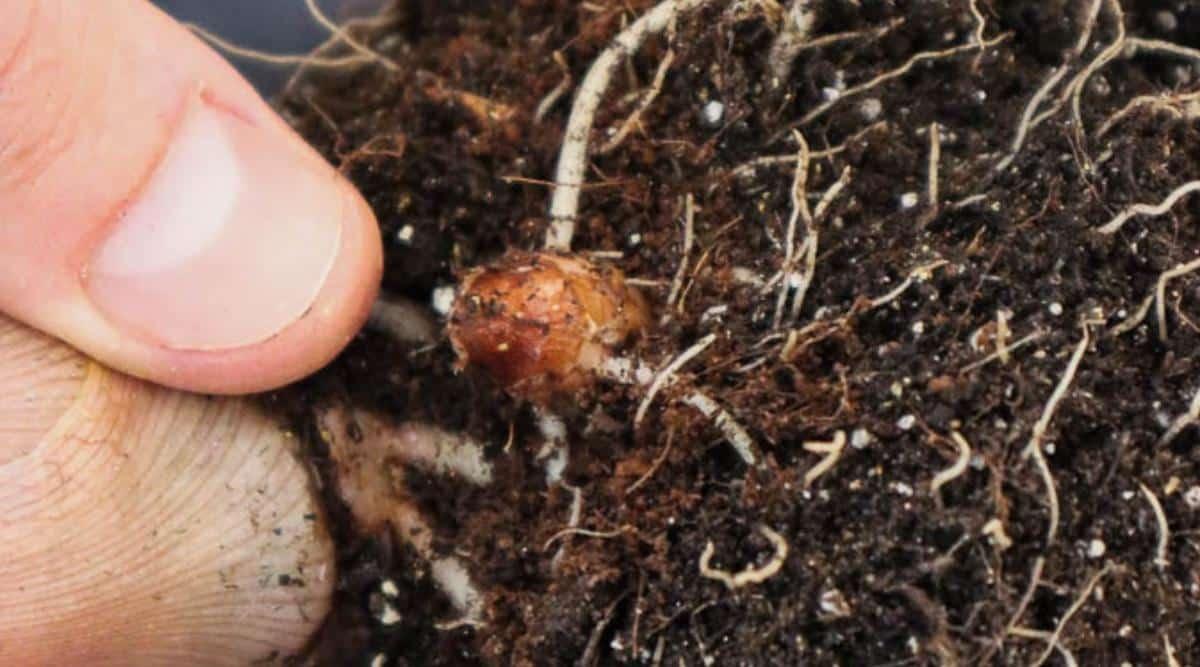
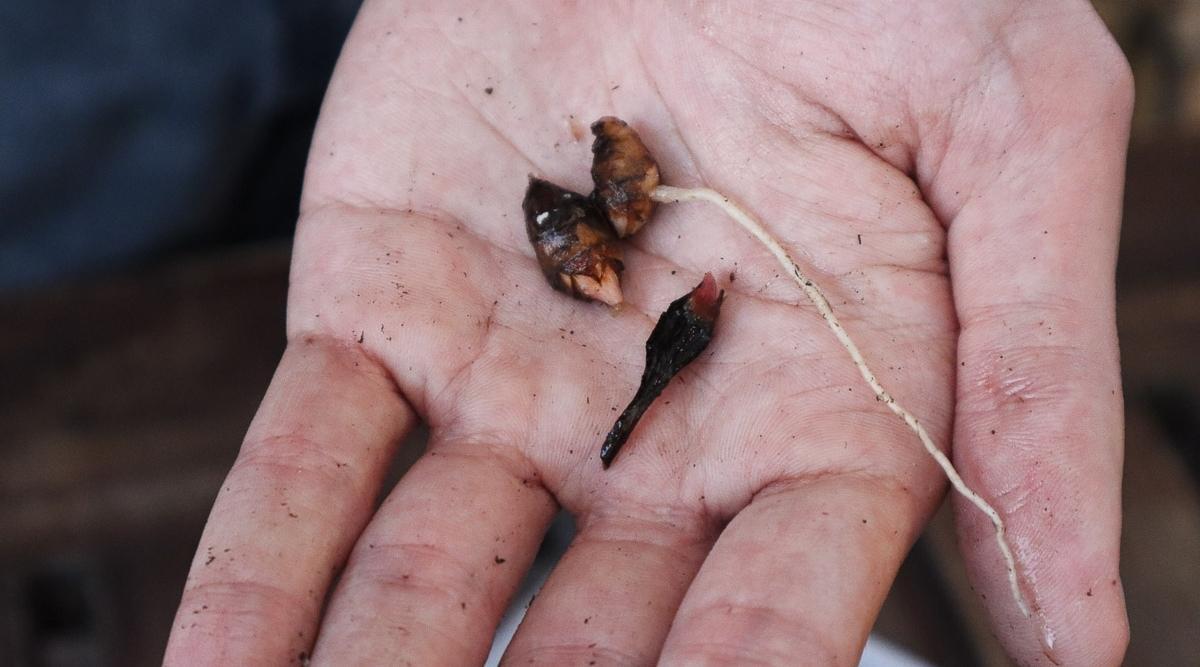
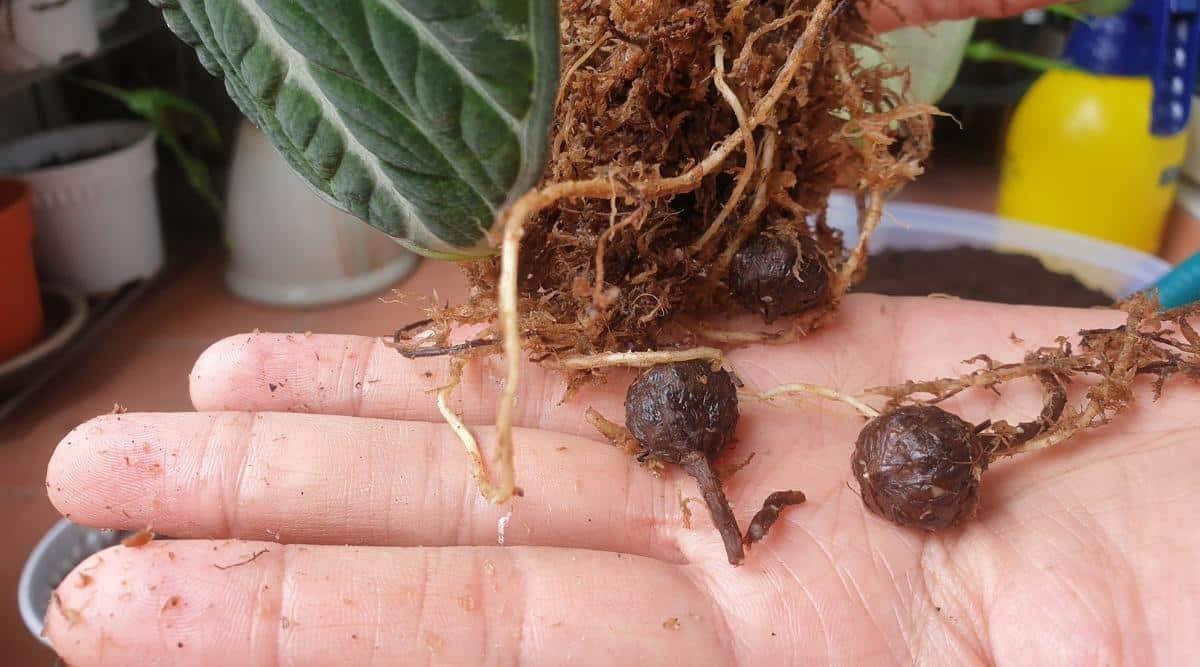
Next, you’ll need to get your hands dirty hunting for corms or bulbs. These are tiny spherical balls around the size of a peanut that you’ll find in the soil attached to the rhizome.
You should find around five or more if your plant is mature and healthy. As the bulbs may not be viable or can rot during the rooting process, it’s best to take as many as you can at once to improve your chances of successful propagation.
The corms should be easy to remove by hand with only a small portion of the base attached to the rhizome. However, if there is some resistance, you can also cut them off with a sharp, clean knife.
Clean any dirt or debris off the bulbs and remove the outer layer (optional) to get ready for rooting.
Step 4: Root in Water
Grab your shallow glass or container and fill it slightly with filtered water. The water line shouldn’t be higher than the top of the bulb as it needs space to breathe and to sprout.
Place your corms in the container so the base is in the water and the top is exposed. You can also lay them on their sides until rooting to get a better idea of where the leaves will emerge. Just make sure the bulb is not completely submerged or it will likely rot before getting a chance to sprout.
Step 5: Cover
Up the humidity around your corms by covering the container with a lid or another glass. This will provide the right conditions for sprouting. To prevent mold build-up, remove the lid or glass for about an hour each day to improve airflow, replacing it again afterward.
Continue to top up the water to keep the water line consistent. The base of the bulb should always be below the water with some areas sticking above the water line. If the water in the container starts getting consistently cloudy, remove the bulbs and wash the container to stop bacterial buildup before planting again.
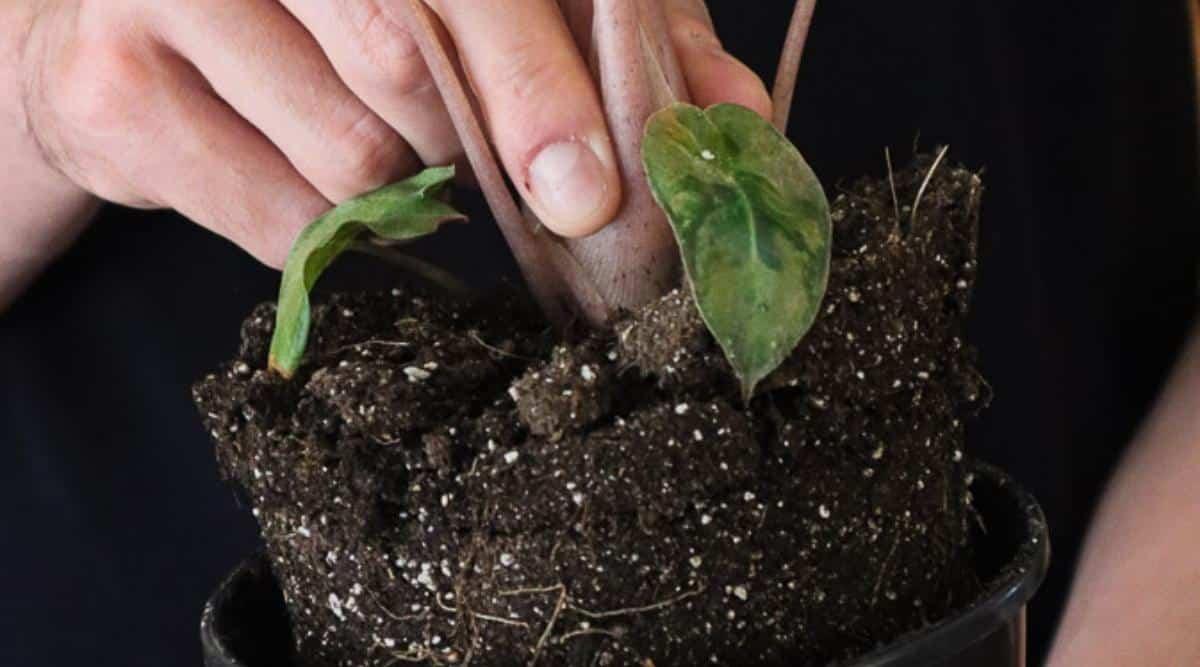
Step 6: Transplant
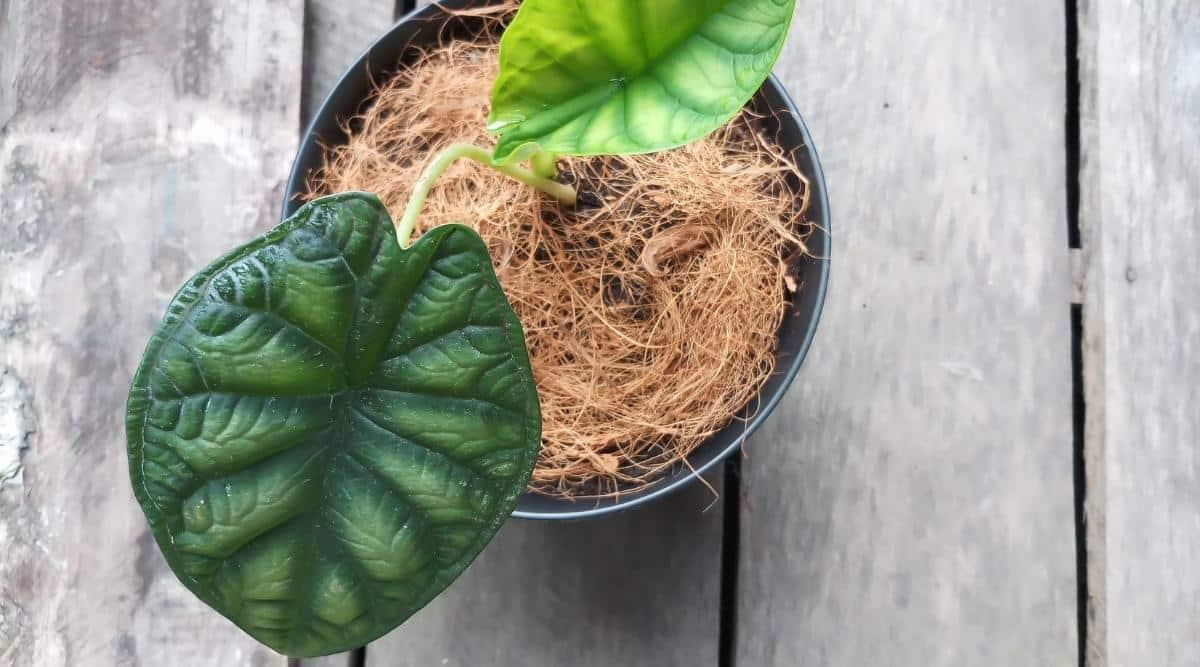
In just over four weeks, you should see some roots sprouting from the bulbs and potentially the starts of some new leaves. Some may not have sprouted at all – simply discard those and focus on the ones that have rooted.
To allow the plant to grow upright and to prevent rotting in the new roots or leaves, it’s time to transplant it into perlite. Perlite will hold the corms upright and in the right position, drawing up some moisture to facilitate growth. You can also use hydroponic clay pebbles if you have some on hand.
Continue to top up the water, keeping the top of the corm exposed to the air. Once the leaves have developed more and the roots have grown, you can transplant into a small container filled with soil mix to continue growth. Don’t leave them in perlite for too long as it does not contain the nutrients these plants need to grow once they have matured.