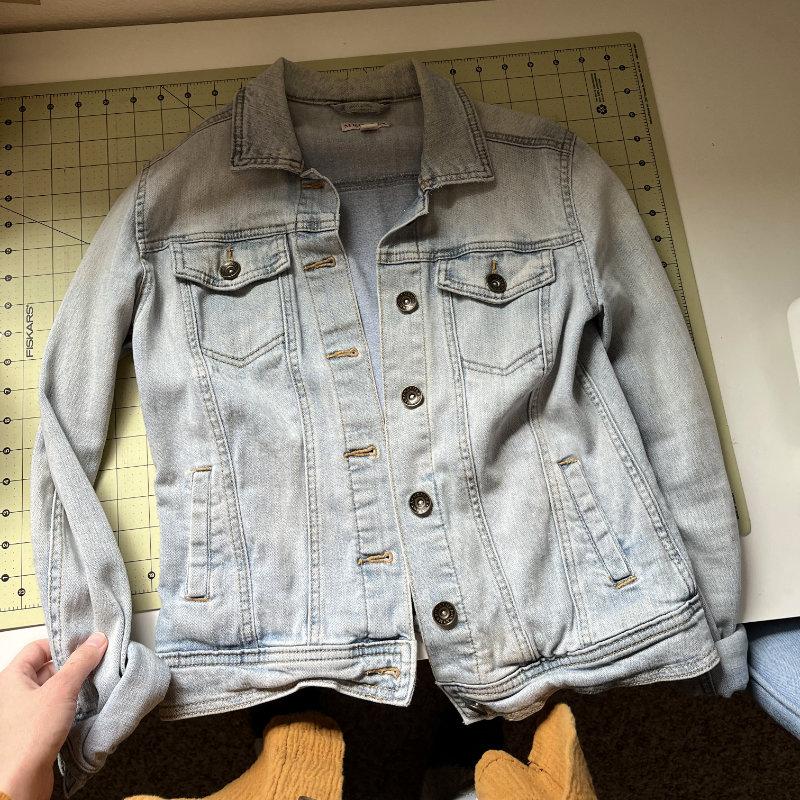
So I’ve had this denim jacket for years but I just wasn’t reaching for it that often. The idea hit me one day to try turning it into a vest to give it new life and purpose in my wardrobe. Now this up-cycle can be as easy as just cutting off the sleeves and leaving a raw edge if you want, but I wanted a cleaner finish and fresh buttons as well. I’ll walk you through how I did this and also share the resources I used for switching out the denim hardware.
I didn’t think of writing a tutorial until after I was done…so unfortunately I don’t have pictures for every single step. I hope I can explain it in words and using the pictures I do have! I also made a short reel on my Instagram that shows some of the steps, like removing the old hardware and installing the new buttons, if you want to check it out. Also feel free to ask any questions in the comments. 🙂
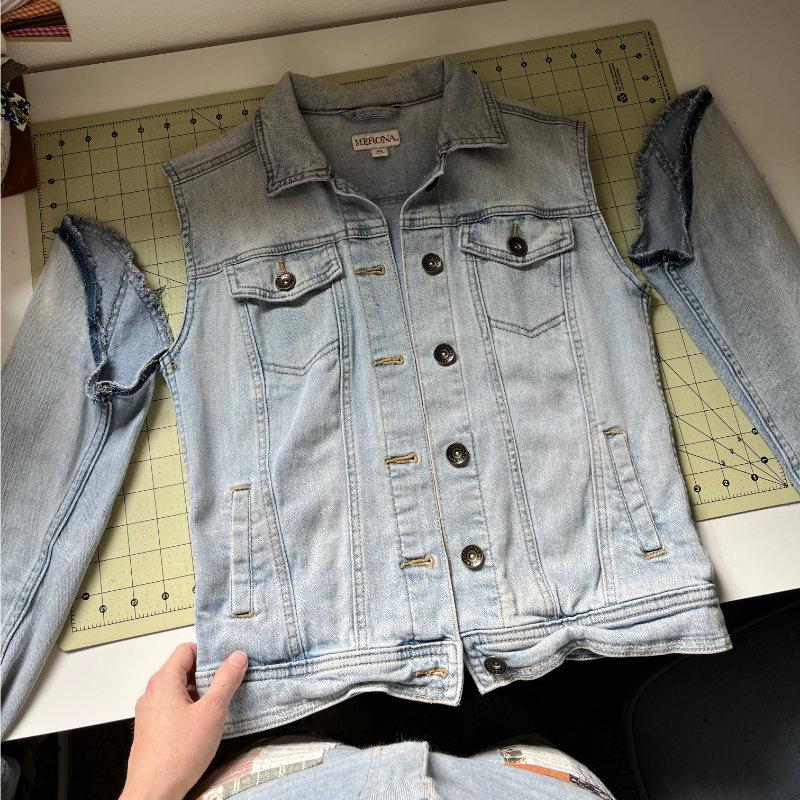
Remove sleeves from denim jacket
The first step is to remove the sleeves with a seam ripper. You could just cut on the outside edge of the sleeve opening and call it a day if you don’t mind a frayed edge. I wanted to maintain the original edge and see what I was working with to figure out how I wanted to finished the armholes.
After removing the sleeves and trying it on, I realized the shoulders looked a little too wide for me. As much as I loved the lived-in look of the shoulder hem and initially wanted to preserve it, I decided to cut a little off to better fit my shoulder size. Totally up to you what you want to do here! I also wanted to scoop the armhole so that I could comfortably wear the denim jacket with my volumionus sleeved tops and dresses.
Scoop the armhole and remove desired width
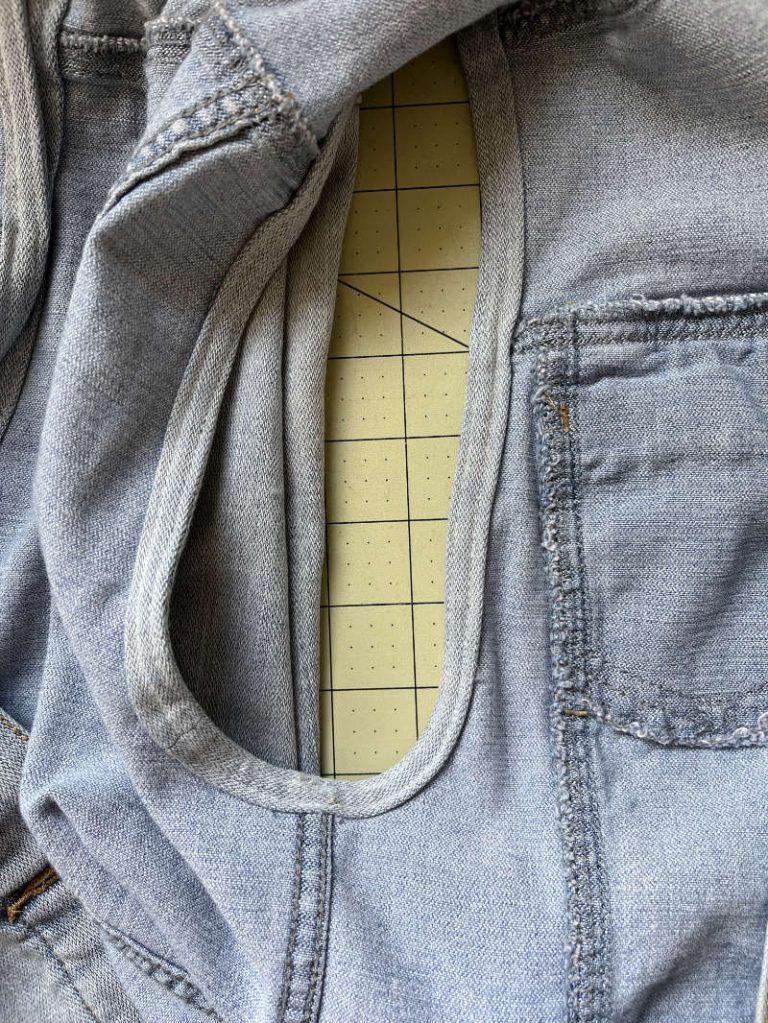
While wearing the jacket, I marked with a washable fabric marker how far down I wanted the armhole to go. I then followed the original armhole curve and connected it to the shoulder as smoothly as I could. This step took a bit of experimenting, and I started with only cutting off a little at a time until I was happy with the shape.
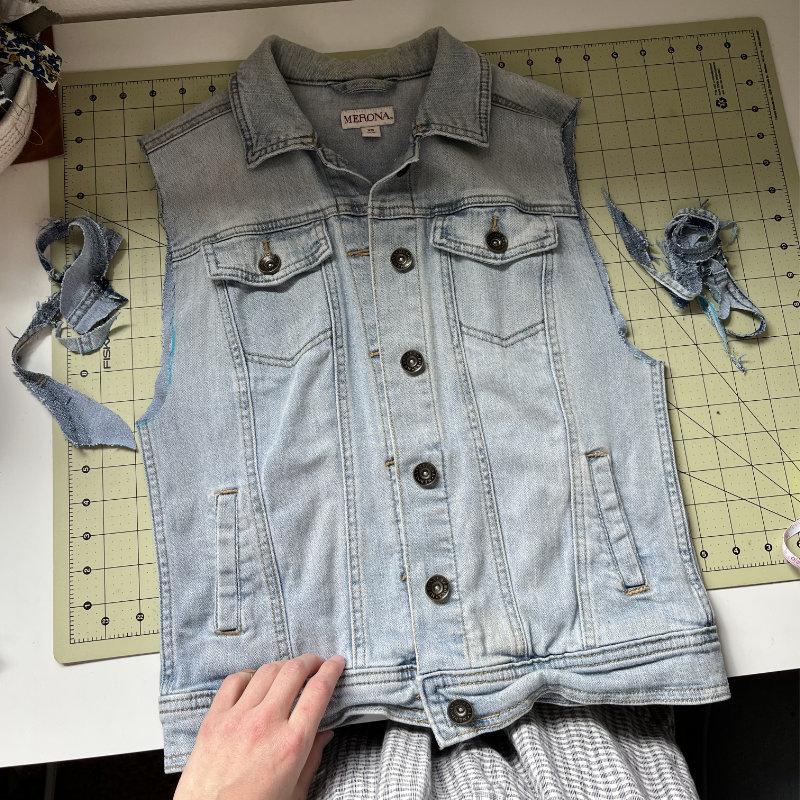
To match the same curve on the other sleeve, I arranged the jacket to line up the newly cut armhole with the uncut armhole and traced where I wanted to cut. (I didn’t get any pictures of this step, so I hope that makes sense!)
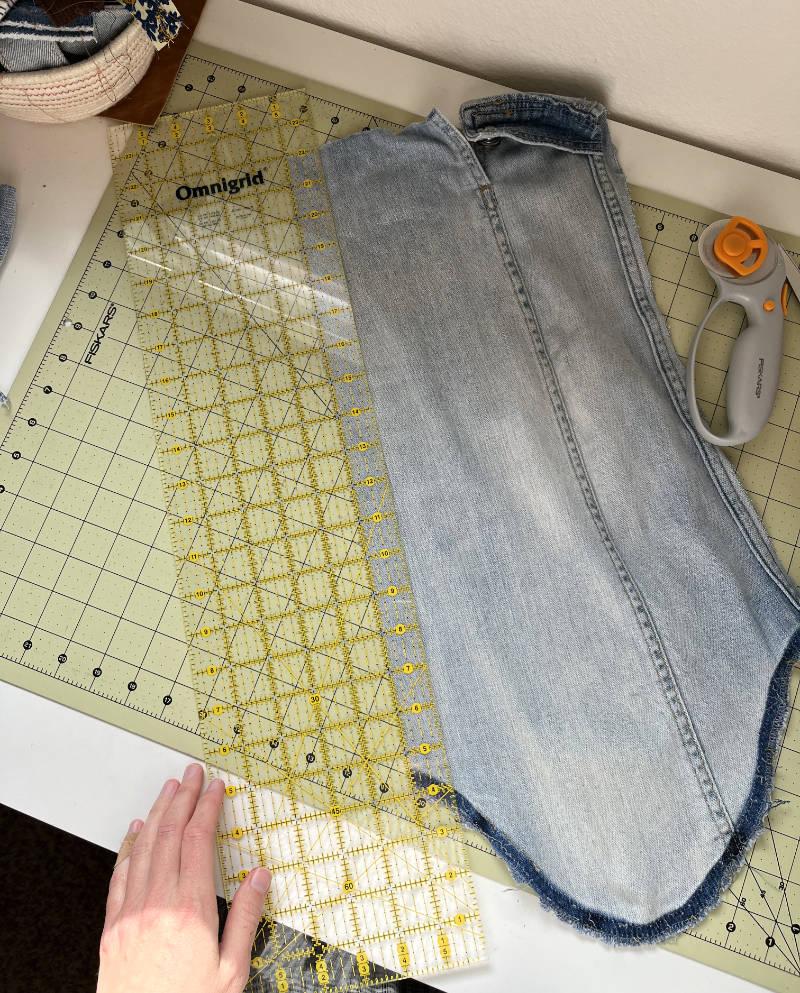
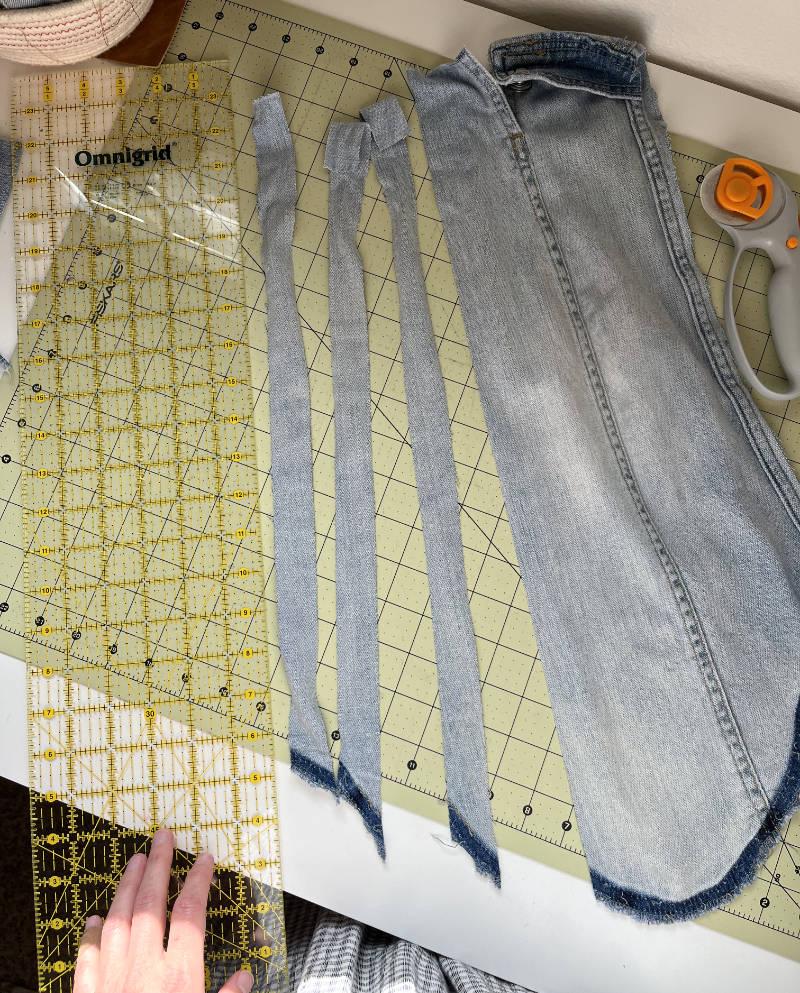
I decided that I wanted to bind the armholes with some bias binding. I used the sleeve of my jacket so it would match, but you could also use a contrasting fabric if you wanted! The denim I was working was mid to lightweight with some stretch to it, so I didn’t have any issue with the denim being too bulky for the binding.
I also didn’t technically cut on the bias…if you use bias tape or fabric that is cut on the bias, this will help your armhole to lay flat. My armhole edge sticks out a tiny bit, more noticeably in the back, but it doesn’t bother me too much.
Sew the bias binding to the armhole
The strips I cut are 1″ wide and I needed to piece them together to fit around the armhole. I started pinning the binding, right sides together, at the back and continued pinning until I reached where I had started. I sewed the ends of the binding together to make a loop to match the circumference of the armhole and trimmed the excess. Then, starting at the side seam, I stitched the binding down with 1/4″ seam allowance. I pressed the binding and seam up and away from the jacket, folded the raw edge over about 3/8″, then again another 3/8″ and used clips to hold it in place.
Topstitch with denim thread
Using denim topstitching thread for my top thread and regular thread in my bobbin and from the right side, I sewed a line of stitching 1/8″ from the edge, then another row 1/4″ from that line. My topstitching thread wasn’t the exact same color as the rest of the jacket topstitching, but it’s close enough.

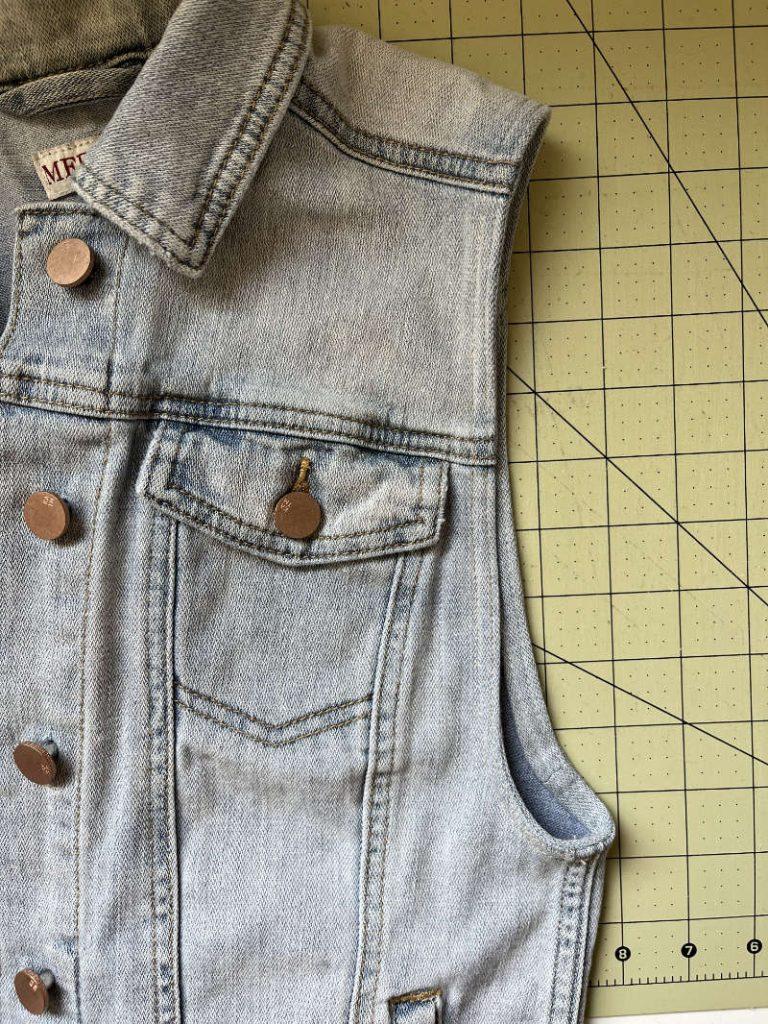
I could have called it done after this step, but I wasn’t crazy about the existing buttons on the jacket and wanted to switch them out. I happened to have just enough buttons from a jean jacket hardware kit I purchased from Stylemaker Fabrics.
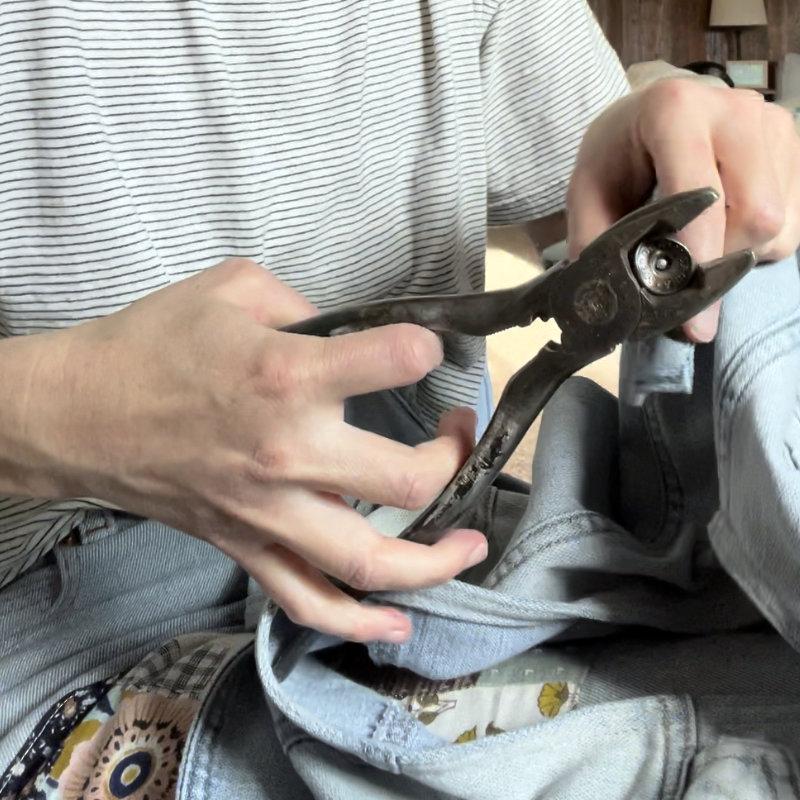
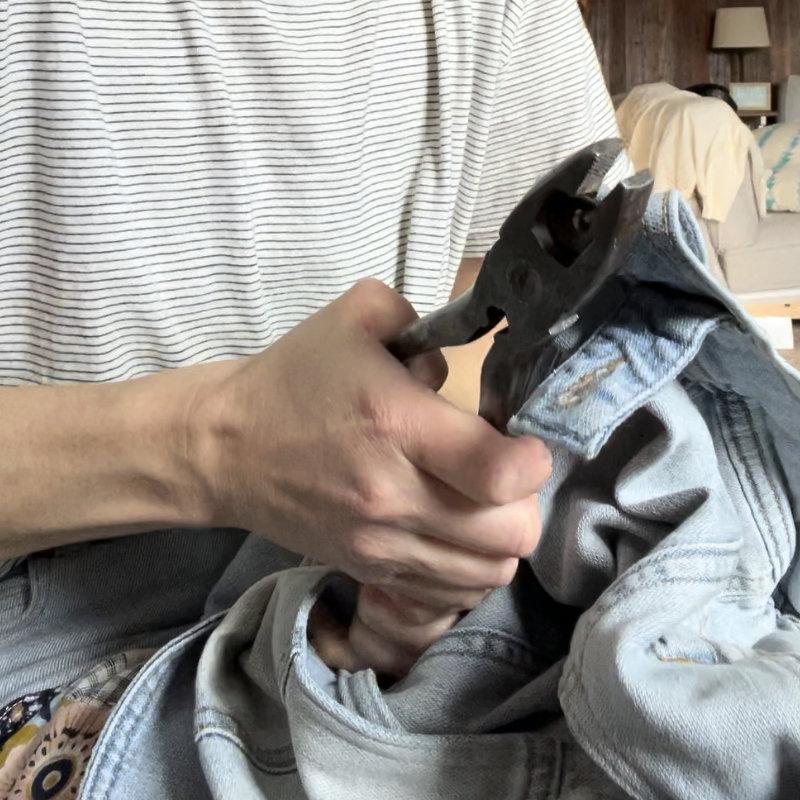
Remove existing denim hardware
First I had to remove the existing hardware though with minimal damage to the denim fabric. I researched a couple of ways (aka, looked it up on YouTube, ha) to do this. The way that ended up working the best for me was to use heavy duty pliers that have a cutter – they have a couple of different names like side cutter pliers, diagonal cutters, or wire cutters – and gradually made cuts along the shank of the button until it came loose. (The photos below are screenshots from a video, so sorry for the blurry quality!)

Here’s a video tutorial of an alternate method from Megan Nielsen that uses two pairs of pliers. I tried this method first, but couldn’t get the buttons to come loose as easily as the video shows. It’s possible it didn’t work with the buttons on my jacket since it’s a ready-to-wear jacket and they were probably installed differently. Anyway, it’s worth a try 🙂
Replace with new jeans buttons
Once all of the denim buttons were removed, I installed the new buttons in the existing holes using a hammer, a circular anvil and a rivet setter (I have the KATM jeans hardware + tools kit from Stylemaker fabrics. It has been super helpful in all my jeans making adventures!) The video above also shows how to replace jeans buttons!

I was really pleased with how this denim vest turned out! It feels like a new piece of clothing again that I’ve had fun incorporating into the rest of my handmade wardrobe. Thanks for reading and hope this gave you some inspiration to try an up-cycle of your own!
